WaveLinx Networked Relay Panel Quick Start (Version 15)
www.cooperlighting.com 6
Configure the WaveLinx Area Controller
Important
The initial configuration of the WaveLinx Area Controller requires the use of a device that has Wi-Fi, an Ethernet port, and a current web
browser. These steps assume that the Area Controller is still in a factory default condition.
Before performing the WaveLinx Area Controller configuration make certain that the Area Controller is connected to PoE port on the
network switch.
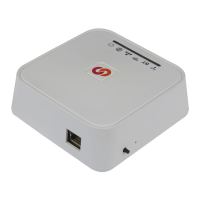
Step 1: Initial Login Configuration - WaveLinx Area Controller
– Prepare for Wi-Fi Connection
• Turn on the device’s Wi-Fi and bring it within the Area
Controller’s range (150 feet). Make note of the Area
Controller’s MAC address.
– Connect to the Area Controller’s Wi-Fi Access Point
• Display the available Wi-Fi networks. Select the network,
Cooper-XXXXXXXXXXXX, where X is the MAC address on
the controller’s label. Enter the password and select next.
• initial login password: wclAdmin
• after initial login: assigned password
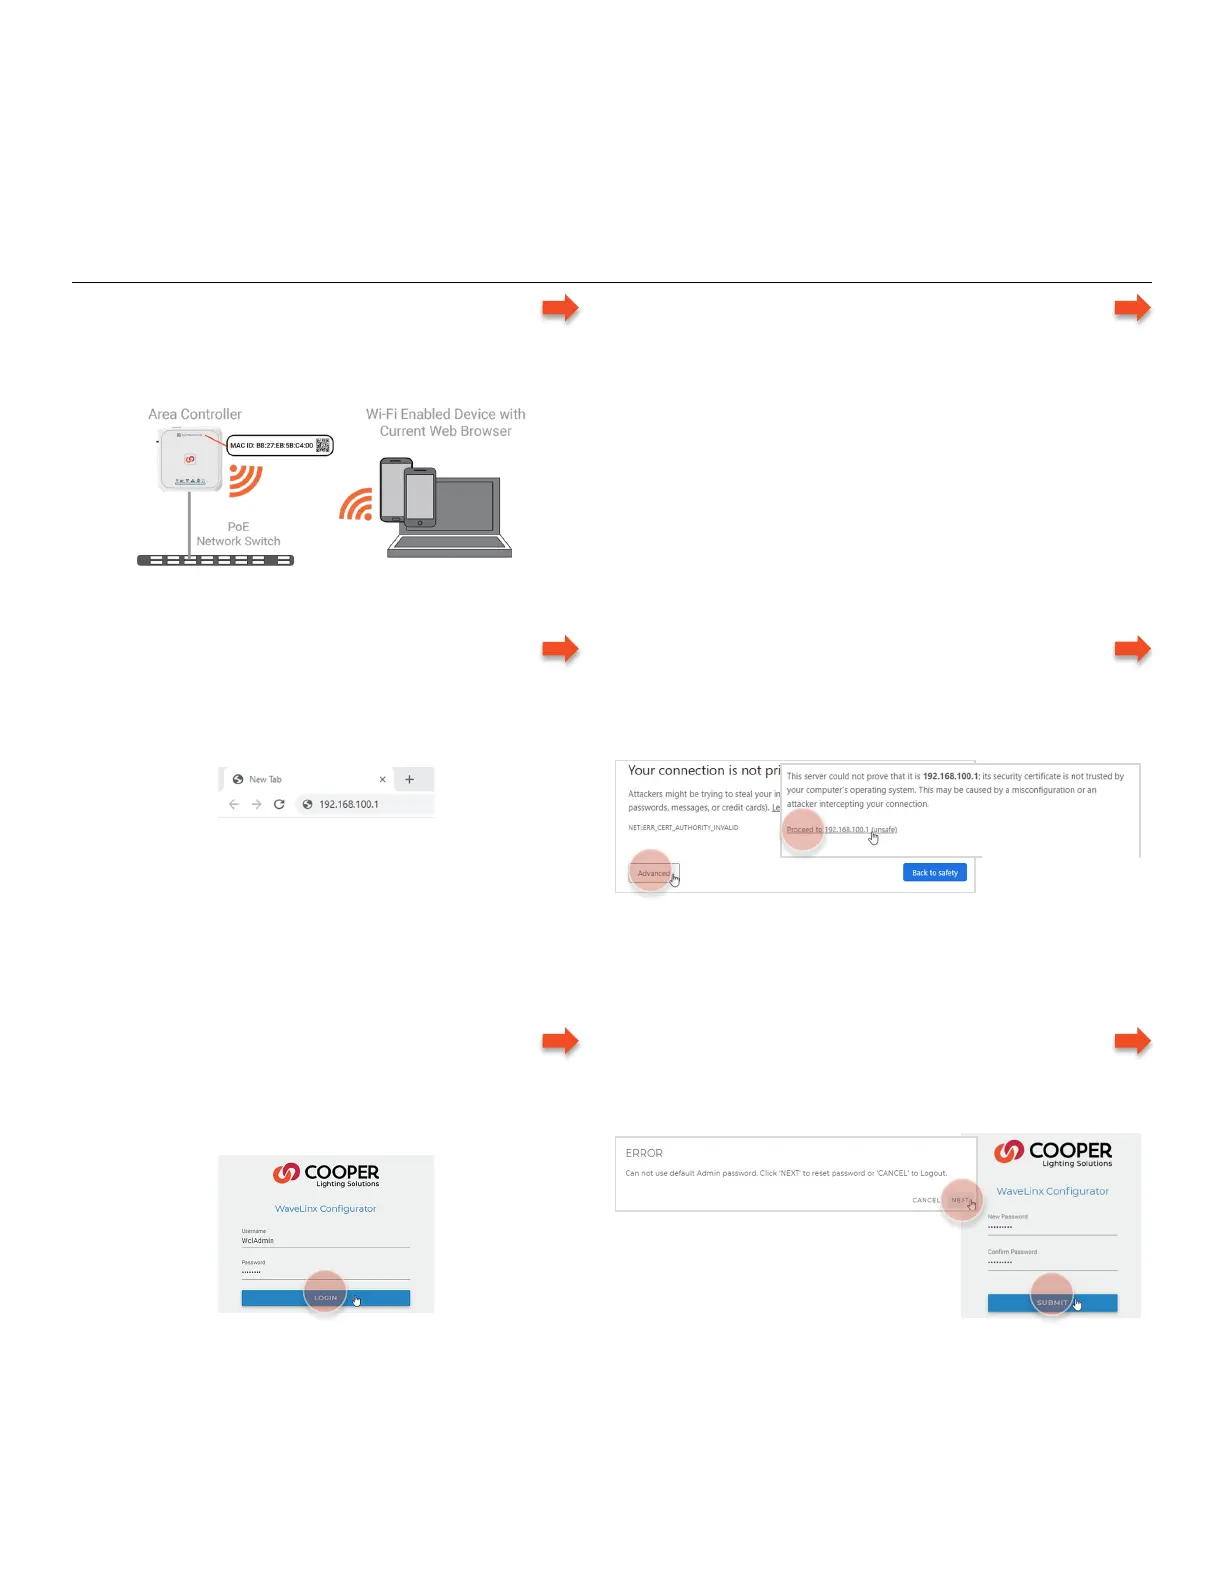
– Open a Web Browser and Access the WaveLinx Area
Controller IP Address
• Open a current web browser and enter the Area
Controller’s default IP address 192.168.100.1 in the
address bar.
– Bypass Warnings and Proceed to the Site
Needed only for Initial login or if browser cache is cleared.
• Bypass any warning messages. Select to proceed to the
site.
(continued
– Login to the WaveLinx Configurator Webpage
Needed for initial login only.
• Enter the admin username, WclAdmin, the default
password, wclAdmin, and then select Login.
– Update the Password
Needed for initial login only.
• Follow the prompts to set a new password.
Continued on next page
different in other
browsers. Locate option
to proceed to the site.
Any future login activity will require the use of the
assigned password.
 Loading...