CTG2000 / CTG3000 / CTG5000 3 09/20/19
CTG2000 / CTG3000 / CTG5000
1/4", 3/8", & 1/2" Digital Torque Wrench
87654321
9 10
13
17
14
20
16 19
18
12
11
15
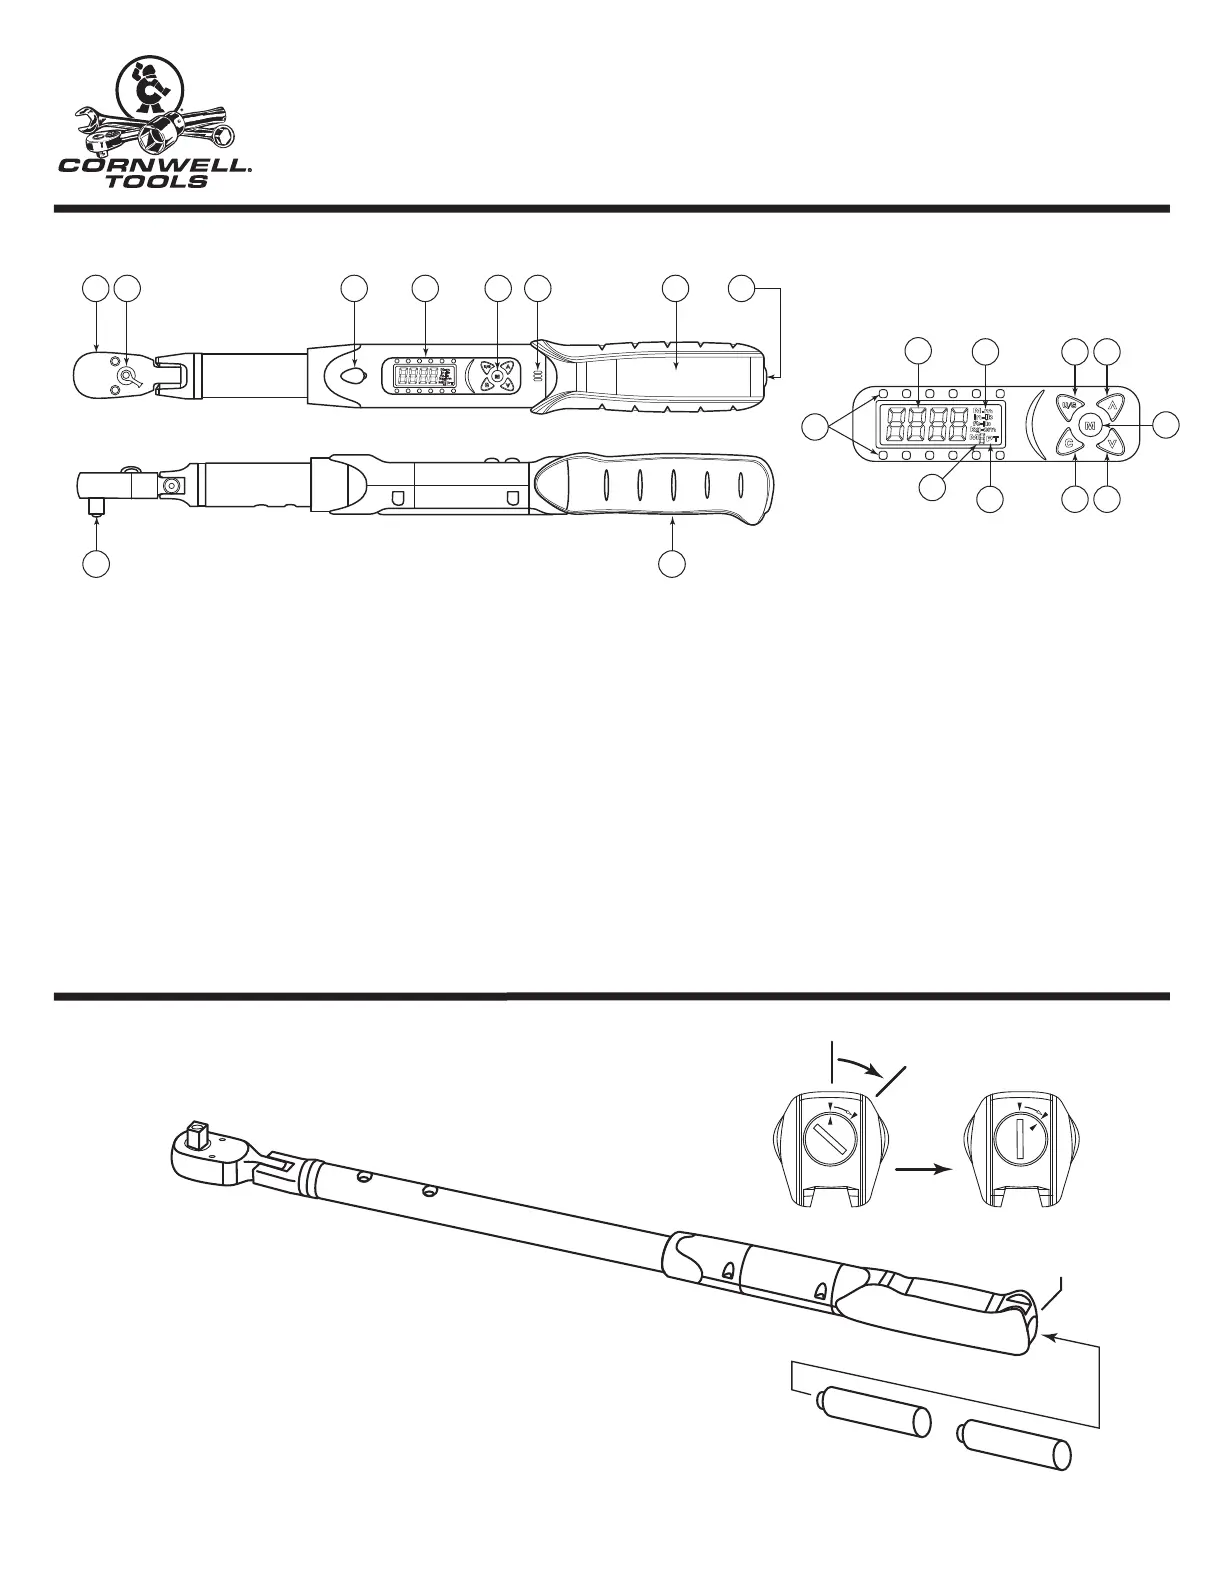
BATTERY INSTALLATION
• Remove the battery cap.
• Insert two AA batteries (provided) matching the
-/+ polarities of the battery to the battery
compartment.
• Replace the battery cap and fasten it tightly
according to the following illustrations:
1. Reversible Ratchet Head
2. Direction Lever
3. Communication Port
(
Authorized service center use only)
4. LCD Readout
5. Function Buttons
6. Alarm/Buzzer
7. Battery Compartment
8. Battery Cover
9. Ratchet Drive
10. Anti-Slip Handle
11. Torque Value Readout
12. Unit of Measure
13. Pre-Set Memory Indicator
(M1 - M9)
14. Peak Hold/Track Indicator
15. LED Indicator Lights
16. Unit/Setting Button
17. Power On/Clear Button
18. Pre-Set Number Select Button
19. Up Button
20. Down Button
+
-
+
-
Battery Cap
REPLACEMENT PARTS AVAILABLE AS:
RS2HRP 1/4” HEAD REPAIR KIT RSCTG2000CS MOLDED CASE FOR CTG2000
RS3HRP 3/8” HEAD REPAIR KIT RSCTG3000CS MOLDED CASE FOR CTG3000
RS4HRP 1/2” HEAD REPAIR KIT RSCTG4000CS MOLDED CASE FOR CTG5000
FEATURES AND FUNCTIONS
BEFORE USING THE WRENCH