14 15
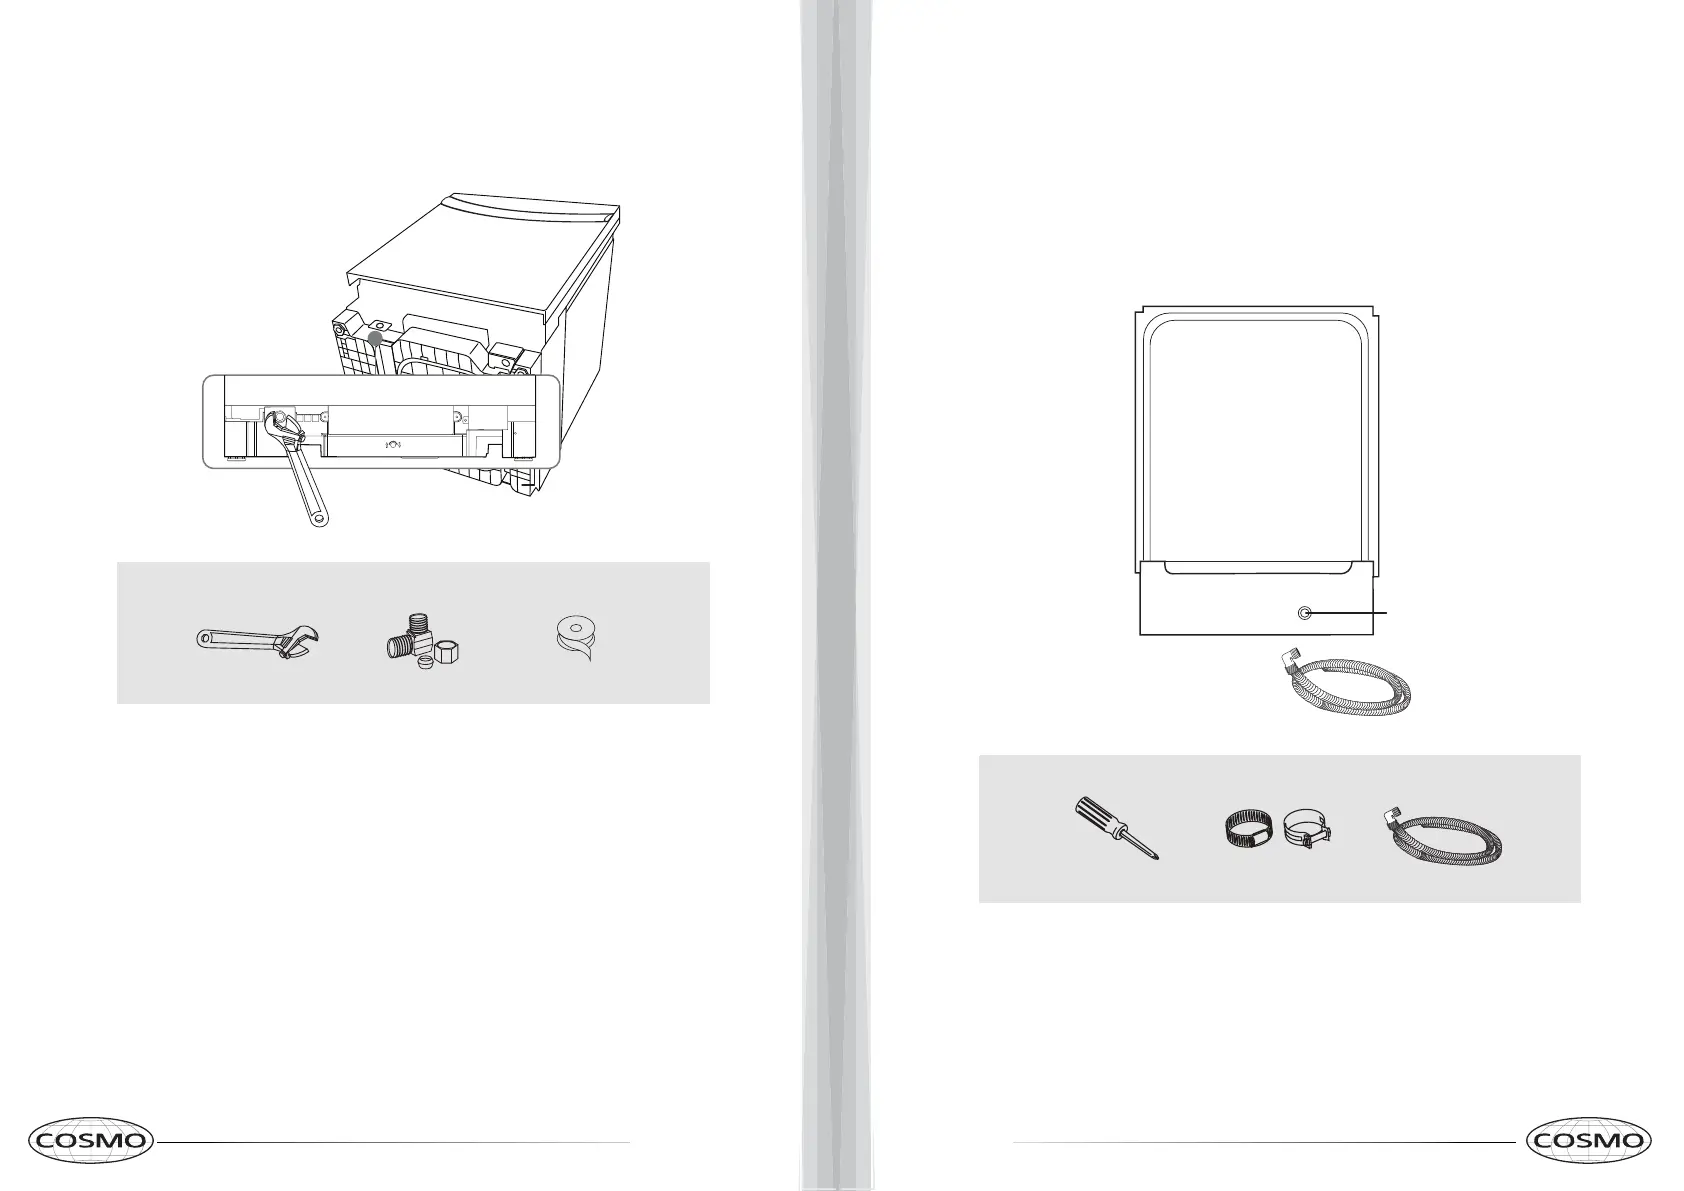
Step 5: Install the 90° water supply elbow
1 Wrap the male thread of the 90° elbow with Teflon thread seal tape twice. Do not use plumber's putty.
2 Install the 90° elbow onto the water valve. Do not overtighten the 90° elbow. The water valve bracket could bend or the
water valve fitting could break.
3 Position the end of the elbow to face the floor when the dishwasher is upright.
You’ll need:
Adjustable wrench
90° elbow
Teflon thread
seal tape
Step 6: Install the drain hose
1 Make sure that the leveling feet are loosened before standing the dishwasher upright. They may be tight from
shipping/packaging.
2 Turn the dishwasher upright.
3 Slide a screw-type hose clamp onto the right-angled end of the drain hose.
4 Install the drain hose to the dishwasher drain outlet on the back of the dishwasher, then tighten the screw-type hose
clamp.
You’ll need:
Drain hose installation hole
Back of dishwasher
Phillips screwdriver
Screw-type
hose clamps

 Loading...