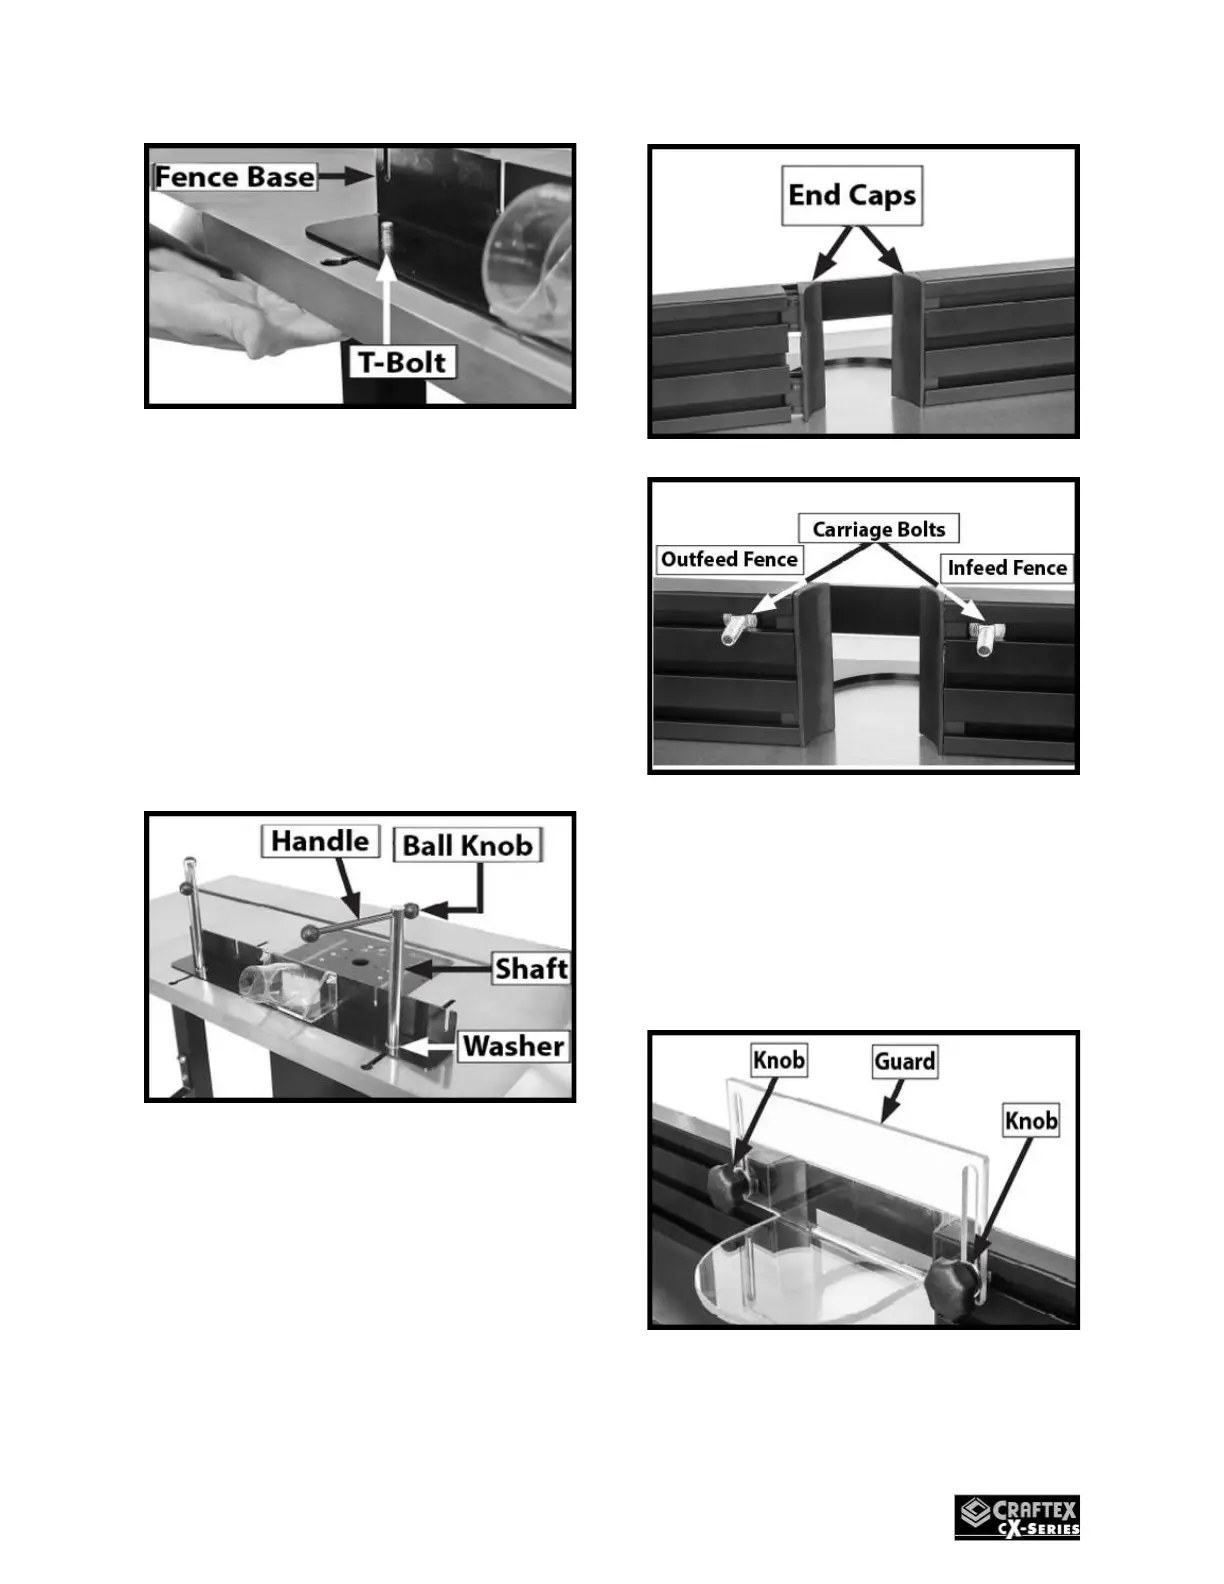
Figure 24
13. Assemble the fence locks as in
(Fig.25) by removing one ball knob
on each handle. Slide it through
the hole at the top of the shaft
then re-install the ball knobs.
14. Install the fence lock and 5/16 flat
washers on each of the T-Bolts
installed in step 12. (See Fig.25).
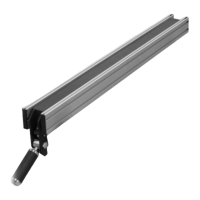
Figure 25
15. Slide (1) ¼-20 x ¾” into the top
slot of both the infeed & outfeed
fences (Fig.27) and press in the (4)
fence end caps into the fences
(Fig.26)
Figure 26
Figure 27
16. Attach the router bit guard to the
carriage bolts in the fence with
the (2) ¼-20 plastic knobs supplied
(Fig.28)
Figure 28
 Loading...