EasyManua.ls Logo

Craftex CX110 - User Manual

Craftex CX110
26 pages
Print Icon
To Next Page IconTo Next Page
Loading...
CX110
12” SLOW SPEED COLD SAW
User Manual

Questions and Answers

  • G
    garyhernandezSep 12, 2025
    How to stop tools from grabbing on my Craftex Lathe?
    • M
      Michael JohnsonSep 12, 2025
      If tools on your Craftex Lathe tend to grab or dig in, the issue could be due to dull tools (sharpen them), the tool support being set too low (reposition its height), the tool support being too far from the workpiece (reposition it closer), or using the wrong tool for the operation (use the correct tool).
  • D
    Dr. Brooke Ramirez DVMAug 25, 2025
    Why does my Craftex CX110 Saw leave ridges on the cutting surface?
    • S
      scott00Aug 25, 2025
      If your Craftex Saw is producing ridges on the cutting surface, several factors could be the cause. First, the disk diameter might be incorrect or too large; try decreasing the disk diameter to better match the part you're cutting. Also, ensure the part is gripped effectively in the vise. Reduce the advance and use less cutting pressure. If the disk teeth are worn, sharpen the tool. Check the level of lubricating refrigerant in the tank. Finally, make sure the blade has a larger tooth pitch to allow better unloading of shavings and hold more lubricating refrigerant.
  • J
    John VazquezAug 25, 2025
    Why is my Craftex Saw disk vibrating?
    • J
      Jenny ChaneyAug 26, 2025
      If the Craftex Saw disk is vibrating, it could be due to several reasons. The tooth pitch or tooth profile might be unsuitable, so choose a suitable disk. Ensure the part is gripped effectively in the vise. If the dimensions of the solid section are too large, abide by the instructions. If the disk diameter is incorrect or too large, decrease the disk diameter to match the part being cut.
  • L
    Leslie HinesSep 23, 2025
    Why is my Craftex Power Tool spindle noisy?
    • K
      Kelly DeckerSep 23, 2025
      A noisy spindle in your Craftex Power Tool could be due to damaged spindle bearings (replace the bearings) or a worn spindle (replace the spindle).
  • M
    Mallory HoldenSep 12, 2025
    What to do if Craftex Lathe motor does not run when power switch is turned on?
    • T
      Timothy MathisSep 12, 2025
      If the motor doesn't run when you turn on the power switch, it could be due to a burnt-out switch, in which case you should replace the switch. Another possible cause is a loose or damaged connection wire, which needs to be tightened or replaced.
  • R
    Riley BurgessSep 15, 2025
    How to fix a Craftex Sander when the motor will not start?
    • K
      Kimberly DavisSep 16, 2025
      If your Craftex Sander motor won't start, it could be due to a few reasons. First, a faulty or defective switch might be the issue; consider replacing it. Second, a faulty or blown capacitor could be the culprit, so replace the capacitor. Third, check for a blown fuse or tripped circuit breaker; if a fuse is blown, replace it with the required size, and if a breaker is tripped, reset it. Finally, low line voltage could be the cause; check the power supply for the correct voltage and adjust as needed.
  • S
    shatfieldSep 5, 2025
    Why is the board edge curved after using my Craftex Power Tool?
    • R
      Renee GarnerSep 5, 2025
      This can happen if the board isn't held with the same pressure on the infeed and outfeed table during the cut; ensure you hold the board with consistent pressure as it moves over the cutterhead. Also, if the board has too much bow or coil along its length, take limited cuts to remove the high spots before a full pass. Surface plane one face so there is a good surface to place along the fence. It should take 3 to 5 passes to get a perfect edge depending on the state of the board and the depth of cut.
  • R
    Robert RothSep 6, 2025
    Why is my Craftex Power Tool causing chipped or ripped out pieces?
    • S
      spencetanyaSep 6, 2025
      This issue can be caused by knots or incompatible grain direction in the wood. Check the workpiece for knots and grain; clean stock should be used. Also, nicked or broken cutter inserts can be the problem; turn or replace the cutter insert. Feeding the workpiece too fast can also cause this; reduce the feed rate. Finally, taking too deep of a cut can cause chipping; take a smaller depth in cut, especially when using hard wood.
  • J
    Jeffrey JohnsonAug 29, 2025
    What to do if Craftex Air Cleaner motor does not run when power is switched on?
    • S
      Stacy CookeAug 29, 2025
      If the motor of your Craftex Air Cleaner doesn't run when you switch it on, the fuse may have blown and needs replacing. Alternatively, the switch could be burned out, requiring replacement. Another potential cause is a loose or damaged wire connection, which should be tightened or replaced.
  • S
    Steven Mcintyre MDAug 30, 2025
    Why Craftex Air Cleaner motor will not reach full power?
    • L
      Laura PhelpsAug 30, 2025
      If your Craftex Air Cleaner motor won't reach full power, the power wiring might be incorrect; replace or correct it. Another possibility is that an overload has tripped; reduce the load by cleaning the filters as necessary.

Overview

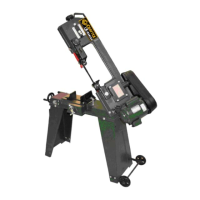
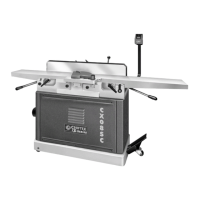
The Craftex CX110 CX-Series is a 12" Slow Speed Cold Saw designed for cutting metal construction materials of various shapes and profiles. It is suitable for fabrication workshops, machinist shops, and general construction work.

Function Description

The CX110 is a cold saw that uses a slow-speed blade to cut metal workpieces. It features a vise for clamping materials, an adjustable head for miter cuts, and a work-stop for consistent length cuts. A coolant pump system is integrated to lubricate the blade and cool the workpiece during operation, enhancing cut quality and blade life. The machine is designed for safe and efficient cutting, with various safety features and controls.

Important Technical Specifications

  • Motor: 2-1/2 HP, 220 V, 16 Amp
  • Coolant Pump: 1/8 HP
  • Coolant Tank Size: 5 L
  • Spindle Speed: 52 RPM
  • Maximum Vise Opening: 4-3/4" (120mm) with Quick Release
  • Approximate Weight: 195 Kg
  • Made in: Taiwan
  • Warranty: 3 Years (parts), 90 days (labor)

Cutting Capacities at 90°:

  • Solid: 2-3/8" (60mm)
  • Hollow: 4" (100mm)
  • Square: 3-1/4" x 3-1/4" (82mm x 82mm)

Cutting Capacities at 45°:

  • Solid: 2" (50mm)
  • Hollow: 3-1/2" (90mm)
  • Square: 3" x 3" (75mm x 75mm)

Usage Features

  • Control Handle: Ergonomically designed for comfortable operation.
  • Trigger Switch: Activates the motor and coolant pump.
  • ON/OFF Button: Main power switch for the machine.
  • Power Indicator Light: Glows green when the machine is turned ON.
  • Coolant Pump Switch: Controls the coolant pump.
  • Emergency Stop Button: Shuts off the machine in case of an emergency.
  • Vise Hand Wheel: Opens and closes the vise jaw to clamp the workpiece.
  • Vise Quick Release Lever: Allows for quick opening, repositioning, and re-clamping of the vise jaws, useful for repetitive clamping procedures.
  • Miter Lock Lever: Releases or locks the saw head in position for angled cuts.
  • Angle Indicator Scale: Provides a guide for setting desired cutting angles.
  • Work-Stop: Allows setting a specific distance from the blade for producing multiple cuts of the same length.
  • Adjustable Vise: Can be adjusted to provide maximum support at different angles and features an auxiliary stability bracket for additional support during cutting.
  • Blade Guard: Ensures safety during operation by covering the blade.
  • Splash Guard: Protects the operator and surrounding area from cutting fluid and debris.
  • Mounting Holes: Located on the cabinet stand for securing the machine to the shop floor using lag shield anchors or studs.

Maintenance Features

  • Daily Checks: Before each use, operators should check for loose mounting nuts and bolts, worn or damaged cords, cutting fluid level, blade damage, proper function of the blade guard, damaged parts, and any other unsafe conditions.
  • Cleaning: The machine should be kept clean, greased, and lubricated regularly. Excess metal chips should be vacuumed, and remaining debris and cutting fluid wiped off with a dry cloth.
  • Coolant System Maintenance: The coolant tank needs to be accessed and cleaned periodically. This involves disconnecting the power, removing the rear stand cover, wearing protective glasses, removing the drain hose, taking out the tank, draining and disposing of used cutting fluid according to regulations, wiping out residual fluid, cleaning screens in the machine base and tank, washing the filter, and refilling with a 1:10 coolant solution to water.
  • Lubrication: The vise lead screw should be cleaned with a rag and lubricated with multipurpose grease, distributed by opening and closing the vise several times.
  • Gearbox Oil Change: The oil in the gearbox must be drained and replaced every six months. This involves disconnecting power, raising the saw, removing the oil sight glass to drain old oil, raising the saw back up, pouring in new oil through the fill plug, and reinstalling the control handle. The oil sight glass also serves as a drain plug.
  • Blade Change: Requires disconnecting power, removing the cap screw securing the blade guard, rotating the guard and linkage out of the way, removing the arbor cap screw and blade flange, placing the flange on the new blade, and reassembling.
  • Troubleshooting Guide: The manual provides a comprehensive troubleshooting section to help diagnose and remedy common issues such as tooth breakage, premature disk wear, chipped disk, disk vibration, ridges on the cutting surface, cuts off straight, and blade sticking in the cut. This guide covers potential causes like incorrect cutting speed, tooth pitch, disk quality, gripping, lubrication, and material accumulation.

Craftex CX110 Specifications

General IconGeneral
BrandCraftex
ModelCX110
CategorySaw
LanguageEnglish

Related product manuals