8. Connect the table to the power
source and then perform your cut.
(Fig.51)
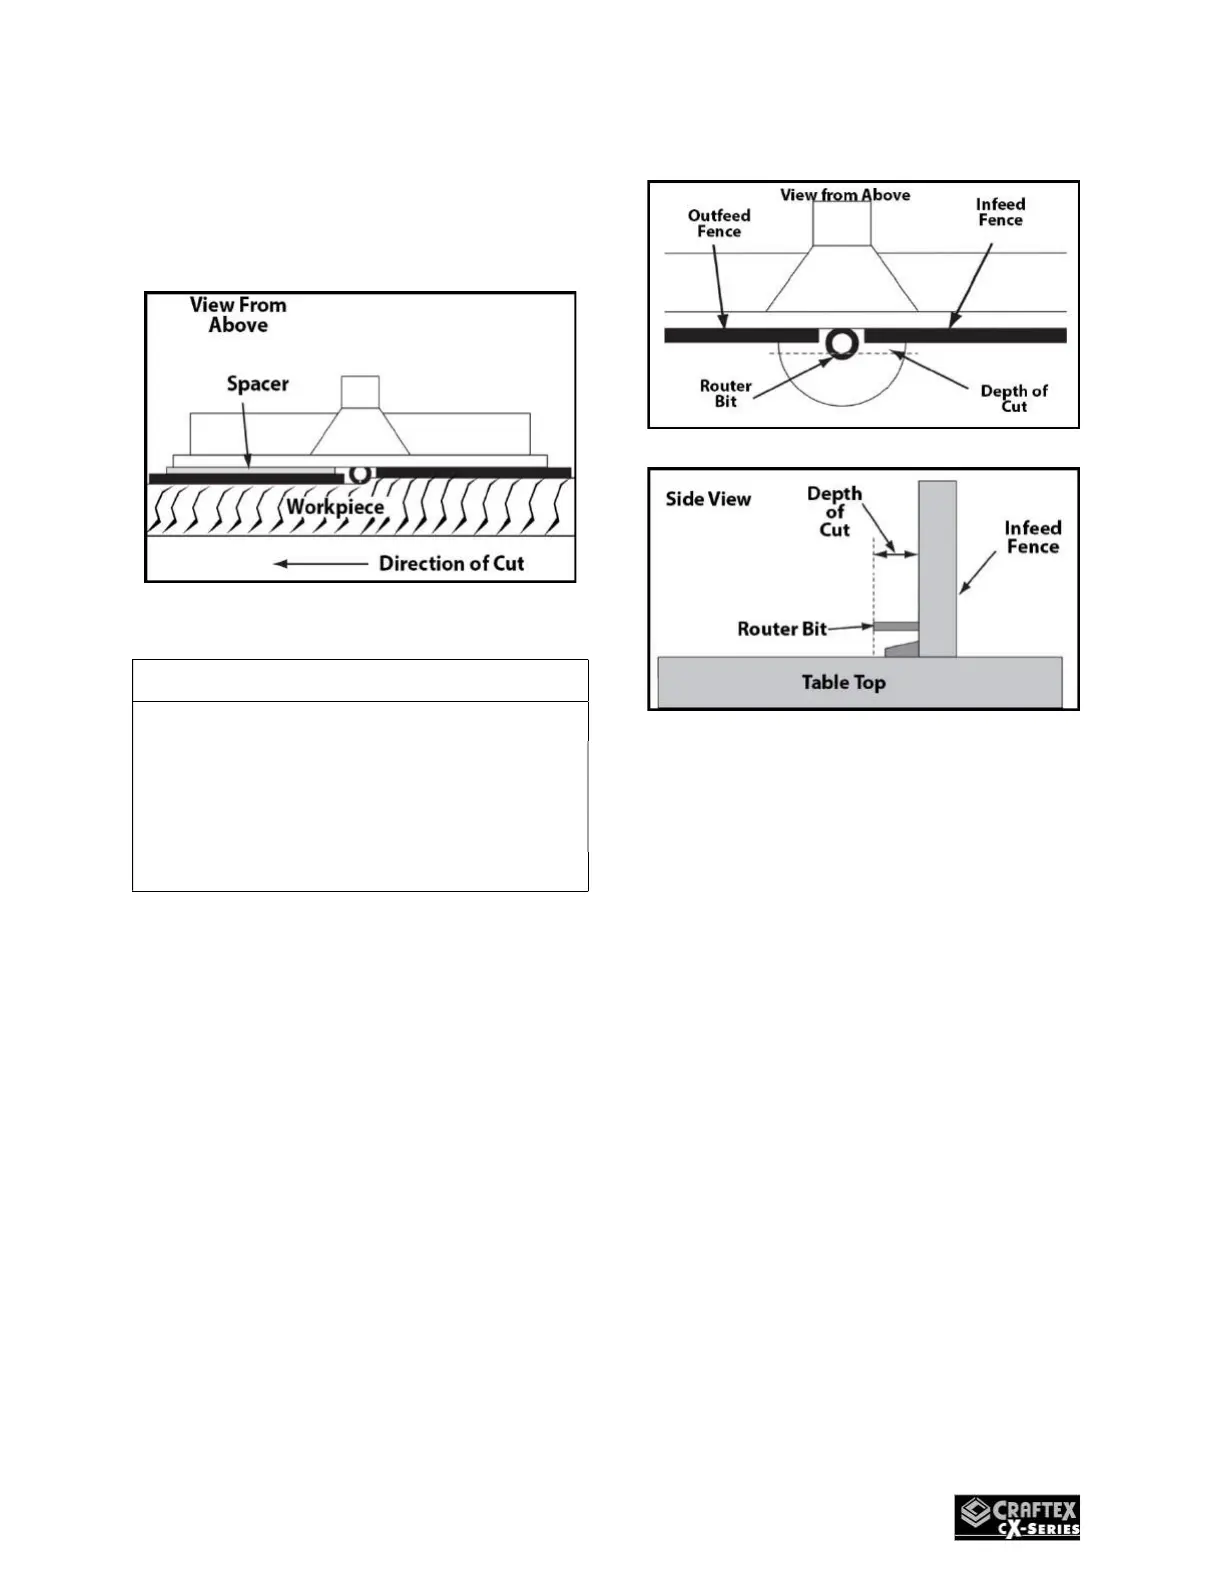
Figure 52
CAUTION!
ALWAYS make sure the fence and
router bit guard are properly
positioned and secured before
connecting power. Failing to do so
increases the risk of personal injury.
Profile Routing
1. DISCONNECT THE MACHINE
FROM POWER!
2. Install a router bit into the
router.
3. With the router lift handle,
raise the router bit to the desired
height, then adjust the fence to the
desired depth of cut
(Fig.53A)(Fig.53B)
Figure 53A
Figure 53B
4. Both infeed and outfeed fences
must be parallel if using the T-slot.
5. Lock the fence in place, tighten
all knobs, reconnect the power and
make your cut.
Routing Small Stock
When feeding small stock through
the router, use a zero-clearance fence
board. This will better support the
workpiece, reduce tear-out and help
to prevent kickback. Kickback can
occur when the workpiece slips into
the space between the fence and the
bit.
 Loading...