EasyManua.ls Logo

Craftsman 103.22181 User Manual

Craftsman 103.22181
6 pages
To Next Page IconTo Next Page
Page #1 background imageLoading...
Page #1 background image
OPERATING iNSTRUCTIONS AND PARTS L|ST FOR
9 raNCH BENCH SAVe/
Model 103.22181
MITER PROTRACTOR
LOCK KNOB
FENCE
FENCE SLIDE BAR
CONTROL KNOB
FIGURE I
This 9-1nch Tilting Arbor Bench Saw will produce
quality work satisfying the demands of the most
exacting craftsman.
To increase the versatility of this saw beyond the
normal range of Bench Saw operations, various ac-
cessories are readily available° See Page 5o
To prevent damage in shipping, some of the parts
were disassembled from the tool. These parts are
listed below. Be sure they are all accounted for before
discarding any of the packing material.
1. Fence; item 106.
2. Miter gage assembly; item 114.
3. Insert with clips; items 15, 16 and 17o
4. Motor pulley; item 66,
5. V-belt; item 64.
6. Bag contains 10, 11, 12, 13, 19, 20, 23, 24, and
63.
7. Fence Slide Bar; item 2.
ASSEMBLY:
Front Fence Bar
The front fence bar must be fastened to the front
edge of the saw table with three (3) slotted head
screws, No. 10, spacers, No. 11, lock washers, Noo 12,
and hex nuts, No. 13. See Fig. 2.
Before -tightening the screws securely, the fence
bar must be accurately adjusted to the 2t/32 dimen-
sion over the entire length.
INSTALLATION OF TABLE INSERT:
The insert in the saw has six tabs which rest on the
ledge of the table insert opening°
FIGURE 2
FIGURE 3
Question and Answer IconNeed help?

Do you have a question about the Craftsman 103.22181 and is the answer not in the manual?

Craftsman 103.22181 Specifications

General IconGeneral
BrandCraftsman
Model103.22181
CategorySaw
LanguageEnglish

Summary

Saw Assembly and Installation

Front Fence Bar Assembly

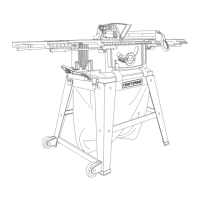
Attaching the front fence bar to the saw table using specific hardware for alignment.

Table Insert Installation

Placing the table insert into its opening on the saw table, ensuring it sits flush.

Motor Mounting and Belt Setup

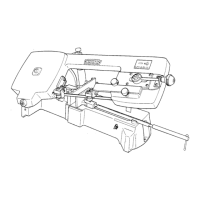
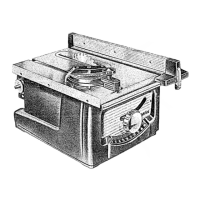
Securing the motor and aligning the pulley and belt for proper operation and tension.

Saw Bench Mounting

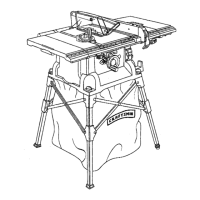
Fastening the saw securely to a workbench for stability and sawdust escape.

Bench Saw Operation and Adjustments

Pre-Operation Checks

Verifying belt tension, blade direction, and motor rotation before starting the saw.

Lubrication and Controls

Identifying lubrication points and explaining control knob functions for blade height and tilt.

Blade Tilt Calibration

Adjusting the pointer and scale for precise 0° and 45° blade tilt settings.

Blade and Fence Alignment

Adjusting the blade to be parallel with miter slots and the fence to lock parallel for accurate cuts.

Bench Saw Safety and Calibration

Mitre Gauge Calibration

Checking and resetting mitre gauge stops for accurate angled cuts.

Cutting Techniques and Limits

Guidelines on blade projection, feed, miter cuts, dado usage, and support for long work.

General Safety Precautions

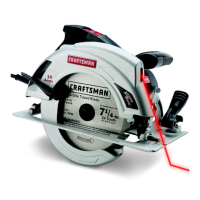
Essential safety rules including attire, hand positioning, and stopping procedures for safe operation.

Parts Identification and Ordering

Available Accessories

Listing optional accessories to enhance the saw's functionality and versatility.

Detailed Parts Listing

Comprehensive list of all parts with their corresponding numbers and names for ordering.

Ordering Repair Parts

Instructions on how to order replacement parts, including required information.

Related product manuals