EasyManua.ls Logo

Craftsman 21807 - 10 in. Table Saw User Manual

Craftsman 21807 - 10 in. Table Saw
56 pages
To Next Page IconTo Next Page
Page #1 background imageLoading...
Page #1 background image
Operator's lVlanual
ERRFrSNRN°
10-in. TABLE SAW WiTH LEG SET
Model No. 137.218070
C us
CAUTION:
Before using this Table Saw,
read this manual and follow
all its Safety Rules and
Operating Instructions
® Safety Instructions
® Installation
® Operation
® Maintenance
® Parts List
Customer Help Line
For Technical Support
1-800-843-1682
Sears Parts &
Repair Center
1-800-488-1222
Sears, Roebuck and Co., Hoffman Estates, IL 60179 USA
Visit our Craftsman website: www.sears.comlcraftsman
Part No. 137218070001 Printed in Taiwan

Table of Contents

Question and Answer IconNeed help?

Do you have a question about the Craftsman 21807 - 10 in. Table Saw and is the answer not in the manual?

Craftsman 21807 - 10 in. Table Saw Specifications

General IconGeneral
Blade Diameter10 in.
Motor15 Amp
Max Cutting Depth at 90 Degrees3-1/8 in.
Max Cutting Depth at 45 Degrees2-1/4 in.
Arbor Size5/8 in.
Voltage120V
Max. RPM / No-Load Speed5000 RPM
Table Size20 in. x 26 in.
Rip Capacity24 in.

Summary

Product Specifications

Power Tool Safety

GENERAL SAFETY INSTRUCTIONS BEFORE USING THIS POWER TOOL

Essential safety guidelines for operating power tools.

Table Saw Safety

Electrical Requirements and Safety

GROUNDING INSTRUCTIONS

Procedures for proper electrical grounding.

GUIDELINES FOR EXTENSION CORDS

Recommendations for using extension cords safely.

Tools Needed for Assembly

Assembly

ASSEMBLE STAND (FIG. A, B, C)

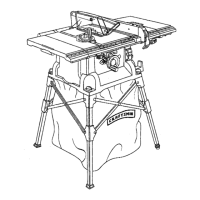
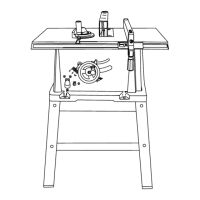
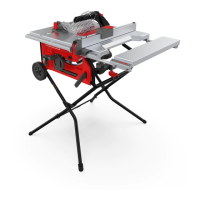
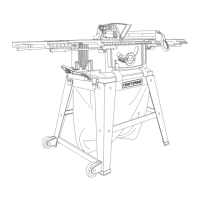
Step-by-step guide to assembling the saw stand.

ASSEMBLE THE ROLLER WHEEL TO STAND (FIG. D, E)

Attaching the roller wheel assembly to the stand.

ASSEMBLE THE FOOT PAD TO STAND (FIG. F)

Instructions for attaching the foot pads to the stand.

ASSEMBLE TABLE SAW TO STAND USING LEVER LOCK (FIG. G)

Securing the saw to the stand using locking levers.

INSTALLING THE BLADE (FIG. M, N, O)

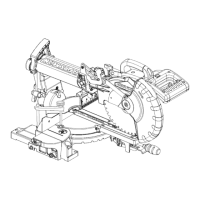
Detailed instructions for installing the saw blade.

REMOVING THE BLADE (FIG. N, O)

Detailed instructions for removing the saw blade.

RIVING KNIFE ASSEMBLY (FIG. P, P-1, Q)

Guide for installing the riving knife.

BLADE GUARD ASSEMBLY (FIG. R, S, T)

Instructions for installing the blade guard.

Adjustments

RIP FENCE ADJUSTMENT (FIG. DD)

How to adjust the rip fence for accuracy.

ADJUSTING THE MITER GAUGE (FIG. FF)

Setting and adjusting the miter gauge angles.

BLADE PARALLEL TO THE MITER GAUGE GROOVE (FIG. JJ, KK)

Aligning the blade parallel to the miter gauge groove.

Operation

ON/OFF SWITCH (FIG. NN)

Using the power switch and safety key.

RIPPING (FIG. QQ, RR)

Detailed guide on performing ripping cuts safely.

CROSSCUTTING (FIG. WW)

Detailed guide on performing crosscutting safely.

BEVEL CROSSCUTTING (FIG. YY)

Performing crosscuts with the blade at an angle.

COMPOUND MITER CROSSCUTTING (FIG. ZZ)

Performing cuts with both miter and bevel angles.

MITERING (FIG. aa)

Performing miter cuts with the blade at 0 degrees.

DADO CUTS (FIG. dd, ee)

Procedures for making dado cuts with the saw.

Maintenance

REPLACING THE CARBON BRUSHES (FIG. hh, ii)

Guide for replacing the motor's carbon brushes.

Troubleshooting Guide

Material kicked back from blade.

Troubleshooting and preventing workpiece kickback.

Parts List

Related product manuals