EasyManua.ls Logo

Craftsman 137.218010 User Manual

Craftsman 137.218010
28 pages
To Next Page IconTo Next Page
Page #1 background imageLoading...
Page #1 background image
Operator's Manuam
m
CAUTION:
Before using this Table Saw,
read this manual and follow
all its Safety Rules and
Operating Instructions
o Safety Instructions
o Installation
o Operation
+ Maintenance
o Parts List
Customer Help Line
1o800o843ol 682
Sears, Roebuck and Co., Hoffman Estates, IL 60179 USA
Visit our Oraftsman website: www.sears.com/craftsman
Part No. 137218010001
Question and Answer IconNeed help?

Do you have a question about the Craftsman 137.218010 and is the answer not in the manual?

Craftsman 137.218010 Specifications

General IconGeneral
Model Number137.218010
TypeTable Saw
Blade Diameter10 inches
Motor Power15 Amp
Max Cutting Depth3 inches
Cord Length6 feet
Bevel Capacity0-45 degrees
Depth of Cut at 90 degrees3 inches
Motor15 Amp

Summary

Warranty

Product Specifications

Power Tool Safety

Table Saw Safety

Electrical Requirements and Safety

Accessories and Attachments

Recommended Accessories

Lists recommended accessories for this power tool.

Carton Contents

Tools Needed for Assembly

Unpacking Your Table Saw

Know Your Table Saw

Assembly and Adjustments

Assemble Stand (Fig. A)

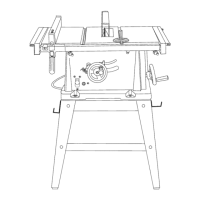
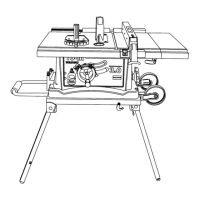
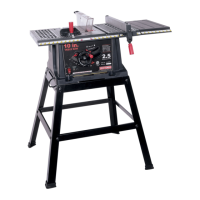
Step-by-step instructions for assembling the saw stand.

Assemble Table Saw to Stand (Fig. A-1)

Instructions to attach the saw to the assembled stand.

Saw Mounted to Work Surface (Fig.B)

Assemble Blade Raising & Tilting Wheel (Fig. C)

Rip Fence (Fig. D, E)

Table Extension – Right Side (Fig. F)

Installing and Changing the Blade (Fig. H, I, J)

Blade Guard Assembly (Fig. K, L, M)

Miter Gauge Adjustment (Fig. N)

Rip Fence Adjustment (Fig. O)

Rip Fence Indicator Adjustment (Fig. O)

Blade Adjustment Mechanisms

Blade Tilting (Fig. P)

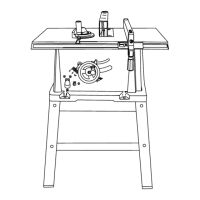
Methods for adjusting the saw blade's tilt angle, including rapid and micro-adjustments.

Blade Height Adjustment (Fig. P)

Procedure for adjusting the saw blade's vertical height using the handwheel.

Blade Parallel to Miter Gauge Groove (Fig. Q, R)

Additional Blade Adjustments (Fig. R)

0° Bevel Stop (Fig. S)

Bevel Pointer Adjustment (Fig. T)

45° Bevel Stop (Fig. U)

Operation

Basic Saw Operations

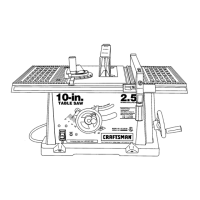
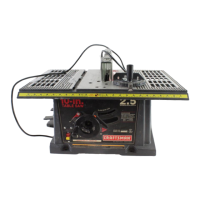
Fundamental operations including switch, overload, and cutting types.

Ripping (Fig W, X)

Detailed guide for performing rip cuts safely and effectively.

Ripping Small Pieces

Crosscutting 90° Miter Angle (Fig. Y)

Bevel Crosscutting (Fig. AA)

Compound Miter Crosscutting (Fig. BB)

Mitering (Fig. CC) 0°~45° Miter Angle

Dado Cuts (Fig. EE)

Maintenance

General Maintenance

Routine cleaning and care for the table saw.

Blade Raising and Tilting Mechanism

Checking and adjusting the blade height and tilt mechanisms.

Lubrication

Recommended lubricants for mechanical parts of the saw.

Troubleshooting Guide

Push Stick Construction

10 In. Table Saw Parts List

10 In. Table Saw Schematic

10 In. Table Saw Parts List & Schematic Stand

10 In. Table Saw Parts List & Schematic Motor

Related product manuals