Do you have a question about the Craftsman 21829 - Professional 10 in. Portable Table Saw and is the answer not in the manual?
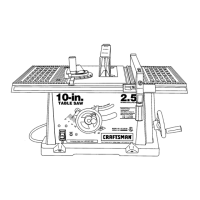
| Model | 21829 |
|---|---|
| Type | Portable Table Saw |
| Blade Diameter | 10 in. |
| Power Source | Electric |
| Motor Power | 15 Amps |
| Max Cutting Depth at 90 Degrees | 3-1/8 in. |
| Max Cutting Depth at 45 Degrees | 2-1/4 in. |
| Arbor Size | 5/8 in. |
| Max. RPM | 5000 RPM |
| Voltage | 120V |
| Table Material | Aluminum |
| No-Load Speed | 5000 RPM |
| Amperage | 15 A |
Guidelines for selecting and using extension cords with the table saw.
Information on connecting the saw to a power supply and voltage requirements.
Importance and procedure for grounding the table saw for safety.
Technical details and measurements of the table saw's components.
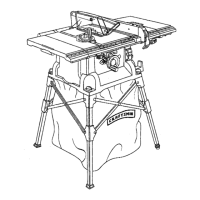
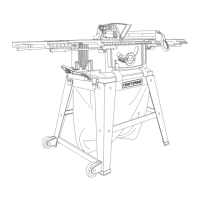
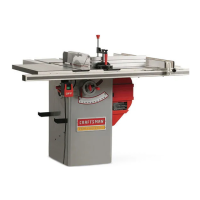
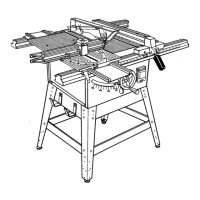
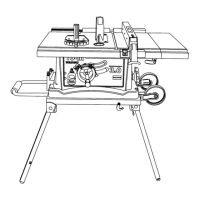
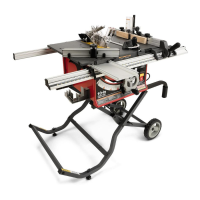
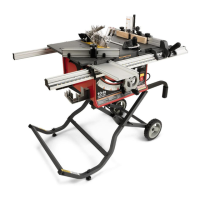
Familiarization with the various components and their functions.
Instructions on the proper use and importance of the blade guard.
Description and function of the rip fence for guiding workpiece.
Details on the miter gauge for accurate angled cuts.
Instructions for safely removing the saw from its packaging.
Steps for unfolding and setting up the table saw's leg stand.
Procedures for stabilizing and leveling the table saw on the work surface.
Methods for storing accessories like the rip fence and miter table.
Instructions for attaching the bevel handle for angle adjustments.
Steps for mounting the front and back rails onto the saw's base.
Procedures for folding the stand and safely moving the table saw.
Guide for removing and reinstalling the throat plate for blade access.
Procedure to verify correct blade installation and orientation.
Steps for attaching the sliding miter table and miter fence assemblies.
Verifying the alignment of the miter table with the saw blade.
How to secure the sliding miter table in a fixed position for cutting.
Instructions for attaching the accessory table to the saw.
Proper installation steps for the blade guard and riving knife.
Fundamental steps for starting and operating the table saw safely.
Explains the factors that lead to kickback during saw operation.
Techniques and precautions to prevent kickback incidents.
Overview of the six basic types of cuts that can be performed.
General advice and best practices for making accurate cuts.
Explanation of what a featherboard is and its use in controlling workpiece.
Step-by-step guide for attaching a featherboard to the saw.
How to adjust the vertical position of the saw blade for cutting.
Adjusting the blade tilt for bevel and compound cuts.
Procedures for checking and adjusting the miter table's alignment.
Ensuring the miter fence is square to the saw blade for accurate cuts.
Aligning the miter base parallel to the saw blade for precise cuts.
Fine-tuning the miter fence alignment with the blade using eccentric screws.
Adjusting the quick stop mechanism for precise 0° miter fence positioning.
Calibrating the rip fence scale for accurate measurements.
Proper procedure for using the rip fence to guide workpieces.
How to use the miter gauge for precise cross and angled cuts.
Step-by-step guide for performing a 90-degree cut across the workpiece grain.
Instructions for cutting along the length of the workpiece with the grain.
Performing angled cuts using the miter gauge.
Cutting across the grain with the blade tilted at an angle.
Cutting with the grain while the blade is tilted at an angle.
Performing angled cuts with the blade also tilted.
Safety and support guidelines for cutting large panels.
Procedures for cuts that do not go completely through the workpiece.
Instructions for cutting grooves or dadoes using a special blade and throat plate.
How to use the accessory table, especially with routers.
Installing T-nuts onto the rip fence for attaching brackets.
Attaching the guard/dust cover post and assembly.
Mounting the guide fence brackets onto the rip fence.
Steps for mounting a router onto the accessory table.
Installing the correct router bit and throat plate.
Final checks and adjustments before using the saw for cutting.
Step-by-step guide for safely removing and installing saw blades.
Aligning and maintaining the riving knife and blade guard for safety.
Calibrating the bevel indicator and stops for accurate 0° and 45° angles.
Adjusting the miter gauge stops for precise angles.
Ensuring the rip fence is perfectly parallel to the saw blade.
Tightening or adjusting the bevel locking lever for secure angle settings.
Adjusting miter locking clamps for proper sliding miter table engagement.
Tightening or adjusting clamps that secure the front and rear rails.
Adjusting the accessory table to prevent loosening on the rails.
Routine cleaning and inspection of the saw's parts and surfaces.
Areas requiring lubrication to ensure smooth operation and longevity.