EasyManua.ls Logo

Craftsman 139.53971SRT User Manual

Craftsman 139.53971SRT
76 pages
To Next Page IconTo Next Page
Page #1 background imageLoading...
Page #1 background image
KG
KG
1
2
3
1/2 HP
GARAGE DOOR OPENER
ABRIDOR DE PUERTA DE COCHERA
For Residential Use Only/Sólo para uso residencial
Model/Modelos 139.53960SRT 139.53968SRT 139.53970SRT
139.53971SRT 139.53973SRT
®
Sears, Roebuck and Co., Hoffman Estates, IL 60179 U.S.A
www.sears.com/craftsman
Read and follow all safety rules
and operating instructions before
first use of this product.
Fasten the manual near the garage
door after installation.
Periodic checks of the opener are
required to ensure safe operation.
Lea y siga todas las reglas de
seguridad y las instrucciones de
operación antes de usar este
producto por primera vez.
Guarde este manual cerca de la
puerta de la cochera.
Se deben realizar revisiones
periódicas del abridor de puertas
para asegurar su operación
segura.
Owners Manual/Manual del Propietario
ENGLISH ESPAÑOL
®
Question and Answer IconNeed help?

Do you have a question about the Craftsman 139.53971SRT and is the answer not in the manual?

Craftsman 139.53971SRT Specifications

General IconGeneral
TypeChain Drive
Horsepower1/2 HP
Max Door Height7 ft
Remote ControlYes
Security FeatureRolling code technology
Voltage120V
Battery BackupNo
Safety FeaturesSafe-T-Beam infrared sensors, automatic safety reverse

Summary

Garage Door Opener Manual Introduction

Initial Safety Instructions

Essential safety guidelines for safe operation and installation of the garage door opener.

Introduction to Safety Symbols and Signals

Safety Symbol and Signal Word Review

Explains the meaning of warning and caution symbols to alert users to potential hazards.

Garage Door Preparation and Required Tools

Tools Needed for Installation

Lists the necessary hand tools required for the assembly and installation of the garage door opener.

Garage Door Opener Installation Planning

Sectional Door Installation Planning

Considerations for planning the installation of the opener on sectional garage doors.

One-Piece Door Installation Planning

One-Piece Door Installation Considerations

Specific planning details and warnings for installing the opener on one-piece garage doors.

Carton Contents and Part Identification

Assembly and Installation Hardware Inventory

Assembly Step 1: Rail and Trolley Assembly

Assembly Step 2: Attach Rail to Motor Unit

Assembly Step 3: Install Idler Pulley

Assembly Step 4: Install Chain, Cable, and Sprocket Cover

Assembly Step 5: Tighten the Chain

Critical Installation Safety Instructions

Installation Step 1: Determine Header Bracket Location

Sectional & Tracked One-Piece Door Bracket Location

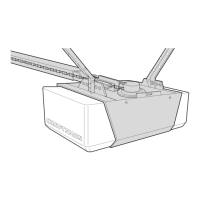
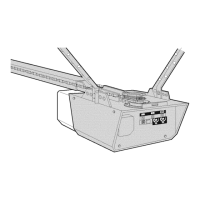
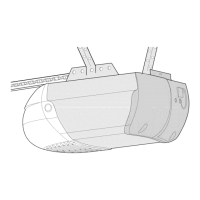
Determining the header bracket position for sectional and one-piece doors with tracks.

One-Piece Door Without Track: Header Bracket Location

Installation Step 2: Install Header Bracket

Wall Mounting Header Bracket

Instructions for mounting the header bracket directly onto the garage wall structure.

Ceiling Mounting Header Bracket

Instructions for mounting the header bracket to the garage ceiling structure.

Installation Step 3: Attach Rail to Header Bracket

Installation Step 4: Position the Opener

Sectional/Tracked One-Piece Door Opener Positioning

Guidance on setting the opener's position for sectional and one-piece doors with tracks.

One-Piece Door Without Track Opener Positioning

Guidance on setting the opener's position for one-piece doors without tracks.

Installation Step 5: Hang the Opener

Installation Step 6: Install the Door Control

Installation Step 7: Install Light and Lens

Installation Step 8: Attach Emergency Release Rope and Handle

Installation Step 9: Electrical Requirements

Electrical Outlet and Wiring Guidance

Ensuring correct electrical connections and outlet types for safe opener operation.

Installation Step 10: Install Safety Reversing Sensor

Safety Reversing Sensor Functionality

Details on how the safety reversing sensor detects obstructions for safe operation.

Install Safety Sensor Mounting Brackets

Garage Track Mounting for Sensor Brackets

Mounting sensor brackets to the garage door track for optimal alignment.

Wall Mounting for Sensor Brackets

Mounting sensor brackets directly onto the garage wall.

Floor Mounting for Sensor Brackets

Mounting sensor brackets to the garage floor.

Mount and Wire Safety Sensors

Align Safety Reversing Sensors

Procedures for correctly aligning the safety reversing sensors for proper function.

Troubleshoot Safety Reversing Sensors

Common issues and solutions for safety reversing sensor malfunctions.

Installation Step 11: Fasten Door Bracket

Sectional Door Bracket Fastening

Securing the door bracket to sectional garage doors, including reinforcement.

One-Piece Door Bracket Fastening

Installation Step 12: Connect Door Arm to Trolley

Sectional Door Arm Connection

Connecting the door arm sections to the trolley for sectional garage doors.

One-Piece Door Arm Connection

Adjustment Step 1: Adjust Travel Limits

Adjusting Travel Limits: When and How

Guidance on adjusting door travel limits for proper opening and closing.

Adjustment Step 2: Adjust Door Force

Adjusting Door Forces: When and How

Procedures for adjusting the opening and closing forces of the garage door opener.

Adjustment Step 3: Test Safety Reversal System

Adjustment Step 4: Test Safety Reversing Sensor

Opener Operation

Critical Safety Instructions for Operation

Critical safety rules to follow when operating the garage door opener.

Using the Garage Door Opener

Instructions on how to operate the garage door opener using various controls.

Using the Wall-Mounted Control

Premium Control Console Features

Details on the light and lock features of the premium control console.

3-Function Remote Light Control Programming

How to program a 3-function remote to control the opener's lights.

Manual Door Operation Procedures

Disconnect Trolley for Manual Use

Steps to manually disconnect the trolley for opening or closing the door by hand.

Reconnect Trolley After Manual Use

Procedure to reconnect the trolley after manual operation.

Opener Care and Maintenance Schedule

Limit and Force Adjustments for Weather

Guidance on adjusting opener limits and forces due to weather changes.

Regular Opener Maintenance Schedule

Recommended checks and lubrication for maintaining the opener's performance.

Remote Control Battery Replacement

Troubleshooting Common Garage Door Opener Issues

Opener Unit & Control Malfunctions

Diagnosing issues like non-operation, remote/control problems, and motor strain.

Door Travel & Reversal Issues

Addressing problems with door not opening/closing fully, reversing, or chain sag.

Performance & Ancillary Issues

Resolving issues related to noise, power failure, and remote range.

Programming the Opener

Add a Hand-held Remote

Instructions for programming additional remote controls to the opener.

Erase All Remote Codes

Procedure to clear all programmed remote controls from the opener's memory.

Program 3-Function Remotes

Details on programming additional buttons on 3-function remotes.

Program Keyless Entry PIN

Identify Repair Parts

Rail Assembly Parts

Diagram and part numbers for components of the opener's rail assembly.

Installation Parts

Diagram and part numbers for various installation components.

Motor Unit Assembly Parts

Garage Door Opener Accessories

Sears Limited Warranty Information

90-Day Full Opener Warranty

Details of the initial 90-day warranty covering defects in material or workmanship.

Limited Warranty for Parts and Motor

Information on the limited warranty for replacement parts and the motor beyond 90 days.

Limitation of Liability Clause

Exclusions and limitations on Sears' liability regarding product use and damages.

Related product manuals