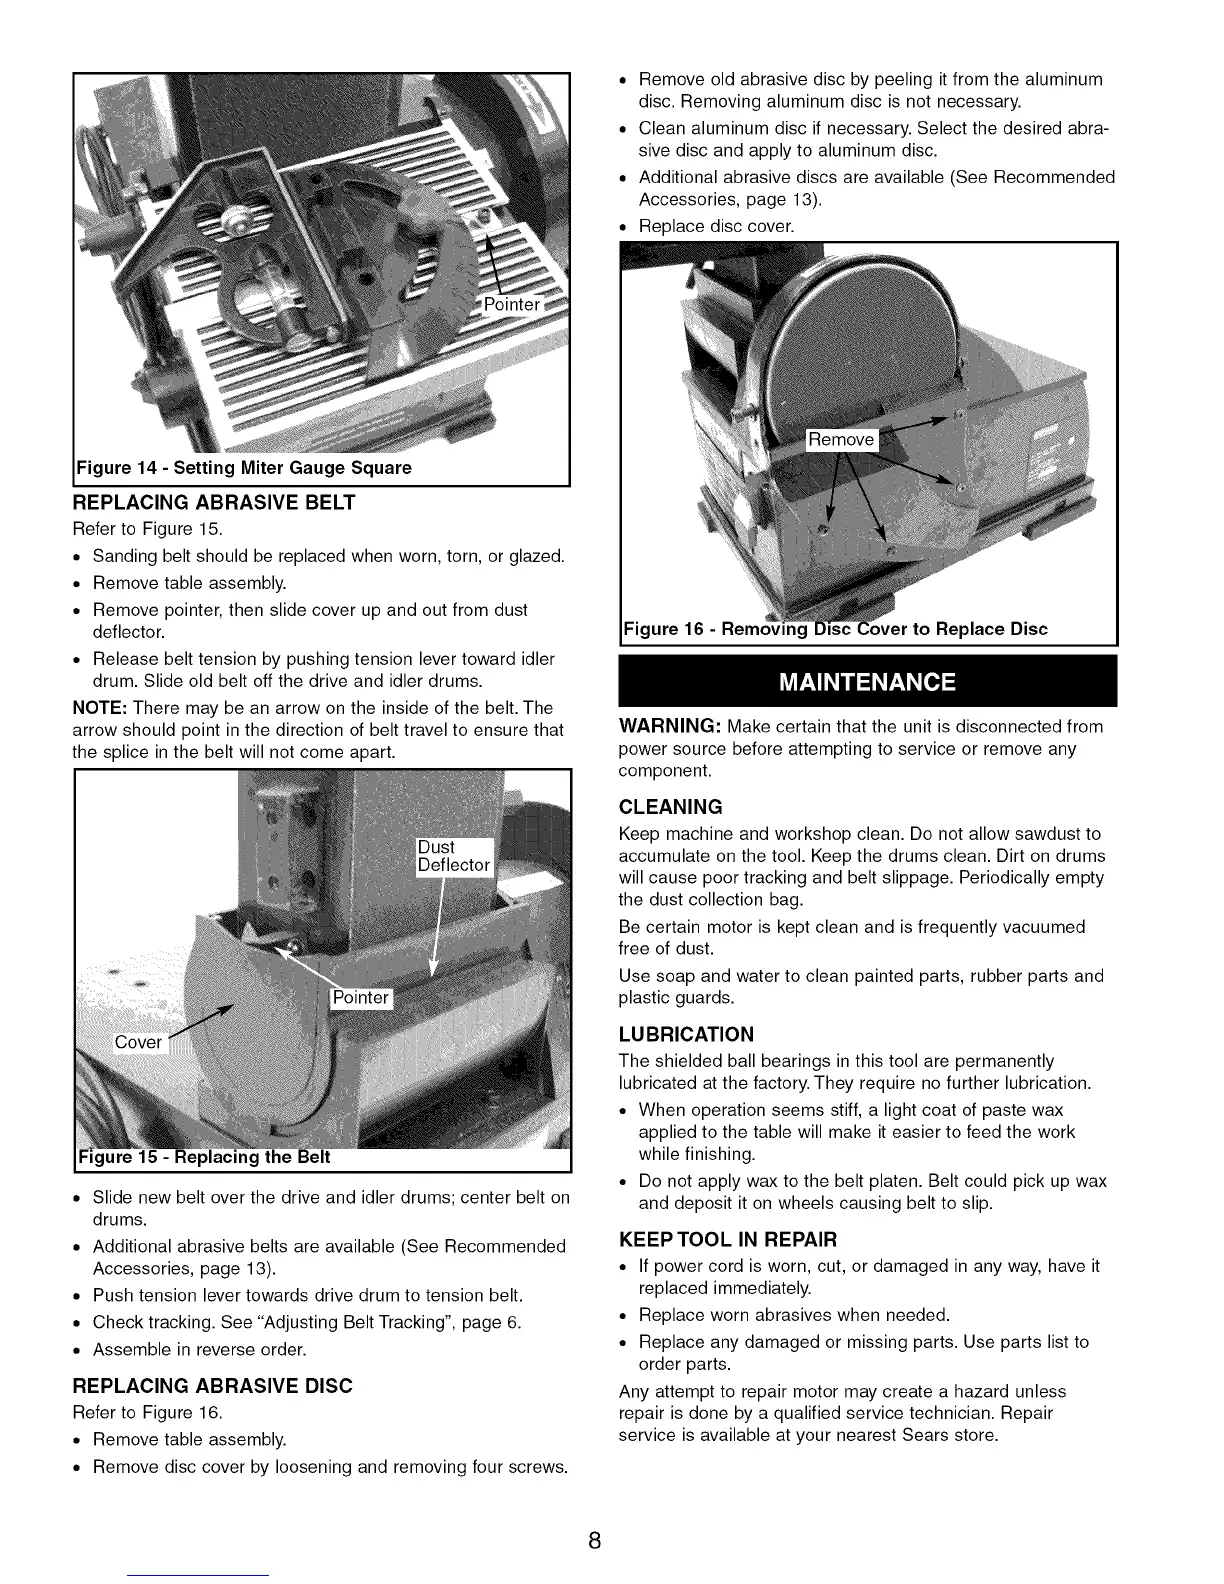
Figure 14 - Setting Miter Gauge Square
REPLACING ABRASIVE BELT
Refer to Figure 15.
• Sanding belt should be replaced when worn, torn, or glazed.
• Remove table assembly.
• Remove pointer, then slide cover up and out from dust
deflector.
• Release belt tension by pushing tension lever toward idler
drum. Slide old belt off the drive and idler drums.
NOTE: There may be an arrow on the inside of the belt. The
arrow should point in the direction of belt travel to ensure that
the splice in the belt will not come apart.
Figure 15 - Replacing the Belt
• Slide new belt over the drive and idler drums; center belt on
drums.
• Additional abrasive belts are available (See Recommended
Accessories, page 13).
• Push tension lever towards drive drum to tension belt.
• Check tracking. See "Adjusting Belt Tracking", page 6.
• Assemble in reverse order.
REPLACING ABRASIVE DISC
Refer to Figure 16.
• Remove table assembly.
• Remove disc cover by loosening and removing four screws.
• Remove old abrasive disc by peeling it from the aluminum
disc. Removing aluminum disc is not necessary.
• Clean aluminum disc if necessary. Select the desired abra-
sive disc and apply to aluminum disc.
• Additional abrasive discs are available (See Recommended
Accessories, page 13).
• Replace disc cover.
Figure 16 - Removing to Replace Disc
WARNING: Make certain that the unit is disconnected from
power source before attempting to service or remove any
component.
CLEANING
Keep machine and workshop clean. Do not allow sawdust to
accumulate on the tool. Keep the drums clean. Dirt on drums
will cause poor tracking and belt slippage. Periodically empty
the dust collection bag.
Be certain motor is kept clean and is frequently vacuumed
free of dust.
Use soap and water to clean painted parts, rubber parts and
plastic guards.
LUBRICATION
The shielded ball bearings in this tool are permanently
lubricated at the factory. They require no further lubrication.
• When operation seems stiff, a light coat of paste wax
applied to the table will make it easier to feed the work
while finishing.
• Do not apply wax to the belt platen. Belt could pick up wax
and deposit it on wheels causing belt to slip.
KEEP TOOL IN REPAIR
• If power cord is worn, cut, or damaged in any way, have it
replaced immediately.
• Replace worn abrasives when needed.
• Replace any damaged or missing parts. Use parts list to
order parts.
Any attempt to repair motor may create a hazard unless
repair is done by a qualified service technician. Repair
service is available at your nearest Sears store.
8

 Loading...