This document is an operator's manual for a Craftsman Edger/Trencher, Model No. 247.762461. It provides comprehensive information regarding the device's safety, assembly, operation, and maintenance.
Function Description:
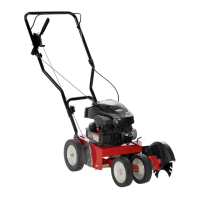
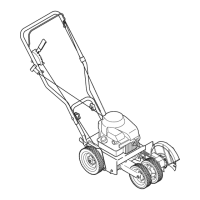
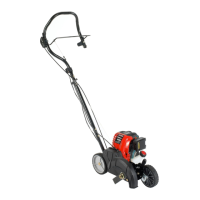
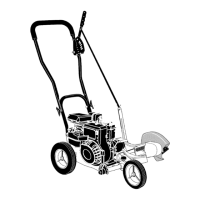
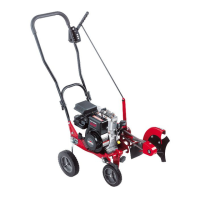
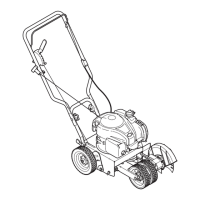
The Craftsman Edger/Trencher is a power equipment designed primarily for edging lawns. It can also be used for trenching to create wider cutting paths, suitable for tasks like laying wire for landscape lighting. The machine is powered by a Briggs & Stratton engine and features a rotating cutting blade to achieve clean edges and trenches.
Important Technical Specifications:
- Engine Oil: SAE 30
- Fuel: Unleaded Gasoline
- Engine: Briggs & Stratton
- Safety Devices: Blade control handle, blade guard, debris shield.
- Adjustments: Blade depth control (multiple positions), bevel adjustment (three positions for edging/trenching or beveled edging), and curb height adjustment (five positions).
Usage Features:
- Starting the Engine: Requires moving the blade depth control lever to the START position, pushing the primer three times (for a cold engine), depressing the blade control against the upper handle, and pulling the recoil starter rope with a rapid, continuous stroke.
- Stopping the Engine: Releasing the blade control stops both the engine and the blade.
- Edging: To begin edging, the edger should be moved to the area to be cut, ensuring the left rear wheel is on a hard surface and the blade is over the cutting area. The blade depth control lever is used to adjust the depth of cut, with multiple passes recommended for desired depth. The edger should be pushed slowly, keeping the left rear wheel on the hard surface and the blade in the cutting path.
- Edging Along a Curb: The right rear wheel can be lowered into one of five positions using the curb height adjustment lever to stabilize the edger while edging along a curb.
- Beveling: The bevel adjustment lever, located on the front, left portion of the edger, allows the blade angle to be set in one of three positions for beveled edging.
- Trenching: An optional trenching feature allows for a wider cutting path. This involves removing the standard edger blade and installing an additional edger blade and flat washer, secured with a flange nut tightened to between 37 and 50 foot-lbs.
Maintenance Features:
- Maintenance Schedule: A detailed schedule outlines routine checks and services, including:
- Each Use: Check engine oil level, loose/missing hardware, air cleaner, and clean unit/engine.
- 1st Month or 5 hours: Change engine oil.
- Annually or 25 hours: Clean air cleaner, lubricate control linkages/pivots and wheels.
- Annually or 50 hours: Change engine oil.
- Annually: Replace spark plug, replace air cleaner.
- Before Storage: Run engine until out of fuel or add fuel stabilizer.
- Lubrication:
- Wheels: Lubricate wheels and bearings with light oil at least once a season.
- Pivot Points: Lubricate blade control, blade depth control lever, blade adjustment lever, and curb height adjustment lever with light oil at least once a season.
- Bearing Block: Lubricate every 25 hours or once a season by applying oil at each end of the cover plate.
- Edger Blade Care: Periodically inspect the blade for cracks and replace if damaged or excessively worn. Replacement involves disconnecting the spark plug wire, using two wrenches to remove the flange nut and blade, and then installing a new blade with the flat washer and flange nut, tightening to 37-50 foot-lbs.
- Belt Replacement: The drive belt should be replaced if signs of cracking, shredding, or rotting are present. This involves loosening the flange lock nut, removing the belt from the engine flywheel pulley, removing the spindle sheaves belt guard, carefully removing the old belt, installing the new belt onto the spindle sheaves, idler pulleys, and engine flywheel pulley, and then reinstalling the belt guard and tightening the flange lock nut. Proper belt orientation and seating are crucial.
- Engine Care: Refer to the Engine Operator's Manual for detailed service specifications. Keep the engine clean of grass, chaff, and debris, and ensure the area around the muffler is clear of combustible debris to prevent overheating and ignition. Do not use water to clean engine parts.
- Off-Season Storage:
- Engine: For storage over 30 days, run the engine until out of fuel or add a gasoline additive and run for several minutes. Change the oil while the engine is warm and clean surface debris.
- Edger: Clean and lubricate thoroughly, coat the blade with chassis grease to prevent rusting, and store in a dry, clean area away from corrosive materials. Apply light oil or silicone to cables and moving parts for rust-proofing, especially in poorly ventilated or metal storage sheds.
Safety Instructions:
The manual emphasizes critical safety warnings, including:
- Always read and follow all instructions to prevent personal injury or death.
- Never allow children under 14 to operate the machine; children 14 and over require training and supervision.
- Keep hands, feet, bystanders, and pets at least 75 feet away from the operating machine.
- Wear safety glasses or goggles, sturdy work shoes, and close-fitting slacks and shirts.
- Never operate without blade guard, debris shield, and blade control handle in place and working.
- Disconnect the spark plug wire and ground it against the engine before any maintenance or adjustments.
- Handle gasoline with extreme care due to its flammability and explosive vapors.
- Never refuel a hot or running engine; allow it to cool.
- Do not modify the engine or tamper with the governor setting.
- Be aware of hot surfaces like the muffler and engine.
- Do not operate under the influence of alcohol or drugs.
- Do not operate in rain or wet soil conditions.
- The machine is equipped with a spark arrestor; ensure it is maintained in effective working order.
- Do not lower the blade over concrete, asphalt, rocks, or similar surfaces to prevent damage and injury.