EasyManua.ls Logo

Craftsman assurelink 139.54990 User Manual

Craftsman assurelink 139.54990
80 pages
To Next Page IconTo Next Page
Page #1 background imageLoading...
Page #1 background image
ENGLISH ESPAÑOL
Read and follow all safety rules and operating
instructions before first use of this product.
Fasten the manual near the garage door after
installation.
Periodic checks of the opener are required to
ensure safe operation.
DO NOT enable the Timer-to-Close feature if
you are installing the garage door opener on a
one-piece door. The Timer-to-Close is to be
used ONLY with sectional doors.
Leer y seguir todas las reglas de seguridad y
las instrucciones de operación antes de usar
este producto por primera vez.
Guardar este manual cerca de la puerta de la
cochera.
Se deben realizar revisiones periódicas del
abridor de puertas para asegurar su operación
segura.
NO uso el característica Temporizador para
cierra se el abridor de la puerta es instalado
en un puerta de un sola pieza. El característica
temporizador para cierra es SOLÓ para uso
con puertas seccionales.
Sears Brands Management Corporation, Hoffman Estates, IL 60179 U.S.A.
www.craftsman.com
Owner’s Manual/Manual Del Propietario
®
Garage Door Opener WITH AssureLink™ CONNECTIVITY
Abridor de puerta de cochera CON CONECTIVO AssureLink™
For Residential Use Only/Sólo para uso residencial
MODEL/MODELO 139.54990

Table of Contents

Question and Answer IconNeed help?

Do you have a question about the Craftsman assurelink 139.54990 and is the answer not in the manual?

Craftsman assurelink 139.54990 Specifications

General IconGeneral
BrandCraftsman
Modelassurelink 139.54990
CategoryGarage Door Opener
LanguageEnglish

Summary

Introduction

Safety Symbol and Signal Word Review

Explains the meaning of Warning and Caution labels.

Preparing Your Garage Door

Garage Door Preparation Steps

Steps to prepare the garage door before installation.

Planning

Sectional Door Installation Planning

Planning considerations for sectional garage doors.

One-Piece Door Installations

Planning for One-Piece Doors

Specific planning points for one-piece garage doors.

Carton Inventory

Opener Parts Inventory

Lists all parts included in the garage door opener carton.

Hardware Inventory

Assembly and Installation Hardware

Lists and illustrates all hardware for assembly and installation.

Assembly Step 1: Assemble Rail and Install Trolley

Rail and Trolley Assembly Procedure

Instructions for assembling the rail and installing the trolley.

Assembly Step 2: Fasten Rail to Motor Unit

Rail-to-Motor Unit Attachment

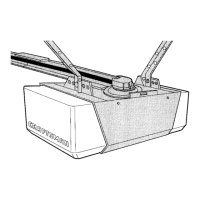
Instructions for attaching the rail to the motor unit.

Assembly Step 3: Install Idler Pulley

Idler Pulley Installation Procedure

Instructions for installing the idler pulley.

Assembly Step 4: Install Chain/Cable

Chain and Cable Installation Procedure

Instructions for installing the chain and cable.

Assembly Step 5: Tighten Chain

Chain Tension Adjustment

Instructions for tightening the chain to the correct tension.

Important Installation Instructions

Installation Safety Warnings and Guidelines

Crucial safety warnings and instructions for installation.

Installation Step 1: Determine Header Bracket Location

Header Bracket Location Selection

Guidelines for selecting the proper header bracket mounting location.

Installation Step 2: Install Header Bracket

Header Bracket Mounting Procedure

Instructions for installing the header bracket on the wall or ceiling.

Installation Step 3: Attach Rail to Header Bracket

Rail-to-Header Bracket Connection

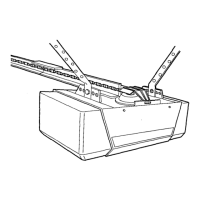
Steps to connect the opener rail to the installed header bracket.

Installation Step 4: Position Opener

Opener Positioning for Different Doors

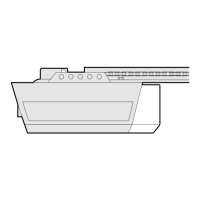
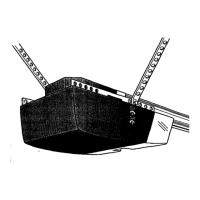
Instructions for positioning the opener for sectional and one-piece doors.

Installation Step 5: Hang Opener

Opener Hanging Procedure

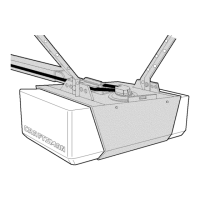
Instructions for securely hanging the opener unit.

Installation Step 6: Install Lights

Opener Light Bulb Installation

Instructions for installing the light bulbs in the opener.

Installation Step 7: Attach Emergency Release Rope and Handle

Emergency Release Mechanism Attachment

Steps to attach the emergency release rope and handle.

Installation Step 8: Fasten Door Bracket

Door Bracket Fastening Instructions

Instructions for fastening the door bracket to the garage door.

Installation Step 9: Connect Door Arm to Trolley

Door Arm-Trolley Connection Procedure

Instructions for connecting the door arm to the trolley.

Installation Step 10: Attach Warning Labels

Warning Label Placement Guidelines

Instructions for attaching entrapment and safety labels.

Installation Step 11: Install Door Control

Door Control Wiring and Mounting

Instructions for wiring and mounting the door control.

Installation Step 12: Install Protector System

Safety Reversing Sensor Installation

Instructions for installing the safety reversing sensors.

Installing Protector System Brackets

Safety Sensor Bracket Mounting Options

Details on mounting brackets for safety sensors.

Installation Step 13: Electrical Requirements

Electrical Connection Safety and Procedures

Information on electrical connections and safety.

Installation Step 14: Align Safety Reversing Sensors

Sensor Alignment and LED Check

Steps to properly align the safety reversing sensors.

Adjustment Overview

Programming Buttons Description

Description of the programming buttons on the opener.

Program the Travel

Travel Limit Programming Steps

Instructions for programming the door's open and close travel limits.

Test Safety Reversal System

Safety Reversal System Test Procedure

Procedure to test the safety reversal system's functionality.

Test Protector System

Protector System Test Procedure

Test procedure for the safety reversing sensors.

Operation

Important Safety Instructions

Crucial safety rules to follow during operation.

Using Your Garage Door Opener

How to activate and use the garage door opener.

Door Control Operation

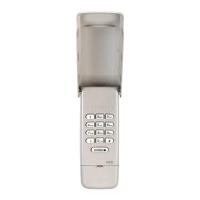
Details on using the wall-mounted door control.

Learn Device Procedure

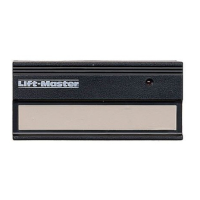
Procedure to program remote controls and accessories.

Lock Feature Explanation

Explanation of the lock feature for preventing remote activation.

Timer-to-Close Feature

Functionality and usage of the Timer-to-Close feature.

Automatic Light Feature

Details on the motion sensor activated automatic light.

Light Feature Activation

How the light activates with sensor beam interruption.

Motion-Detecting Control Panel Setup

Timer-to-Close (TTC) Setup

How to activate, deactivate, and suspend TTC.

Light Duration Adjustment

How to adjust the duration of the opener lights.

Light Feature Operation

How the light feature is activated and deactivated.

Motion Sensor Activation

How to activate or deactivate the motion sensor.

Programming Remotes and Keyless Entry

Program Remote Using Learn Button

Step-by-step guide to programming remotes via the learn button.

Program Remote via Control Panel

How to program remotes or keyless entry using the control panel.

Erase Memory of Codes

Procedure to erase all programmed remote controls and keyless entries.

Manual Door Operation

Disconnect and Reconnect Trolley

Instructions for manually opening the garage door.

Opener Maintenance Schedule

Monthly Maintenance Tasks

Recommended monthly maintenance tasks and checks.

Remote Control Battery Replacement

Instructions for replacing the battery in the remote control.

Troubleshooting

Diagnostic Chart and Solutions

Table correlating diagnostic codes with symptoms and solutions.

Troubleshooting Common Issues

Remote Control Not Activating

Troubleshooting steps when the remote control fails.

Door Will Not Close

Troubleshooting for door not closing and blinking lights.

Light Stays On

Explains features that keep the light on and how to disable them.

Neighbor's Remote Controls Opener

Solution for a neighbor's remote controlling the opener.

Repair Parts

Rail Assembly Parts Identification

Identification of parts related to the rail assembly.

Installation Parts Identification

Identification of parts used during installation.

Motor Unit Assembly Parts

Motor Unit Component Identification

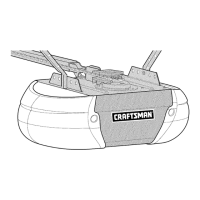
Identification of parts within the motor unit assembly.

Accessories

Optional Accessories List

Lists and describes optional accessories for the opener.

Warranty Information

Craftsman Product Warranty Details

Details the limited warranty terms for the product.

Related product manuals