10
ASSEMBLY
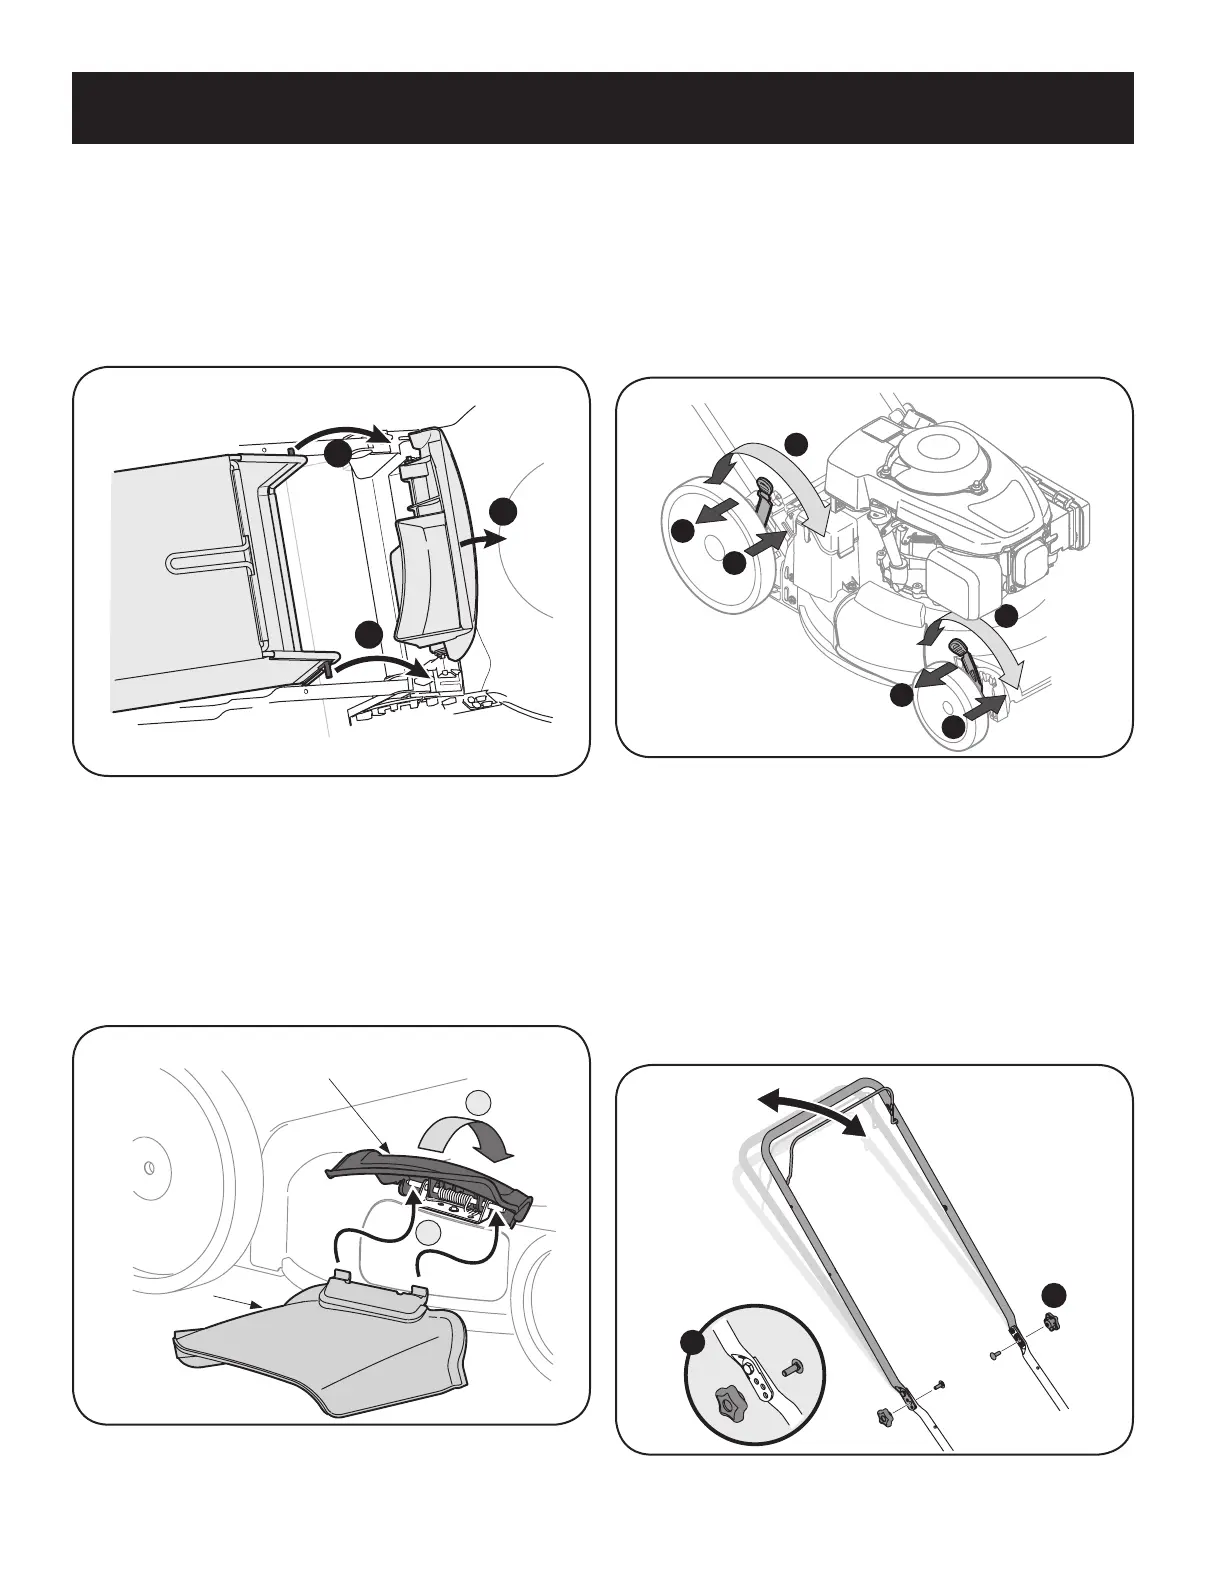
2. Followstepsbelowtoattachgrasscatcher:
a. Liftreardischargedoor.
b. Placegrasscatcherintotheslotsinthehandlebracketsasshownin
Figure8.Letgoofdischargedoorsothatitrestsonthegrasscatcher.
Toremovegrasscatcher,liftreardischargedooronthemower.Liftgrasscatcherup
andofftheslotsinthehandlebrackets.Releasereardischargedoortoallowitto
closerearopeningofmower.
Figure 8
Attaching Side Discharge Cover
Yourmowerisshippedasamulcher.Toconverttosidedischarge,makesuregrass
catcherisoffoftheunitandreardischargedoorisclosed.
1. Onthesideofthemower,liftthemulchingcover.SeeFigure9.
2. Slidetwohooksofsidedischargecoverunderhingepinonmulchingcover
assembly.Lowermulchingcover.Donotremovesidemulchingcoveratany
time,evenwhenyouarenotmulching.
2
1
Side Mulching
Cover
Side Discharge
Cover
Figure 9
Adjustments
Cutting Height
Thereisacuttingheightadjustmentleverlocatedabovethefrontandrearrightwheel.
1. Pulltheheightadjustmentleveroutwardtowardswheel(unitwilltendto
fallwhenleverismovedoutward).SeeFigure10.
2. Movelevertodesiredpositionforachangeincuttingheight.SeeFigure10.
3. Releaselevertowardsdeck.
3
2
2
1
3
1
Lower
Lower
Higher
Higher
Figure 10
IMPORTANT: Allwheelsmustbeplacedinthesameposition.Forroughoruneven
lawns,moveeachheightadjustmentlevertoahigherposition.Thiswillpreventyou
fromcuttingthegrasstooclosetotheground.
Handle Pitch
Forconvenienceofoperation,youmayadjustthepitchofthehandleasfollows:
1. Removewingnutsandcarriageboltsfromhandle.SeeFigure11.
2. Positionthehandleinoneofthethreepositionsthatismostcomfortable.
SeeFigure11inset.
3. Secureintopositionwithwingnutsandcarriageboltsremovedearlier.
Figure 11