ADJUSTMENT/REPAIR
AUGER SHEAR BOLT REPLACEMENT
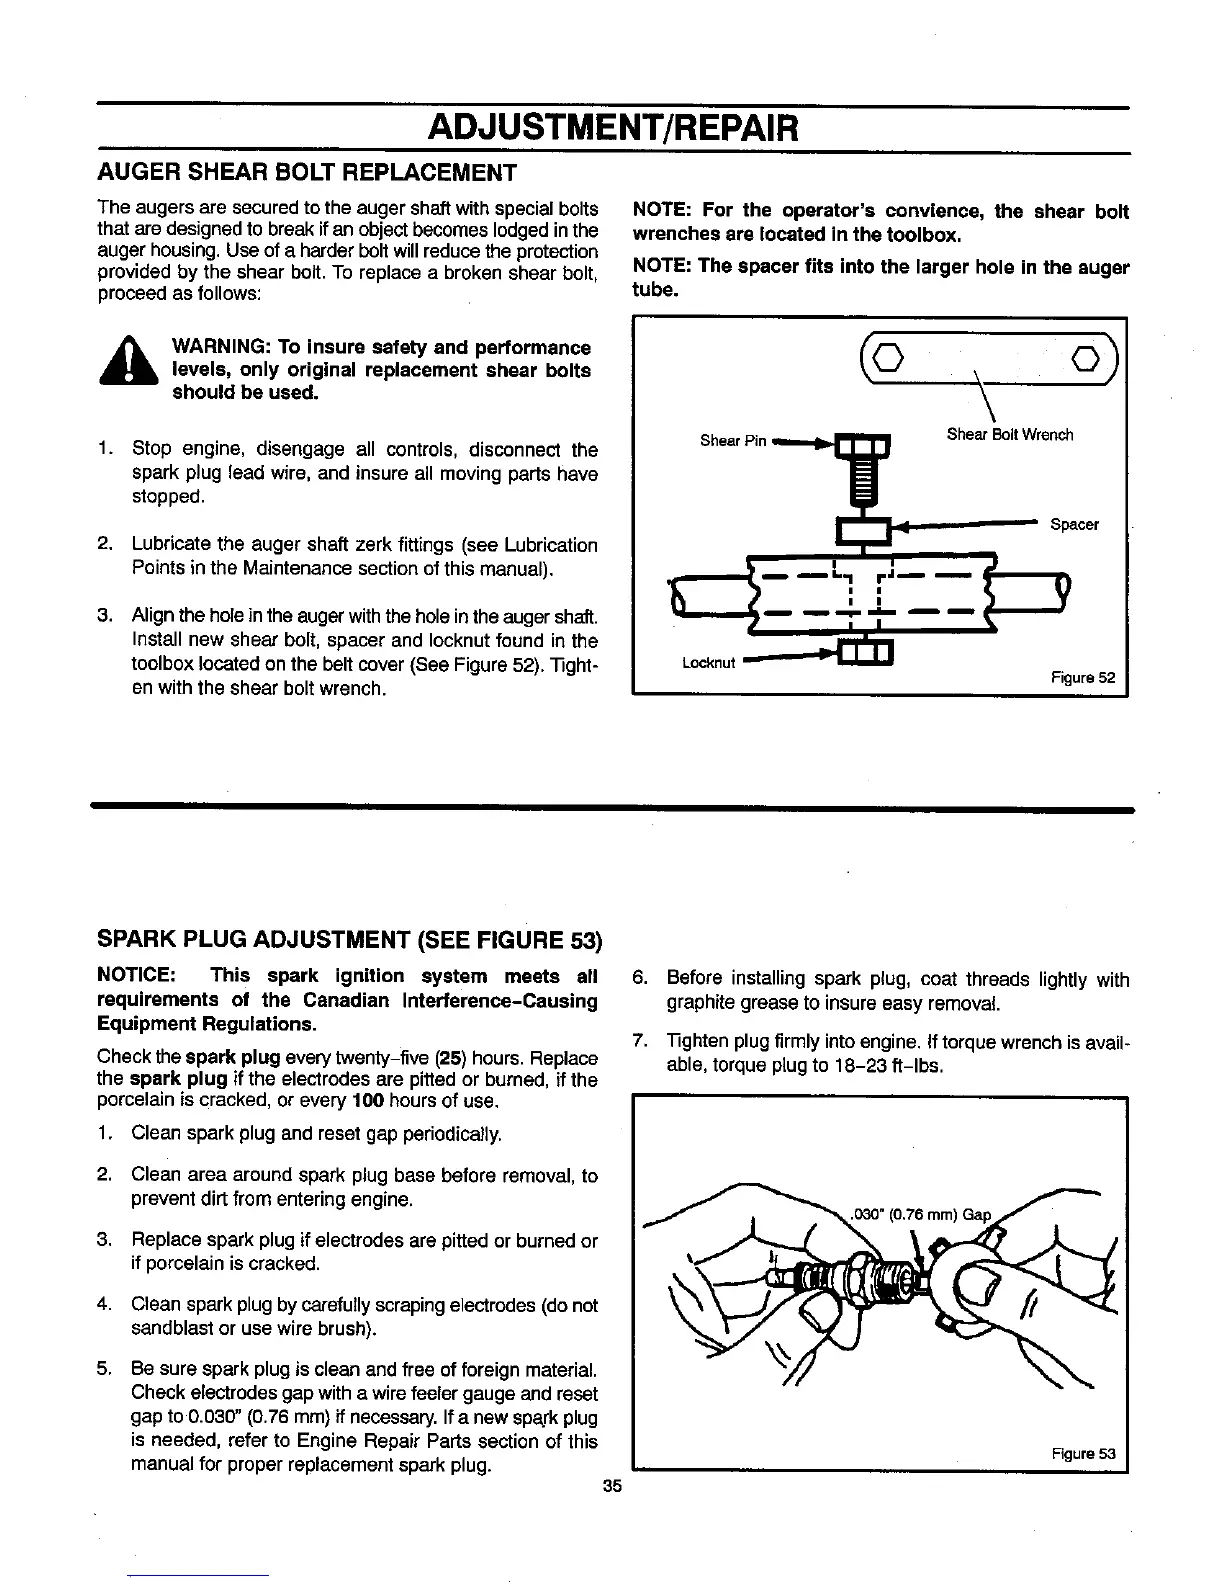
The augers are secured to the auger shaftwith special bolts
that are designed to break if an object becomes lodged in the
auger housing. Use of a harderbolt will reduce the protection
provided by the shear bolt. To replace a broken shear bolt,
proceed as follows:
NOTE: For the operator's convlence, the shear bolt
wrenches are located in the toolbox.
NOTE: The spacer fits into the larger hole in the auger
tube.
_lb WARNING: To insure safety and performance
levels, only original replacement shear bolts
should be used.
1. Stop engine, disengage all controls, disconnect the
spark plug lead wire, and insure all moving parts have
stopped.
2. Lubricate the auger shaft zerk fittings (see Lubrication
Points in the Maintenance section of this manual).
3,
Align the hole in the auger with the hole in the auger shaft.
Install new shear bolt, spacer and Iocknut found in the
toolbox located on the belt cover (See Figure 52). "l]ght-
en with the shear bolt wrench.
Shear Bolt Wrench
Shear Pin _
LF _ Spacer
Locknut
Figure 52
SPARK PLUG ADJUSTMENT (SEE FIGURE 53)
NOTICE: This spark ignition system meets all 6.
requirements of the Canadian Interference-Causing
Equipment Regulations.
7.
Check the spark plug every twenty-five (25) hours. Replace
the spark plug if the electrodes are pitted or burned, if the
porcelain is cracked, or every 100 hoursof use.
1. Clean spark plug and reset gap periodically.
2. Clean area around spark plug base before removal, to
prevent dirt from entering engine.
3. Replace spark plug if electrodes are pitted or burned or
if porcelain is cracked.
4,
5.
Clean sparkplug by carefully scrapingelectrodes (do not
sandblast or use wire brush).
Be sure spark plug is clean and free of foreign material.
Check electrodes gap with a wire feeler gauge and reset
gap to 0.030" (0.76 mm) if necessary. Ifa new spark plug
is needed, refer to Engine Repair Parts section of this
manual for proper replacement spark plug.
35
Before installing spark plug, coat threads lightly with
graphite grease to insure easy removal.
"nghten plug firmly into engine. If torque wrench is avail-
able, torque plug to 18-23 ft-lbs.
Figure 53