7
ENGLISH
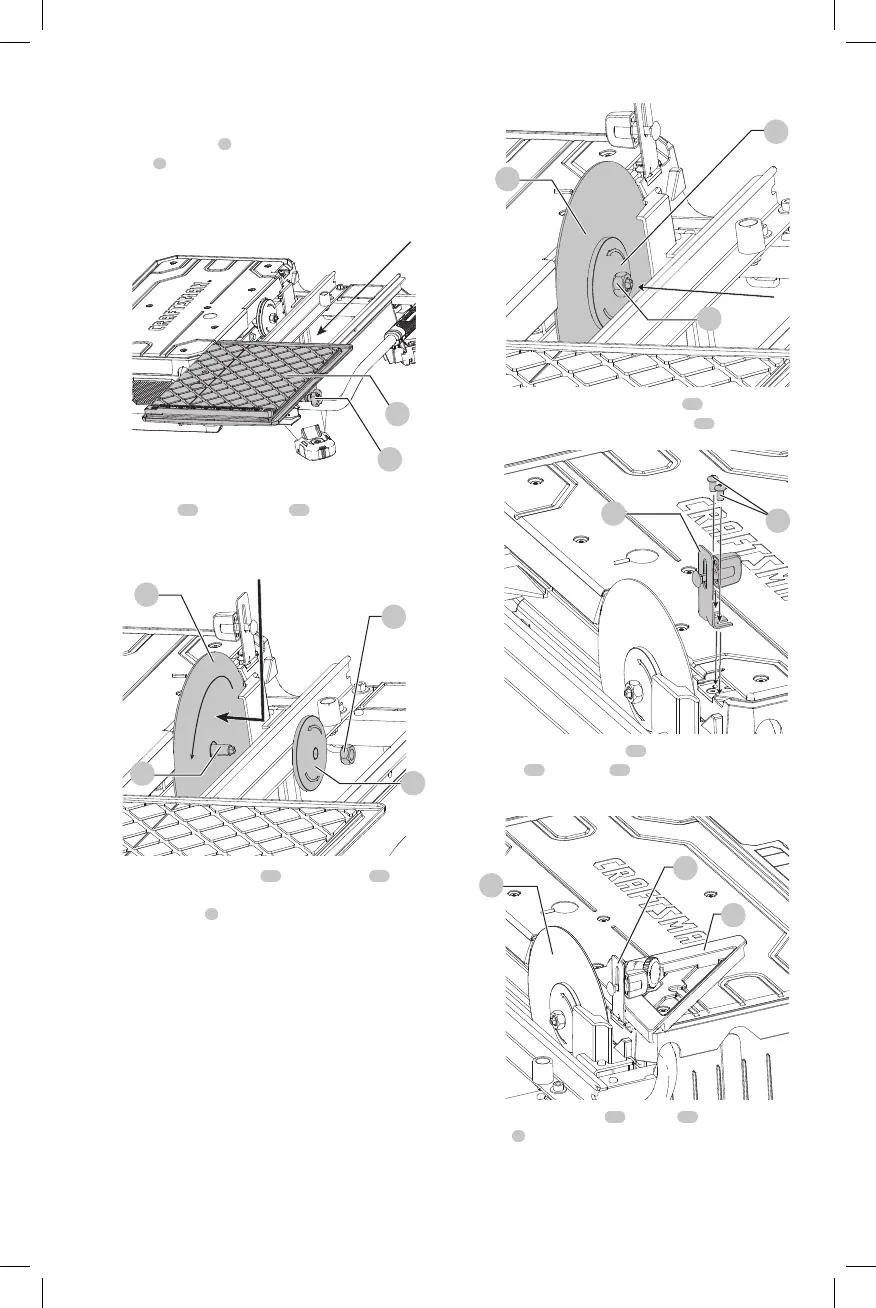
Assembly (Fig. A, B–H)
1. Place the tool on a stable, levelsurface.
2. Unlock cutting cart
2
by pulling out on the cutting cart
lock pin
3
and slide the cutting cart back to reveal the
bladehousing.
Fig.B
2
3
3. Install blade
16
onto the arbor
29
. Ensure the blade is
fully on the arbor and fitted with the rotational direction
matches the direction of thewasher.
Fig.C
13
12
29
16
4. Install outer clamp washer
12
and blade nut
13
. While
holding blade in place, fully tighten blade nut with
supplied wrench
4
.
NOTE: Do not overtighten. Make sure the tile blade is
secure beforeuse.
Fig.D
16
13
12
5. Loosely install splash hood bracket
14
using the two
supplied splash hood bracket screws
15
.
Fig.E
14
15
6. Use supplied edge guide
10
to align splash hood
bracket
14
and blade
16
. Once bracket is aligned, fully
tighten hood bracketscrews.
Fig.F
10
16
14
7. Remove carriage bolt
17
and nut
18
from splash
hood
5
and install splash hood onto the splash hood
bracket. Insert carriage bolt through both the splash
hood and bracket. Install and loosely tighten the nut.
Adjust the height for your specific application. Fully
tighten the nut.