7
ENGLISH
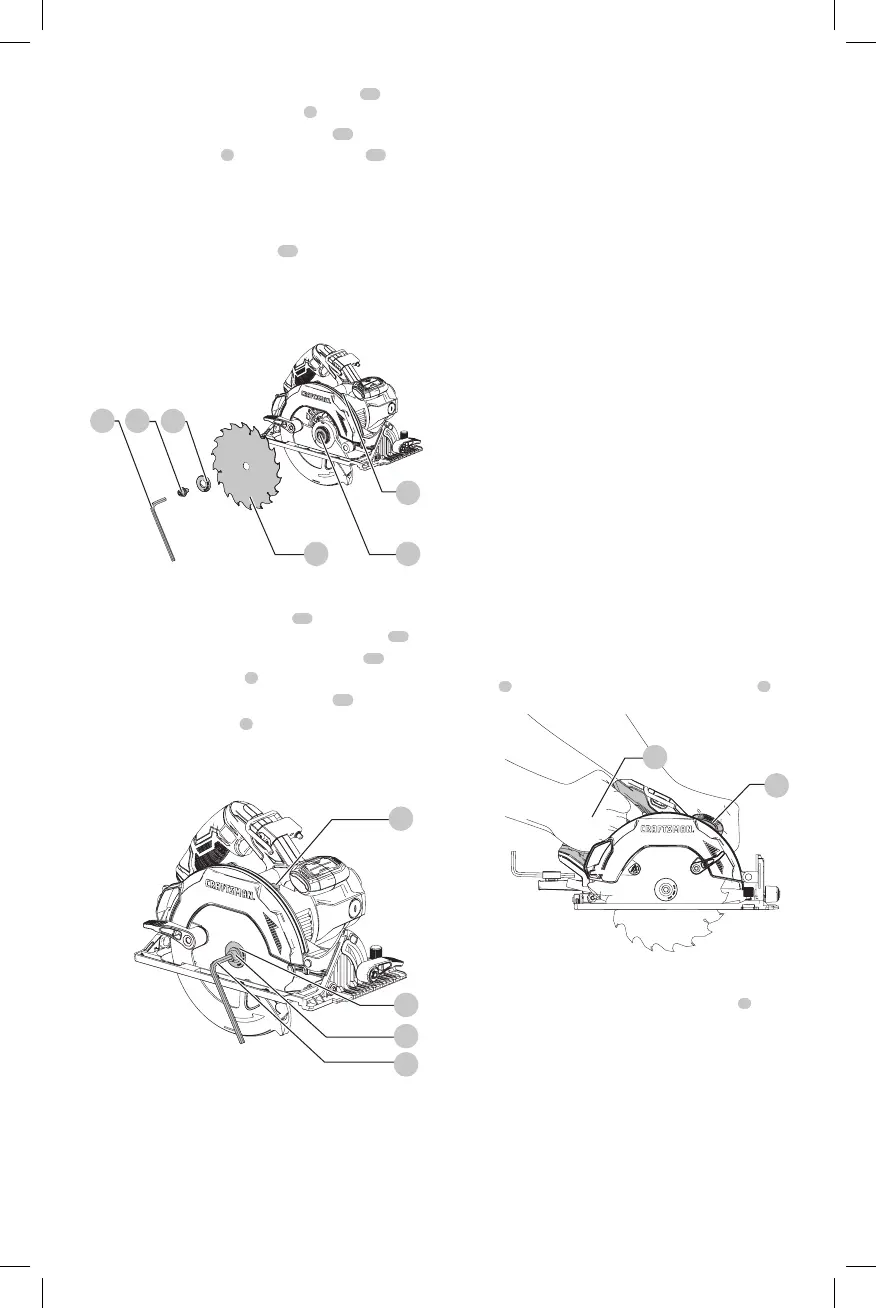
2. Loosen and remove the blade retaining bolt
11
by
turning the saw blade hex wrench
8
counterclockwise.
3. Remove the outer blade clamp washer
10
.
4. Place the saw blade
5
onto the spindle shaft
16
making
sure that the arrow on the blade points in the same
direction as the arrow on the upper gaurd of thetool.
5. Fit the outer washer on the spindle with the larger flat
surface against the blade.
6. Insert the blade retaining bolt
11
into the hole in
thespindle.
7. Securely tighten the blade retaining bolt by turning hex
wrench clockwise to tighten the blade retaining screw.
8. Release
spindle lock button.
Fig.H
10
11
8
16
5
17
Removing the Blade (Fig. H, I)
1. Depress the spindle lock button
17
while turning the
blade until the button engages the spindle shaft
16
.
2. Loosen and remove the blade retaining bolt
11
by
turning the hex wrench
8
counterclockwise.
3. Remove the outer blade clamp washer
10
.
4. Remove the saw blade
5
.
NOTICE: Never engage the spindle lock while the saw
is running. Never turn the saw on while the spindle
lock is engaged. Severe damage to the saw mayresult.
Fig.I
17
11
8
10
General Cuts (Important: Read Safety
Warnings and Instructions) Guard
Against Kickback
With unit unplugged, follow all assembly, adjustment and
set up instructions.
Make sure lower guard operates. Select the proper blade for
the material to be cut.
1. Measure and mark work for cutting.
2. Support and secure work properly (Refer to To Reduce
the Risk of Kickback).
3. Use appropriate and required safety equipment (Refer
to Additional Safety Information).
4. Secure and maintain work area (Refer to General Power
Tool Safety Warnings).
5. With plug inserted and guard closed, make sure switch
turns saw on and off.
WARNING: It is important to support the work
properly and to hold the saw firmly to prevent loss of
control which could cause personal injury. FigureJ
illustrates proper hand position.
OPERATION
WARNING: To reduce the risk of serious personal
injury, turn unit off and disconnect it from
power source before making any adjustments or
removing/installing attachments or accessories.
An accidental start-up can causeinjury.
Proper Hand Position (Fig. J)
WARNING: To reduce the risk of serious personal injury,
ALWAYS use proper hand position as shown.
WARNING: To reduce the risk of serious personal
injury, ALWAYS hold securely in anticipation of a
suddenreaction.
Proper hand position requires the one hand on the main
handle
2
and the one hand on the auxiliary handle
3
.
Fig.J
2
3
Trigger Switch (Fig. A)
To operate the tool, depress the trigger switch
1
. The
tool will continue to run as long as the trigger switch
isdepressed.
To turn the tool off
, release the trigger switch. There is no
provision for locking the tool on, and the switch should never
be locked on by any other means.
Cutting Operations
WARNING: With unit unplugged, follow all assembly,
adjustment and set up instructions. Check the function
of the lower blade guard by pushing the lower guard