Do you have a question about the Craftsman CMXEOCG781 and is the answer not in the manual?
Explains the meaning of safety symbols (Warning, Caution) and signal words.
Details the use of Timer-to-Close and myQ features with sectional doors.
Provides essential warnings about door balance, springs, and safe operation practices.
Guides on checking Wi-Fi signal strength for app connectivity and setup.
Lists essential hand tools required for the opener's assembly and installation process.
Details specific planning aspects for sectional garage doors.
Outlines planning steps and reinforcement needs for one-piece doors.
Warns about the critical importance of correctly installing the safety reversing sensor.
Instructions for assembling the opener's rail and inserting the trolley component.
Details on securely attaching the assembled rail to the main motor unit.
Step-by-step guide for installing the idler pulley onto the opener's rail.
Instructions for routing and connecting the main drive belt.
Guidance on properly tensioning the drive belt for optimal operation.
Instructions for fitting and securing the sprocket cover for safety.
Explains how to find and mark the correct position for the header bracket.
Instructions for mounting the header bracket to the garage wall or ceiling.
Guide for connecting the assembled rail to the header bracket.
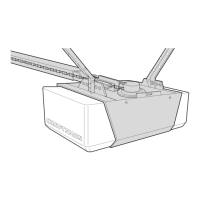
Instructions on correctly positioning the opener unit relative to the garage door.
Steps for securely mounting the opener unit using hanging brackets.
Guide for installing the light bulbs into the opener unit.
Instructions for attaching the emergency release mechanism to the trolley.
Instructions for attaching the door bracket to the garage door, including reinforcement.
Specific guidance for fastening the door bracket on one-piece garage doors.
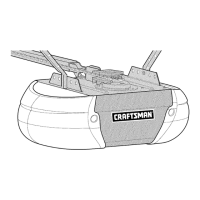
Steps for connecting the door arm sections to the trolley and door bracket.
Specific instructions for connecting door arms on one-piece doors.
Steps for wiring and mounting the LCD door control panel.
Guidance on installing and aligning the safety reversing sensors.
Details on mounting the safety reversing sensor brackets using different methods.
Instructions for mounting sensors and connecting their wires to the opener.
Information on proper electrical connections and grounding for the opener.
Steps to properly align sensors and troubleshoot common LED issues.
Overview of the opener's adjustment capabilities for travel and force.
Specific advice for setting UP travel on one-piece doors to prevent issues.
Detailed steps for programming the open and close travel limits of the opener.
Procedures for testing the safety reversal system with an obstruction.
How to test the safety reversing sensors to ensure they are functional.
Steps for installing, testing, and charging the backup battery.
Explains the meaning of different LED indicators for battery status.
Lists requirements and steps to connect the opener to a smartphone via Wi-Fi.
Comprehensive safety guidelines for operating the garage door opener.
Explains key features like myQ, Timer-to-Close, and the safety reversal system.
Details energy conservation, lighting, and battery backup functionalities.
General instructions on operating the opener using various controls.
How to use control buttons and navigate the LCD screen interface.
Details on programming remotes, the lock feature, and Timer-to-Close.
How to navigate menus on the LCD screen for various settings.
Instructions for configuring features like clock, temperature, and light duration.
Steps to program a remote control directly using the opener's learn button.
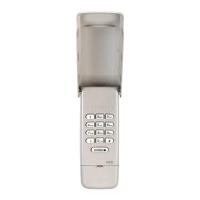
Instructions for programming remotes or keypads via the LCD door control.
How to erase all programmed remote and device codes from memory.
Steps to disconnect the opener from the home Wi-Fi network.
Instructions for manual door operation and re-engaging the trolley.
Guidance on battery replacement and regular opener maintenance.
A chart listing diagnostic codes, symptoms, and their corresponding solutions.
Addresses common problems not indicated by diagnostic codes, like beeping or remote issues.
Identifies parts related to the opener's rail assembly.
Lists parts specifically used during the installation process.
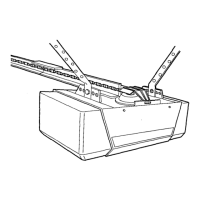
Identifies internal components of the motor unit with part numbers.
Lists optional accessories available for the garage door opener.
Details the warranty period and terms for the garage door opener.
Provides an overview of general safety precautions for garage doors and openers.
Specific safety advice regarding children and garage door openers.
Guide for visually inspecting the door and opener and testing manual operation.
How to test the opener's safety reversal and sensor functions.
| Power Source | Electric |
|---|---|
| Connectivity | Wi-Fi |
| Mobile App | Yes |
| Drive System | Belt Drive |
| Horsepower | 1/2 HP |
| Smart Functionality | Yes |
| Warranty | Limited Lifetime (Motor), 1 Year (Parts) |
| Drive Type | Belt Drive |
| Remote Controls Included | 2 |
| Battery Backup | Yes |
| Security | Rolling code technology |
| Type | Garage Door Opener |
| Compatibility | Most garage doors |
| Voice Control | Yes (Amazon Alexa, Google Assistant) |
| Safety Features | Safety sensors |
| Motor Type | DC |
| Works With | Google Assistant, Amazon Alexa |