EasyManua.ls Logo

Crane TOP FILL EE-6913 - User Manual

Crane TOP FILL EE-6913
14 pages
Print Icon
To Next Page IconTo Next Page
Loading...
TOP FILL
Warm/Cool Mist
Ultrasonic Humidifier
EE-6913
PLEASE READ AND SAVE ALL INSTRUCTIONS TO ENSURE THE SAFE AND
EFFECTIVE USE OF THIS HUMIDIFIER.
If you have any questions about the operation of your
humidifier, please contact Crane Customer Care.
Toll Free: 1-888-599-0992
Email: Customer- Service@Crane-USA.com

Questions and Answers

Summary

Crane & Sustainability

Important Safety Instructions

General Safety Instructions

Child Safety & General Warnings

Humidifier is not a toy; adults only operation. Never leave unit unattended.

Electrical & Cord Safety

Use correct power outlet, polarized plug, and safe extension cords.

Operational Precautions

Carry by base, avoid heat, do not remove parts, do not cover mist lid.

List of Main Parts

Technical Specifications

Before Each Use

Humidifier Placement

Place on elevated, non-metallic, lint-free, waterproof surface 2 feet above floor. Avoid carpet, towel, wood surfaces.

Humidity Notes

Reduce excess humidity by opening door and lowering mist; avoid moisture buildup.

Operating Cautions

Do not operate without water. Do not plug/unplug with wet hands.

Assembly & Use

Digital Control Panel Icons

Guide to ON/OFF, MODE (Humidity, Auto, Baby, Manual), Night Mode, Timer, Warm Mist, UV, Ionizer, Light.

Filling and Operation

Instructions for filling tank, attaching cap, replacing cover, and plugging in unit.

Mist Output & Remote Control

Adjust mist output using control panel or remote control; understand humidity absorption.

Aroma Tray & Battery

Use aroma tray for essential oils; guide to replacing remote control battery.

Maintenance

Daily Maintenance

Empty tank, rinse, and air dry components daily.

Weekly Maintenance

Clean with vinegar solution, wash parts, and rinse.

Ceramic Filter Cleaning

Submerge filter in vinegar, rinse, and air dry.

Storing Your Humidifier

Empty, clean, dry, and store in a cool, dry place.

Troubleshooting

No Mist Production

Check power, top security, and programmed humidity settings.

No Power

Ensure proper plug-in; check power indicator light; contact Customer Care if needed.

Strange Odor

Clean base, tank, and ceramic filter; unit may be new.

White Dust

Use distilled water; clean ceramic filter.

Mist Issues

Check warm-up phase, mist fineness, room temperature, and humidity sensor.

Crane Warranty

Limited Warranty

Product is free from manufacturing defects for 1 year; contact Customer Care before returning.

Warranty Requirements

Requires dated proof of purchase; void if misused or not operated per instructions.

Warranty Limitations

Liability limited to purchase price; not liable for indirect/consequential damage.

Warranty Validity

Valid in 48 contiguous states; effective only if purchased/operated in the USA.

Overview

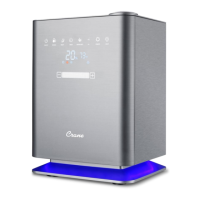
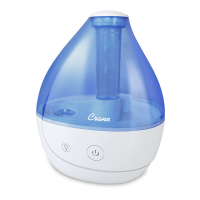
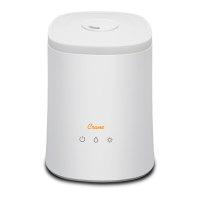
The Crane Top Fill Warm/Cool Mist Ultrasonic Humidifier (Model EE-6913) is designed to improve indoor air quality by adding moisture to the air. This humidifier is intended for household use only and offers a range of features for comfortable and effective operation.

Function Description:

The primary function of this device is to humidify the air using ultrasonic technology, producing either a warm or cool mist. It helps to alleviate dry air conditions, which can contribute to various discomforts. The humidifier operates by breaking water into a fine mist using high-frequency vibrations, which is then dispersed into the room.

Usage Features:

The humidifier features a digital control panel and also comes with a remote control for convenient operation from a distance. The control panel includes several icons for various settings and modes:

  • ON/OFF: A simple touch button to power the humidifier on or off. When initially powered on, the unit defaults to Manual Mode.
  • MODE Selection: This allows users to choose between different operating modes:
    • HUMIDITY MODE: Users can manually set a desired humidity level between 30% and 80% using a scroll bar or arrow buttons.
    • AUTO MODE: This mode automatically sets the humidity to 45%. Once this level is reached, the mist output adjusts to maintain it.
    • BABY MODE: Designed for nurseries, this mode sets the humidity to 55% and activates Warm Mist, UV Light, and Ionizer functions. The mist output then adjusts to maintain 55% humidity.
    • MANUAL MODE: In this mode, users can manually adjust the mist output level from 1 to 7 using the scroll bar or arrows.
    • Note: In AUTO and BABY Modes, the Mist Output Level is pre-set, and the slide bar/arrows for manual adjustment are deactivated. Attempting to use them will briefly display "NA."
  • NIGHT MODE: Activates a dim display on the control panel, turning off all other lights for undisturbed sleep.
  • TIMER: Allows users to set an operating time from 1 to 12 hours. The humidifier will automatically stop misting once the programmed time elapses. A long touch on the timer button cancels the setting.
  • WARM MIST: Activates the warm mist function. It's important to allow 10-15 minutes for the mist to warm up after activation.
  • UV Light: A button to turn the UV light on or off. The UV LED helps to sanitize the air within the humidifier.
  • Ionizer: Pressing this button activates the ionizer to freshen the air.
  • LIGHT: Controls the base light, allowing users to turn it on or off.

The humidifier should always be placed on a smooth, flat, lint-free, non-metallic, waterproof, and level surface, at least 2 feet above the floor. It's crucial not to place it on carpet or towels, as the fan vent at the back must not be obstructed. Avoid placing it on wood surfaces or near furniture that could be damaged by excessive moisture.

Filling the humidifier is straightforward: remove the top cover and fill the water tank directly, or remove the water tank from the base and fill it before replacing. Always use fresh, cool tap water (filtered or distilled water is recommended to avoid white dust, especially with hard water). Hot water, essential oils, medication, or salt should never be added to the water tank or base. The Mist Chamber Cap should be attached to the top of the mist chamber in the water tank before replacing the cover.

The device includes an aroma tray for essential oils. To use it, press to open and remove the tray, add essential oils to the included pad (or any compatible scent pad), and then replace the tray before operating the humidifier.

When the humidifier runs out of water, it will beep three times, and a low water icon will appear on the display. The unit will stop working but will restart after 5 seconds if refilled. If not refilled, it will automatically power off after 5 minutes.

Maintenance Features:

Regular cleaning and disinfecting are essential for maintaining the humidifier's performance and preventing mineral buildup and bacterial growth.

  • Daily Maintenance:

    1. Turn off, unplug, and remove the top and water tank.
    2. Empty water from the water tank and base daily, ensuring to pour away from the fan outlet.
    3. Rinse the water tank with water.
    4. Allow the top, water tank, and base to air dry completely.
    5. Leave the top off the base until the next use.
  • Weekly Maintenance:

    1. Turn off, unplug, and remove the top and water tank from the base.
    2. Fill the base and water tank halfway with clean water, then add 2-4 tablespoons of white vinegar. Let it sit for 20 minutes.
    3. Empty the base and rinse with clean water, again pouring away from the fan outlet.
    4. Wash the top and mist lid with a white vinegar and water solution, wiping each piece and rinsing with clean water.
    5. Gently clean the nebulizer with a damp cloth, soft brush, or cotton swab after soaking.
    • Important: NEVER immerse the humidifier base in water.
  • Ceramic Filter Cleaning: The ceramic ball filter should be cleaned and activated after every 30 fills or when it appears dirty.

    1. Submerge the ceramic filter in white vinegar for 5 minutes.
    2. Rinse the filter thoroughly with clean water.
    3. Allow the filter to air dry for 4-6 hours.
  • Storing Your Humidifier:

    1. Turn off, unplug, and empty water from the top and base.
    2. Follow the weekly maintenance instructions.
    3. Ensure all parts are completely dry.
    4. Store the humidifier in a cool, dry place.

The humidifier is designed for ease of use and maintenance, ensuring a healthy and comfortable indoor environment.

Crane TOP FILL EE-6913 Specifications

General IconGeneral
ModelEE-6913
Water Tank Capacity1.2 gallons
RuntimeUp to 24 Hours
FilterNo filter required
Weight3.5 lbs
Variable Output SettingsYes
Auto Shut OffYes
Coverage AreaUp to 500 sq ft
Power SourceElectric
Color OptionsWhite
TypeUltrasonic
Room SizeUp to 500 sq ft
OutputCool mist

Related product manuals