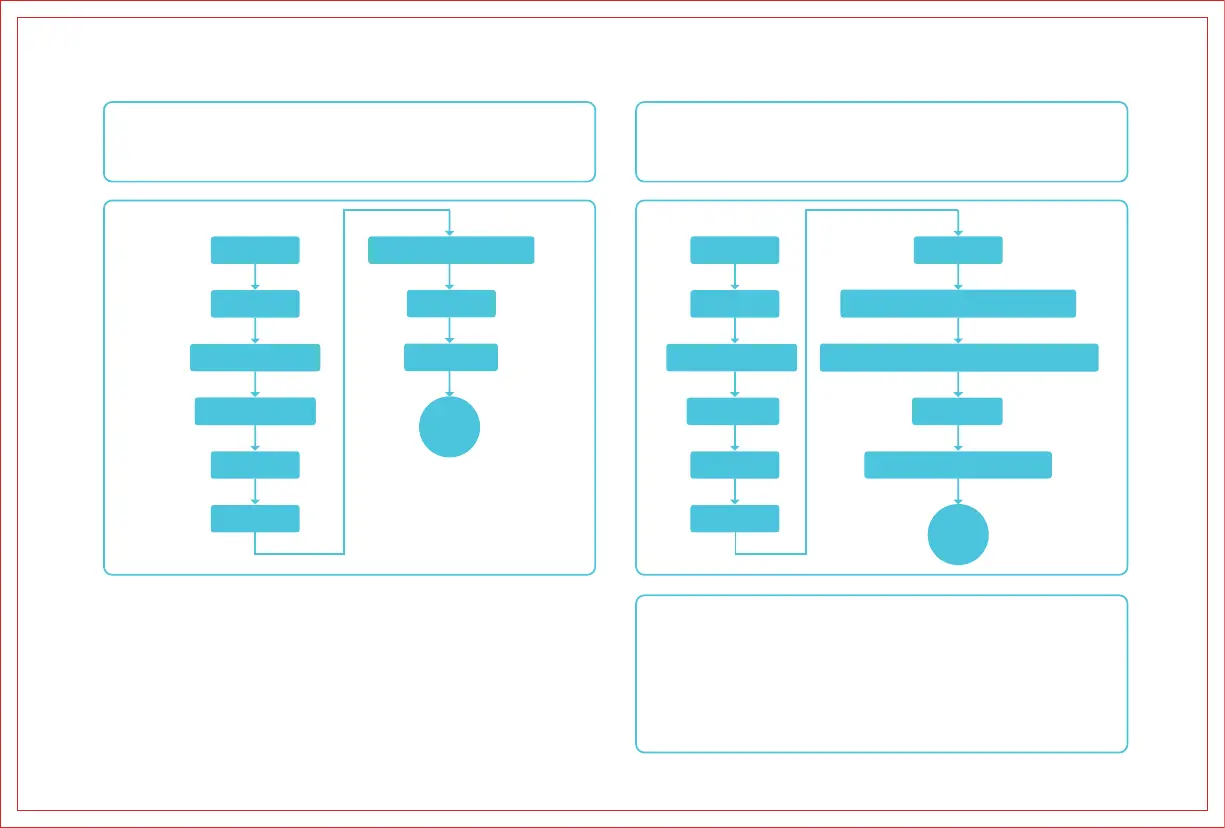
A. Online Operation
B. Oine Operation
Generate engraving or cutting files (G-code) using software (Falcon Design Space/Light-
Burn). Save the files to the root directory of a (self-provided) USB drive. Before powering
on, connect the (self-provided) USB drive to the device using an A to C adapter. After
connecting the power, the device will beep twice. Once the device initializes, it will enter
standby mode, and the indicator light will turn on.
Connect the device to the software in real-time using the Type-A to Type-C cable. Note:
For information about real-time operation with the Type-A to Type-C cable, please refer
to the corresponding model's documentation at wiki.creality.com/en/laser-engraver.
Camera calibration is not mandatory. If there is a significant positioning deviation, it is
recommended to recalibrate.
1. Press the "start" button, and the machine will enter preview mode from standby mode. The
laser head will emit a weak light and repeatedly move around the maximum X and Y edges of
the image to be processed. The indicator light will remain on, allowing you to adjust the
material to the appropriate position.
2. In preview mode, press "start" again, and the machine will enter working mode. At this time,
the laser head will emit a strong light, the machine will start, and the indicator light will remain
on. If you need to pause, press "start", and the indicator light will change to a breathing light
effect. Press "start" again to continue. If you need to cancel, press and hold "start" for 3 seconds,
after which the machine will reset and enter standby mode, and the indicator light will change
to a breathing light effect.
3. After the work is completed, the machine will reset and enter standby mode, and the
indicator light will change to a breathing light effect.
Assembly
Place material
Laser module focusing
Connect to computer
Install software
Add device
Assembly
Place material
Laser module focusing
Install software
Add device
Import file
Camera calibration (optional)
Import file
Set parameters
Start
Set parameters
Save G-code file to (self-provided) USB drive
Connect (self-provided) USB drive to device using A to C adapter
Power on device
Press Start to enter frame preview
Begin
Note:
1. The (self-provided) USB flash drive needs to be in FAT32 format.
2. The (self-provided) USB flash drive only contains one firmware that needs to be updated,
and no other redundant files.
3. Do not insert two firmware packages with different versions into the machine for updating
at the same time, which will cause a circular update.
4. The USB flash drive temporarily does not support hot plugging.If the machine fails to
recognize the (self-provided) USB flash drive, please restart the machine.
5. The device reads the latest engraving file in the first-level directory of the (self-provided)
USB flash drive by default. It is recommended to delete other engraving files in the first-level
directory.
16