Model Mirror
Software Operation
Click the mirror button , [1]
you can pop up the mirror menu.
Button is a mirror along [2]
the X axis.
Button is a mirror along [3]
the Y axis.
Button is a mirror along [4]
the Z axis.
Note that the mirror
transformation is different from
the rotation, such as the mirror
transformation will lead to a
change in the direction of rotation,
and the rotation will not change the model.
3
1
2
4
View Mode
From the overhang view, you
can see the suspended part of the
model which is shown in red color.
By changing the supporting angle
can be seen suspended parts size is
dynamically changing.
By slice view can easily observe
the generated path, you can easily
observe the different layers of sliced
by slicing altitude indicator, use Ctrl
+ arrow keys can also be observed
layer-by-layer.
- 24 -
3
1
2
Software Operation
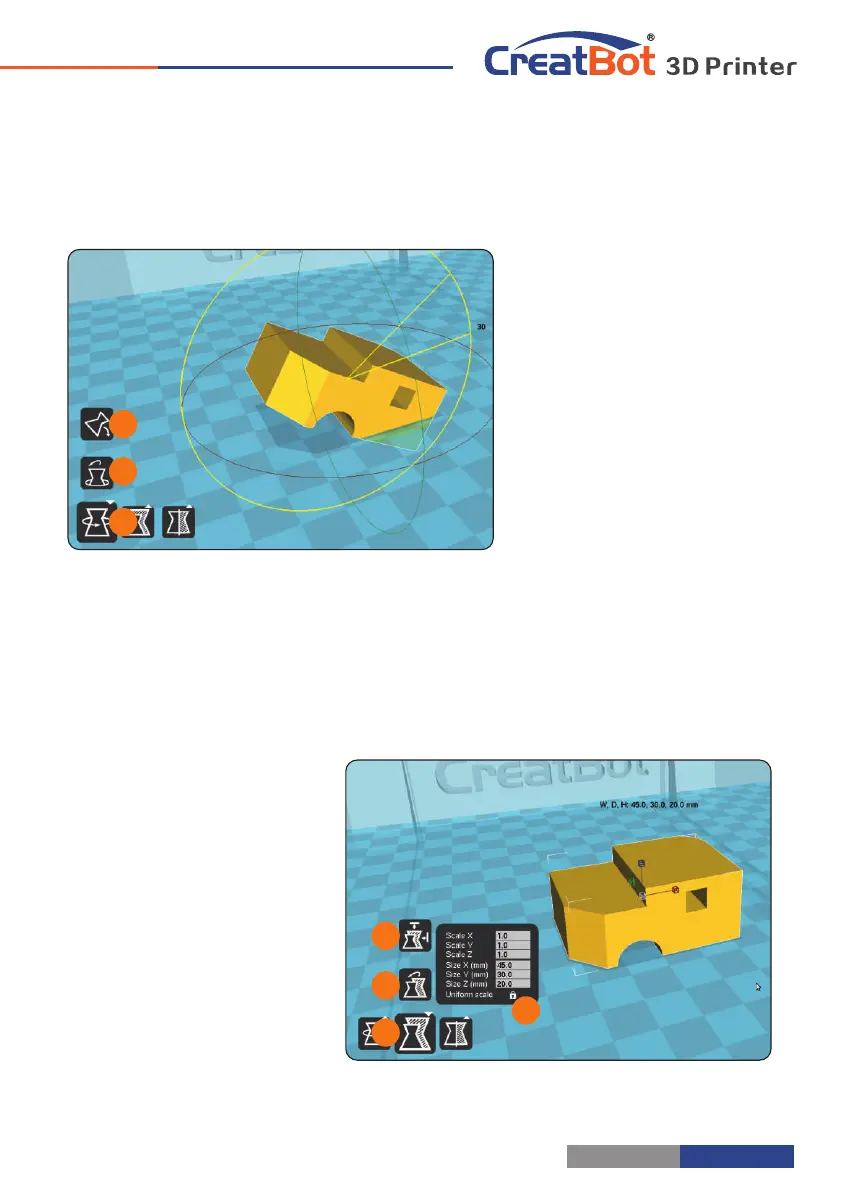
Model Rotate
Click on the left corner of
the rotate button , you can [1]
see three ring line around the
model, respectively along the X,
Y, Z direction. The default
rotation angle is 5 degrees,
press the Shift key can restrict
the rotation angle to 1 degree.
Button to is the reset [2]
button, can restore rotate status
to the default state.
Button is lay flat button, [3]
can lay the model flat on the
platform automatically.
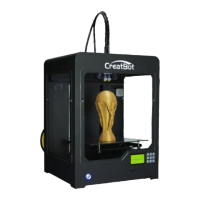
Model Scale
3
1
2
4
Click the left corner of the
zoom button , you can see a [1]
contour line around the model,
and shows the current size of the
model. You can input the value of
the zoom ratio in Scale X / Y / Z ,
may also directly enter the size
you need. Button indicates [4]
locking scaling.
Button is zoom reset [2]
button, you can restored the
model to the default size.
Button for the zoom [3]
model size to the maximum print size.
- 25 -