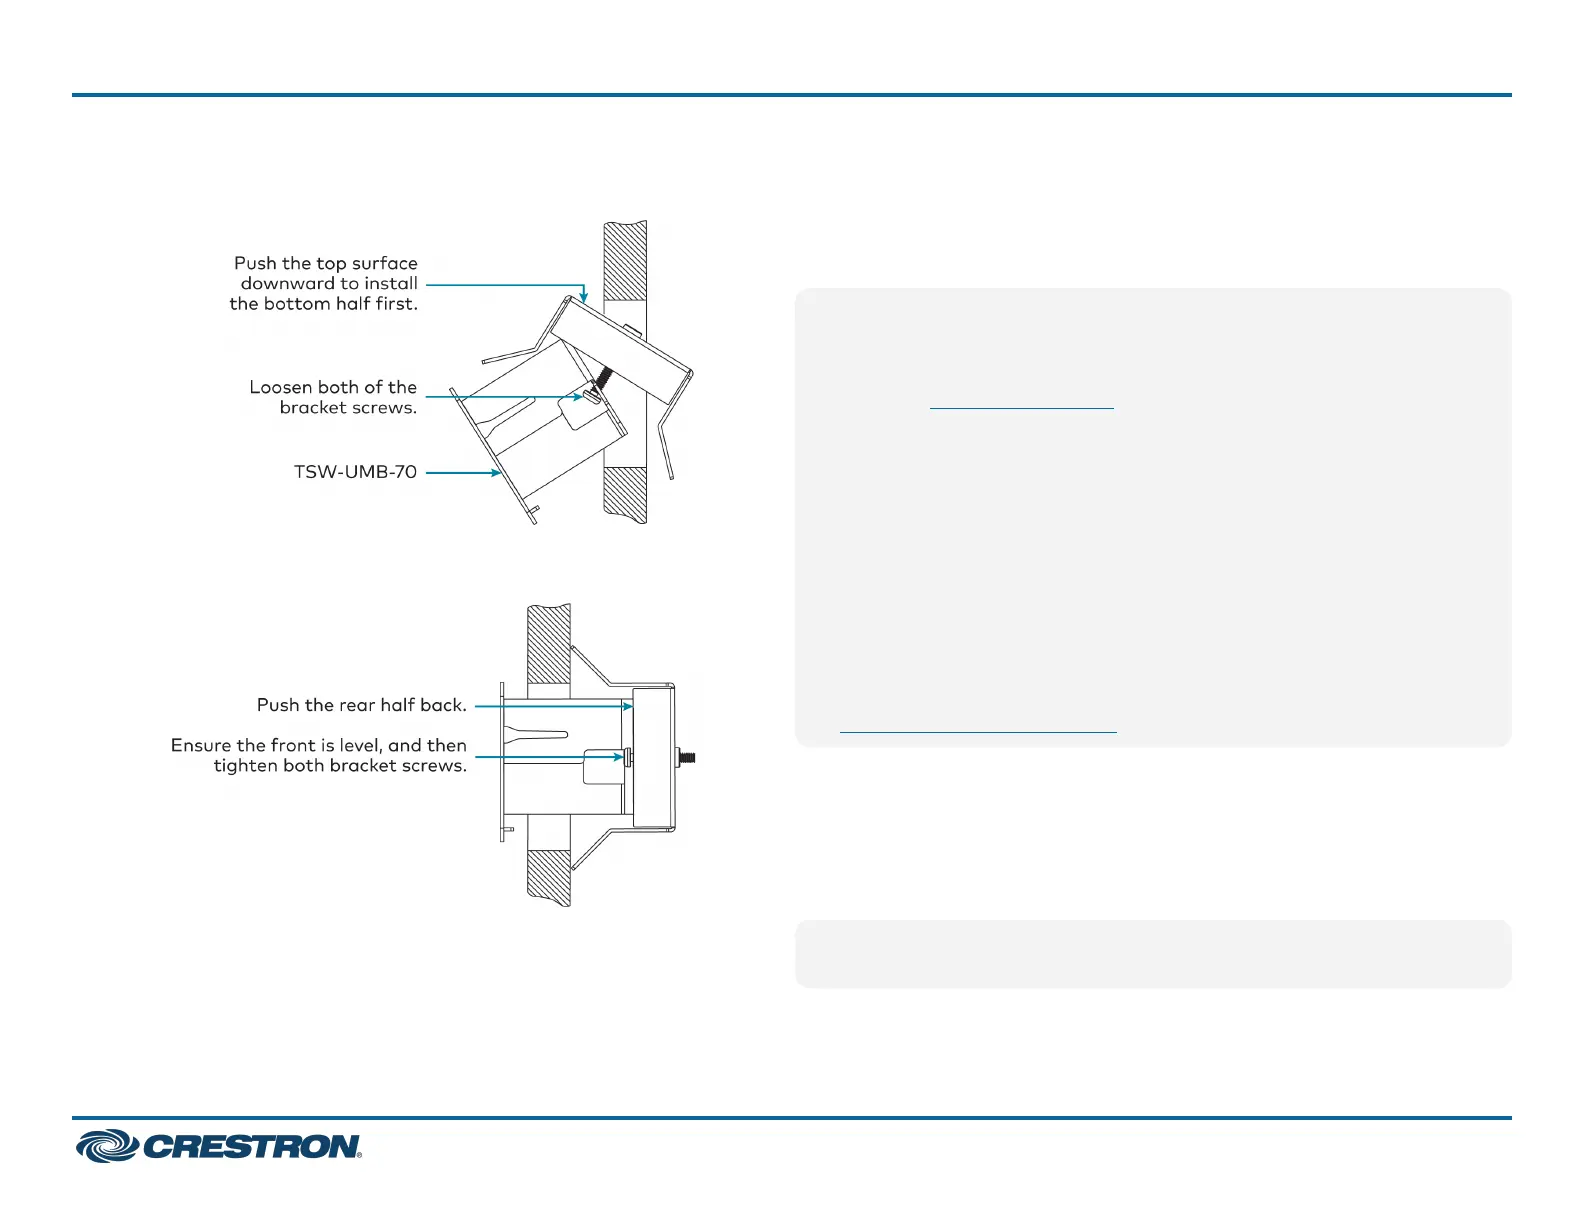
5. Push the rear half of the mounting bracket back so that it is seated
behind the mounting surface completely.
6. Ensure the front of the TSW-UMB-70 is level, and then tighten the
two bracket screws.
Install theTSW-770/TSW-1070MountingBracket
The TSW-770 and TSW-1070 install over a standard 2-gang or 3-gang
U.S. electrical box, a 2-gang European electrical box, or a 2-gang U.K.
electrical box. The touch screen also installs into drywall.
NOTES:
l
Additional mounting options are possible using the following
mounting accessories. For more information, refer to the product
pages at www.crestron.com.
o
TSW-UMB-70 universal mounting bracket
o
TSW-UMB-70-PMK preconstruction mounting kit
o
TSW-UMB-70-BBI wall mount back box
o
TSW-770/1070-MSMK series multisurface mounting kits
o
TSW-770/1070-MUMK mullion mounting kit
o
TSW-770/1070-RMB series retrofit mounting brackets
o
TSW-770/1070-RMK series rack mount kits
l
Installing the mounting bracket to an electrical box is required only
if one of the mounting solutions above is not used. Refer to the
documentation for your chosen mounting solution at
www.crestron.com/manuals.
Electrical Box Mounting
To mount the touch screen into an electrical box, use the appropriate
screws (four 6-32x3/4in. screws, four M3x16mmscrews,ortwo
M3.5x25 mm screws) to attach the mounting bracket to the electrical
box as shown in the following illustrations:
NOTE:ForU.S.installations,usea#2Phillipsscrewdriver. For
European or U.K. installations, use a #1 Phillips screwdriver.
3
TSW-570, TSW-770, and TSW-1070
QuickStart
5 in., 7 in., and 10.1 in. Wall Mount Touch Screens
 Loading...