EasyManua.ls Logo

CrimeStopper SP-100 - User Manual

CrimeStopper SP-100
16 pages
Print Icon
To Next Page IconTo Next Page
Loading...
1
SP-100
REMOTE CONTROL ALARM SYSTEM
INSTALLATION & OPERATING INSTRUCTIONS
INTRODUCTION
CONGRATULATIONS on your choice of a ā€œSecurity Plusā€ Remote Alarm System by Crimestopper Security
Products Inc. This booklet contains the information necessary for installing, using, and maintaining your alarm
system. If any questions arise, contact your installation dealer or Crimestopper Security Products Inc. at the
Tech Support number below.
This installation book is designed for the installer or individual with an existing understanding of automotive
electrical systems, along with the ability to test and connect wires for proper operation. To ease installation,
we suggest that you READ THIS MANUAL before beginning your installation. This book is provided as a
GENERAL GUIDLINE and the information contained herein may differ from your vehicle.
TECH SUPPORT
Mon-Fri 8:00 AM-4:30 PM Pacific Time
www.crimestopper.com
Phone (800) 998-6880
FAX (805) 581-9500
REV. B 02.2009
This device complies with FCC Rules part 15. Operation is subject to
the following two conditions: 1) This device may not cause interference,
and (2) this device must accept any interference that may be received,
including interference that may cause undesired operation. The
manufacturer is not responsible for any radio or TV interference caused
by unauthorized modification to this equipment. Such modification
could void the user's authority to operate the equipment.
Question and Answer IconNeed help?

Do you have a question about the CrimeStopper SP-100 and is the answer not in the manual?

Summary

Installation Cautions and Warnings

Wiring

Green Wire: Negative Door Trigger

Connects to the negative door trigger wire, identifying vehicles with isolated triggers.

Purple Wire: Positive Door Trigger

Connects to the positive door trigger wire for vehicles with positive voltage when doors are open.

Yellow Wire: Ignition Switched Power

Connects to the ignition wire providing 12 Volts in both 'ON' and 'START' positions.

Black Wire: System Ground

Instructions for connecting the system ground wire to the vehicle chassis for a good connection.

Wiring Continued

Orange Wire: Starter Disable Output

Negative ground output for starter disable or optional devices, with starter kill relay wiring details.

Brown Wire: Siren Output

Connects to the positive siren wire for outputting siren signals.

Red Wire: 12 V Power Input

Connects to a 12 Volt source, typically the vehicle battery positive terminal, with fuse.

Shock Sensor Wiring and Adjustment

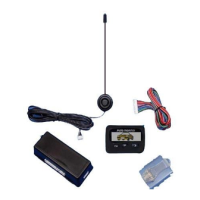
Details the 4-pin sensor plug (Green, White, Black, Red wires) and sensor adjustment.

Power Door Lock Wiring

Remote Transmitter Programming

Initiate Programming Mode

Turn ignition ON and press the override/program button 4 times to enter programming mode.

Learn Transmitter Codes

Press button #1 on each remote to learn its code; the system confirms with light flashes/chirps.

Option Programming

Passive Arming

Enables automatic arming 40 seconds after ignition off and doors closed.

Carjack Protection Types

Selects between Active, Active/Passive, or Full-Time carjack protection.

Carjack Feature Enable;Disable

Turns the carjack features ON or OFF.

Operating Instructions

Emergency Override & Disarm

Procedure to disarm the alarm using the key and override button if transmitter is lost.

Valet Mode

Temporarily disables alarm functions for service by holding the override/program button.

Carjack Protection

Active Carjack

Initiates a countdown and alarm sequence if button #2 is pressed while ignition is on.

Passive Carjack

Triggers a countdown and alarm sequence if a door is opened while ignition is on.

Full-Time Carjack

Provides continuous carjack protection, requiring resets after ignition cycles or door openings.
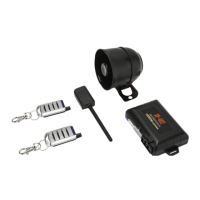
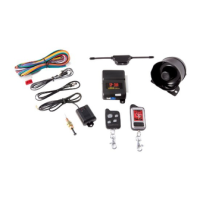
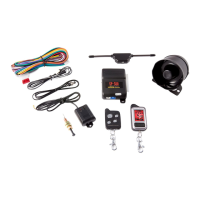
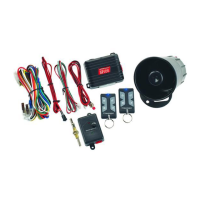
Wiring Diagram SP-100

CrimeStopper SP-100 Specifications

General IconGeneral
Remote ControlYes
Number of Buttons on Remotes4
Number of Remotes Included2
Shock SensorYes
Panic ModeYes
Starter KillYes
LED IndicatorYes
Dome Light SupervisionYes
Door TriggerYes
Hood TriggerYes
Trunk TriggerYes
Ignition Controlled Door LocksYes
Valet ModeYes
Operating Voltage12V DC

Related product manuals