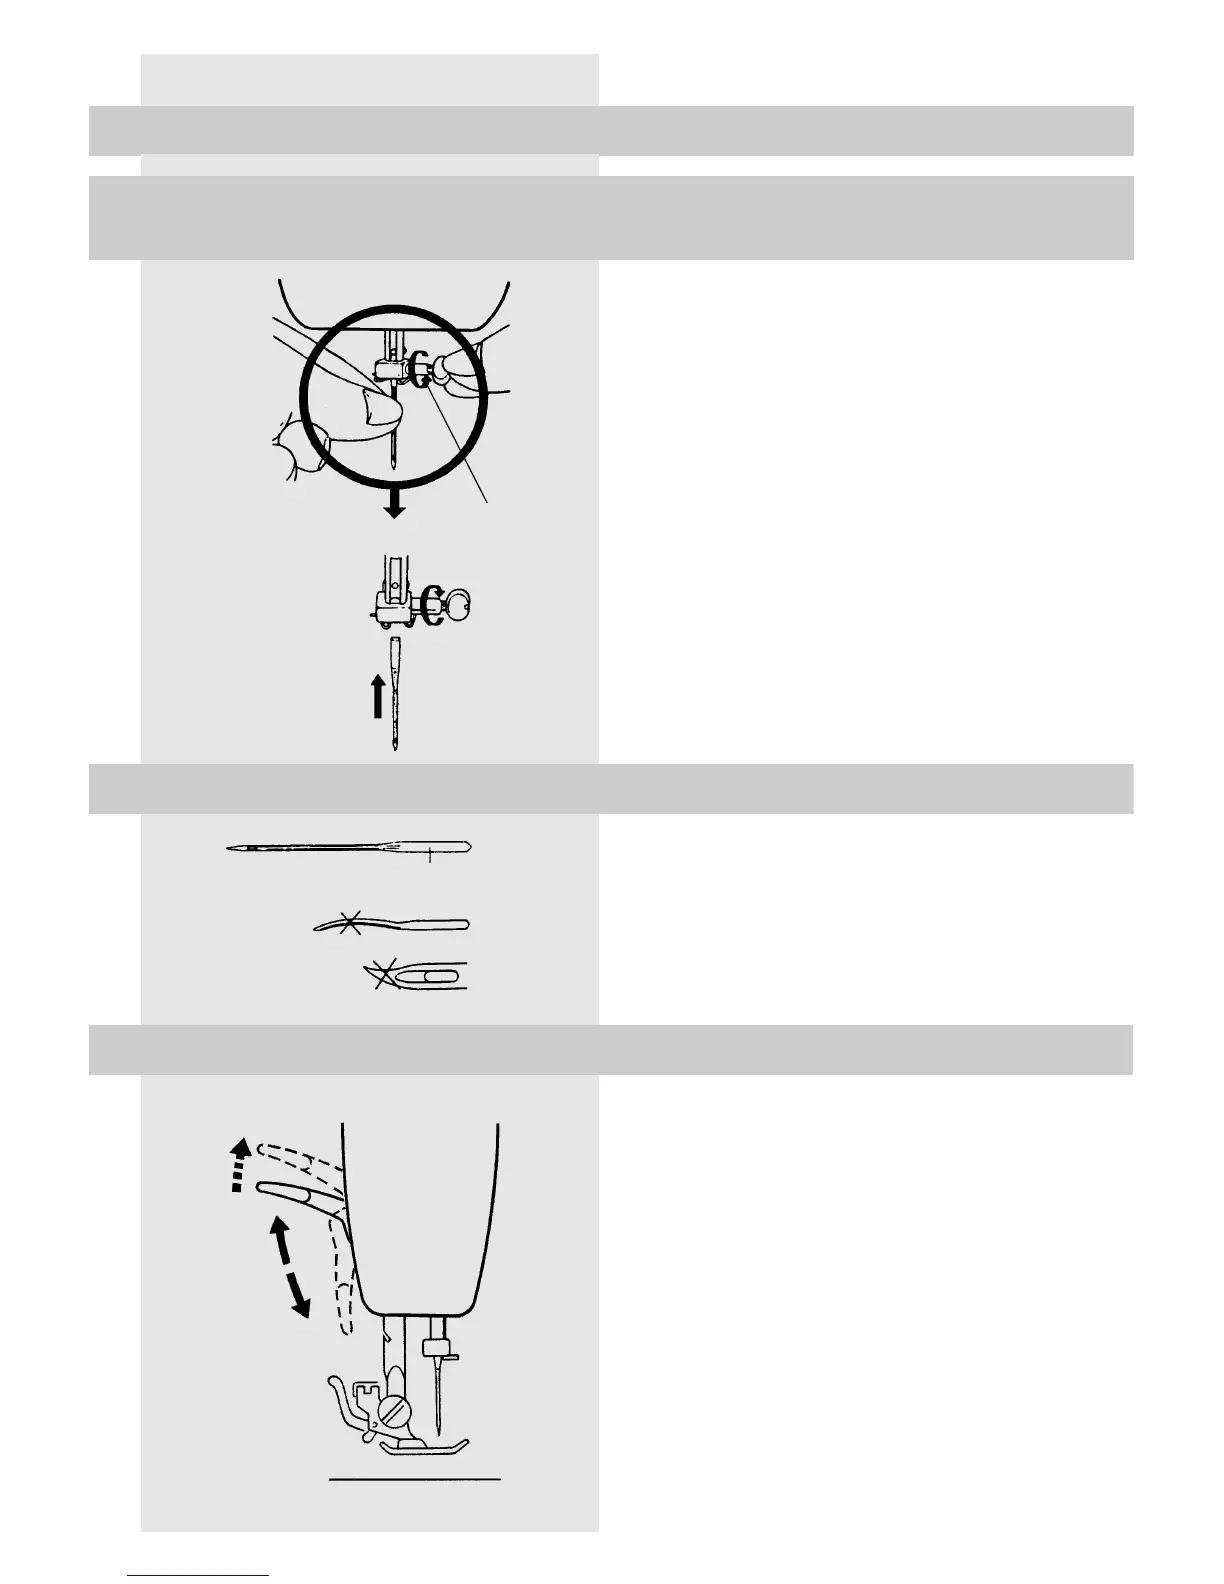
Turn the balance wheel (28) toward you until the
needle moves up to its highest position.
1. Loosen the needle bar screw (12)
by turning it toward you.
Remove the needle from the
needle holder (17)
2. Insert the new needle with its flat side toward
the back. Push the needle up into the clamp
as far as it will go.
3. Tighten the needle bar screw.
The number indicating the strength of the
needle is shown on the shank.
The higher the number, the stronger the needle.
Never use a needle which is crooked or blunt.
By raising or lowering the presser foot lever (23),
the presser foot (14) goes up or down (A).
In order to be able to sew thick fabrics, the
presser foot can be raised a bit (B) to get some
additional room for maneuvering the thick
fabric.
Changing the needle
Raising or lowering the presser foot
Attention!
For this step, the machine must be switched off and unplugged.
1
2
8
B
A
Needle bar screw
Shank
Presser foot lever
Selection of the right needle