IV. Setting Up
The Detective+ has been designed to display as much or as little information to
the user as is required by the controller of the equipment. On the one hand it
is a four channel measuring instrument with continuous readout, on the other,
a basic alarm only detector with status display and no way of switching it off.
This section describes how to tailor the instrument to the application via the
front panel buttons. The section on Configuring the instrument with Portables
PC details other adjustments that may be made to the instrument configuration
via a PC and the Portable PC software.
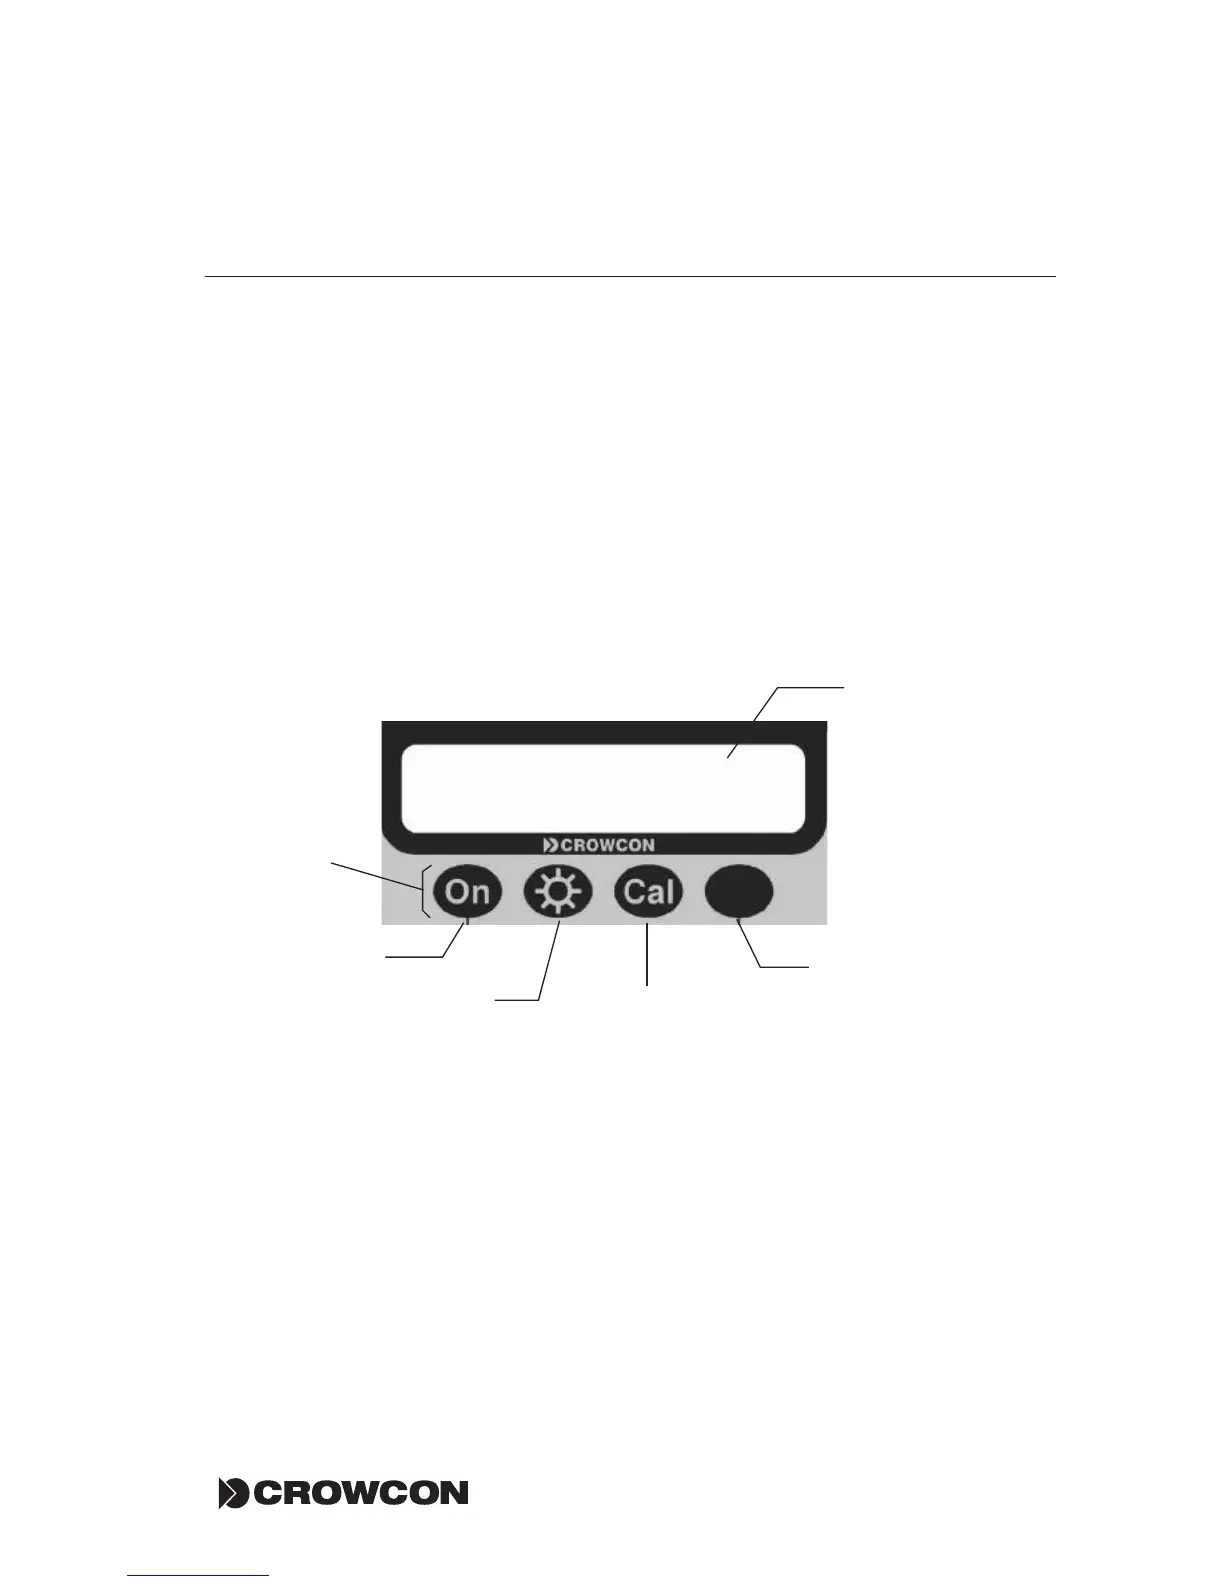
4.1 Using the Menu system
To access the SETUP menu press ‘CAL’ button. The screen will display the
following:
The four buttons have above them a symbol or word: these are the ‘soft key’
functions currently assigned to that particular key. Use the ON and BACKLIGHT
buttons to scroll left and right, the CAL button to quit the menu system and
the UNMARKED button to select a menu option. View the road map on page
37 for details of Detective+ configuartion menu system
The options available are:
MENU This selects the configuration menu. It is password protected, and
described below
EVENT This marks an event in the data log. There is no menu beneath this
option.
LOG This selects the log menu, described below.
Setting Up Detective+Detective+ Setting Up
<< >> QUIT LOG
MENU EVENT LOG
Buttons act
as 'soft key'
functions
Scroll menu list
to the left
Scroll menu list
to the right
Quit menu and
return to normal
gas reading screen
Select Menu option
currently indicated.
This will change as
Menu is scrolled.
As the menu is
scrolled left or right,
the menu item
here will appear
as the 'soft key'
option above the
UNMARKED button