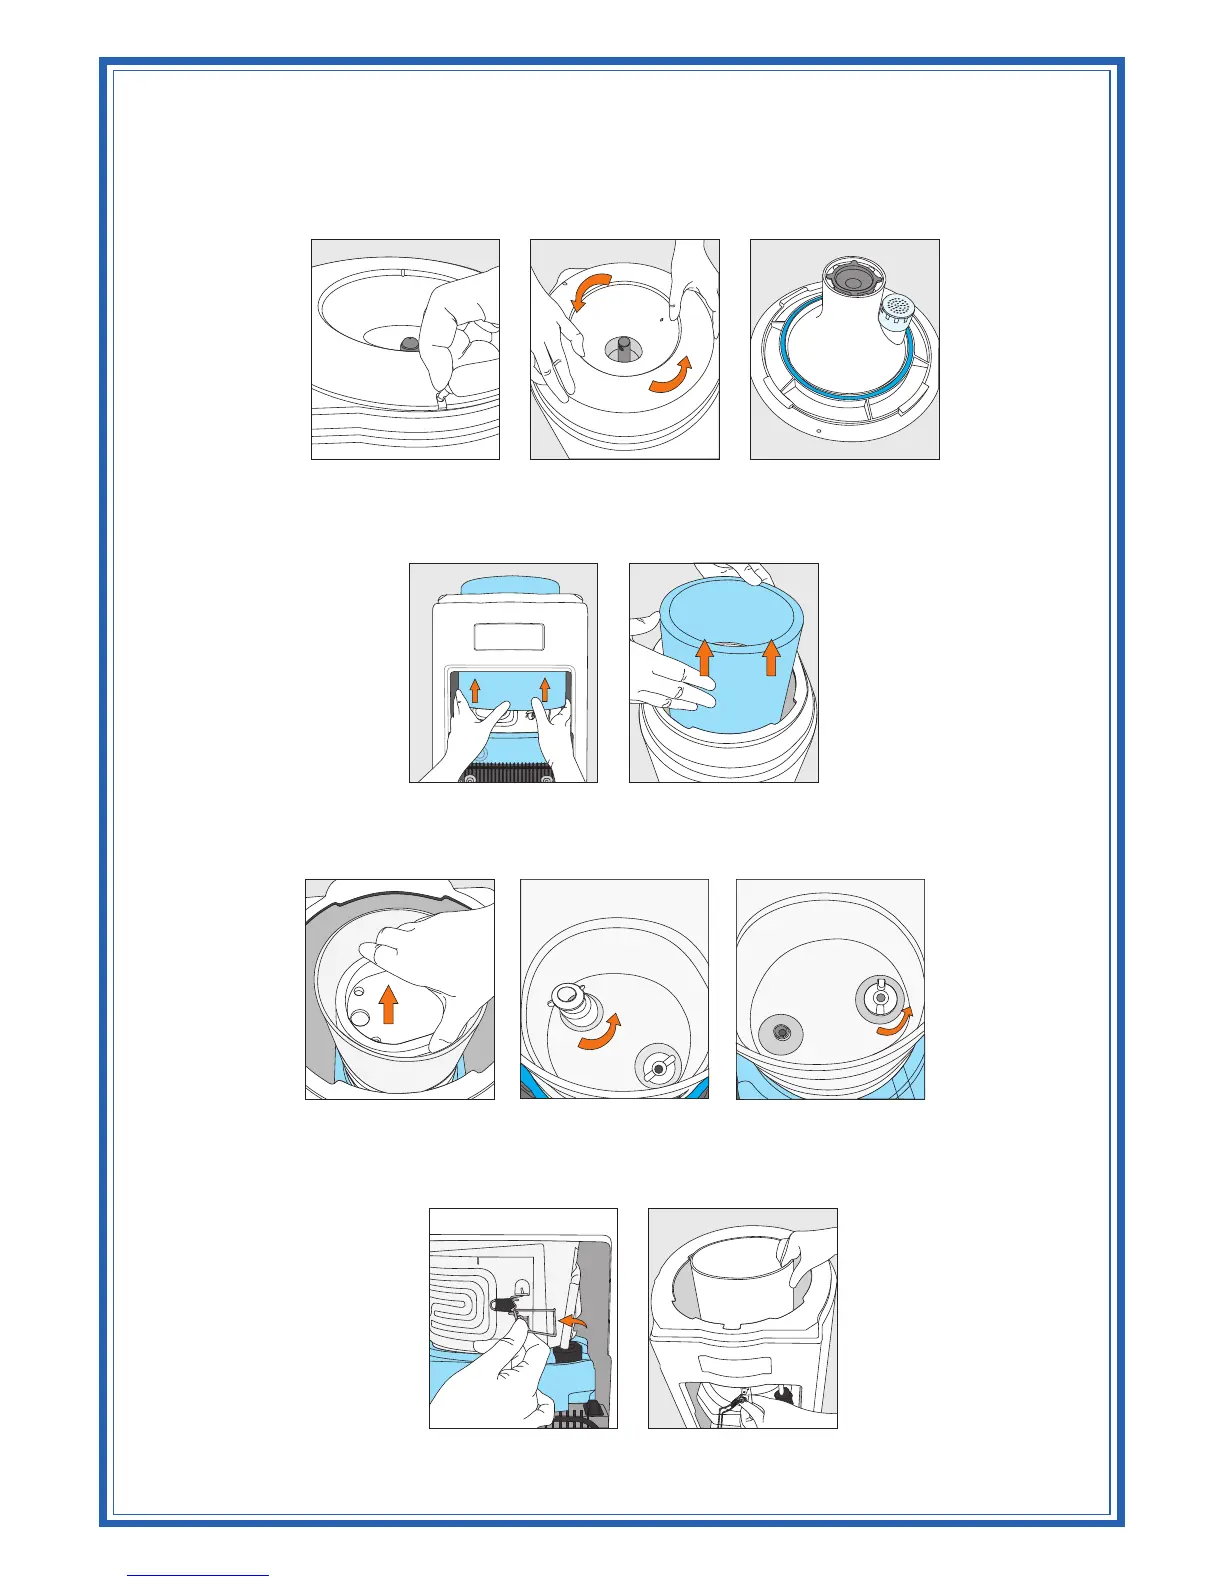
3. Remove the locking pin from the Crystal Guard (Figure 18), which may be stiff, requiring a
tool. Use the fingertips of both hands to press on the Crystal Guard and turn counter
clockwise till it is free from the cooler opening (Figure 19 and Figure 20).
4. Use fingers of both hands to lift up and remove the insulation jacket covering the reservoir, from the
cooler opening (Figure 21 and Figure 22).
5. Remove the baffle cup by lifting straight out (Figure 23). Loosen & remove the baffle stem and wing
nut by turning counterclockwise. (Figure 24 and Figure 25)
6. Approach the cooler from the rear and open the latch provided on the evaporator band (Figure 26).
7. Use both hands to loosen the reservoir from the evaporator band and lift it straight through the cooler
opening (Figure 27).
TM
Note: If the cooler is equipped with a DryGuard , see the DryGuard removal section of the
instructions.
TM
Figure 18 Figure 19 Figure 20
Figure 22
Figure 23
Figure 24
Figure 21
Figure 25
Figure 26 Figure 27
 Loading...
