This document is an instruction manual for the PAL/SAL "N" Series Automatic Level, a precision measuring instrument designed for leveling tasks. It provides detailed information on its features, operation, calibration, and maintenance, and is available in multiple languages including English, Spanish, French, Italian, German, and Portuguese.
Function Description
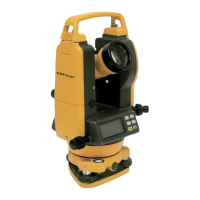
The PAL/SAL "N" Series Automatic Level is used for accurate height and angle measurements in surveying and construction. It features a wire-hung, magnetically dampened compensator for optimal range and accuracy, which automatically levels the line of sight once the instrument is roughly leveled. This compensator can be locked during transport or storage to protect the instrument and can also serve as a checking tool for its proper operation. The instrument is designed to provide a horizontal line of sight within 3 mm of level for accurate readings.
Important Technical Specifications
The manual details several models within the PAL/SAL "N" series, including SAL20N, SAL24N, SAL28N, SAL32N, PAL22, and PAL26, each with varying magnifications and leveling accuracies.
General Specifications:
- Magnification: Ranges from 20x (SAL20N, PAL22) to 32x (SAL32N).
- Leveling Accuracy:
- 1/8" @ 100' (3mm/30m) for SAL20N and PAL22.
- 1/16" @ 100' (1.6mm/30m) for SAL24N, SAL28N, SAL32N, and PAL26.
- Working Range: From 200' (60m) to 400' (120m) depending on the model.
- Clear Objective Aperture: 36mm for SAL20N, SAL24N, PAL22; 40mm for SAL28N, SAL32N, PAL26.
- Setting Accuracy (Compensator): +/- 0.8" for SAL20N, SAL24N, PAL22; +/- 0.5" for SAL28N, SAL32N, PAL26; +/- 0.3" for SAL32N.
- Standard Deviation (for 1 km double-run leveling): Ranges from 2.5mm (SAL20N) to 1.0mm (SAL32N).
- Water Resistant: Yes (IP54 protection degree for some models).
- Instrument Net Weight: 1.8 kg (4 lbs).
- Mounting Thread: 5/8" x 11, compatible with standard tripods.
Telescope:
- Image: Erect.
- Length: 8" (202mm).
- Shortest Focusing Distance: 1' (0.3m).
- Field of View: 1°20'.
- Stadia Ratio: 1:100.
- Stadia Addition: 0.
Compensator:
- Leveling Range: +/- 15'.
- Dampening: Magnet dampening (Yes).
Circular Bubble Vial:
- Sensitivity: 8'/2mm.
- Circle Graduation: 1° or 1 gon.
Usage Features
The manual provides clear instructions for setting up and using the automatic level.
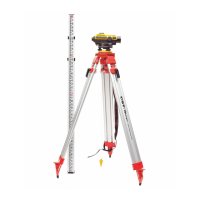
- Setting Up: Involves attaching the level to a tripod and roughly leveling the tripod head. The circular bubble vial is then centered using the leveling screws (A, B, and C) as illustrated in Fig. 2.
- Focusing: The cross hairs are focused first by pointing the telescope at a bright background or white paper and adjusting the eyepiece. Then, the telescope is focused on the target (e.g., a leveling rod) using the optical peep sight and the focusing knob. The horizontal drive knobs are used to center the vertical hair within the target.
- Reading Measurements:
- Height Reading: Read directly from the leveling rod where it intersects the horizontal hair.
- Distance Measurement: Calculated using the upper and lower stadia hairs. The difference between these readings, multiplied by the stadia ratio (1:100), gives the distance to the rod.
- Angle Measurement: Achieved by sighting point A, setting the horizontal circle to "0," then rotating the level to sight point B, where the reference mark indicates the angle.
- Calibration: The instrument is factory-calibrated but should be checked periodically.
- Compensator Lock Button Check: Push and release the button to ensure the compensator returns to its exact horizontal position.
- Circular Bubble Vial Adjustment: After centering the bubble, rotate the instrument 180°. If the bubble moves, adjust it using the leveling screws and the Allen wrench provided, repeating until it remains centered.
- Line-of-Sight Adjustment: A detailed procedure involving setting up the instrument midway between two leveling rods (30m to 50m apart), taking initial readings (a1, b1), then moving the instrument closer to one rod (within 6 feet/2m) and taking new readings (a2, b2). If (a1-b1) does not equal (a2-b2), the line-of-sight needs adjustment. The eyepiece cover is unscrewed, and an adjusting screw is turned with an adjusting pin (Fig. 12) until the horizontal cross hair reads the calculated adjusting value (b3 = a2 - H) on rod B. This process is repeated until the difference between (a1-b1) and (a2-b2) is within 3 mm.
Maintenance Features
Proper maintenance is crucial for maintaining the instrument's accuracy and longevity.
- Cleaning: After each use, the instrument should be wiped clean with a soft, dry cloth and stored in its carrying case. Aggressive detergents or solvents should not be used.
- Lens Care: Dust should be removed from the lenses with a soft brush or non-abrasive wipe. Lenses should never be touched with fingers.
- Storage: Store the instrument in a dust-free area with low humidity. If the instrument gets wet, it should be dried completely before being placed in its case.
- Moisture Control: Each instrument includes a bag of silica gel dryer. If it loses effectiveness, it should be baked to remove moisture or replaced.
- Repairs: Any damage to the instrument must be repaired by a CST/berger Authorized Service Center. Attempts to repair the product by unauthorized personnel will void the warranty.
- User Responsibility: The user is responsible for the correct use, care, and ongoing calibration of the instrument. Calibration and routine maintenance are not covered by the warranty.