Series 1000 and 1500
63
33.6. The transaxle contains .95 gal (116.5 fl.oz) of
20W-50 motor oil with an API classification of
SH/CD.
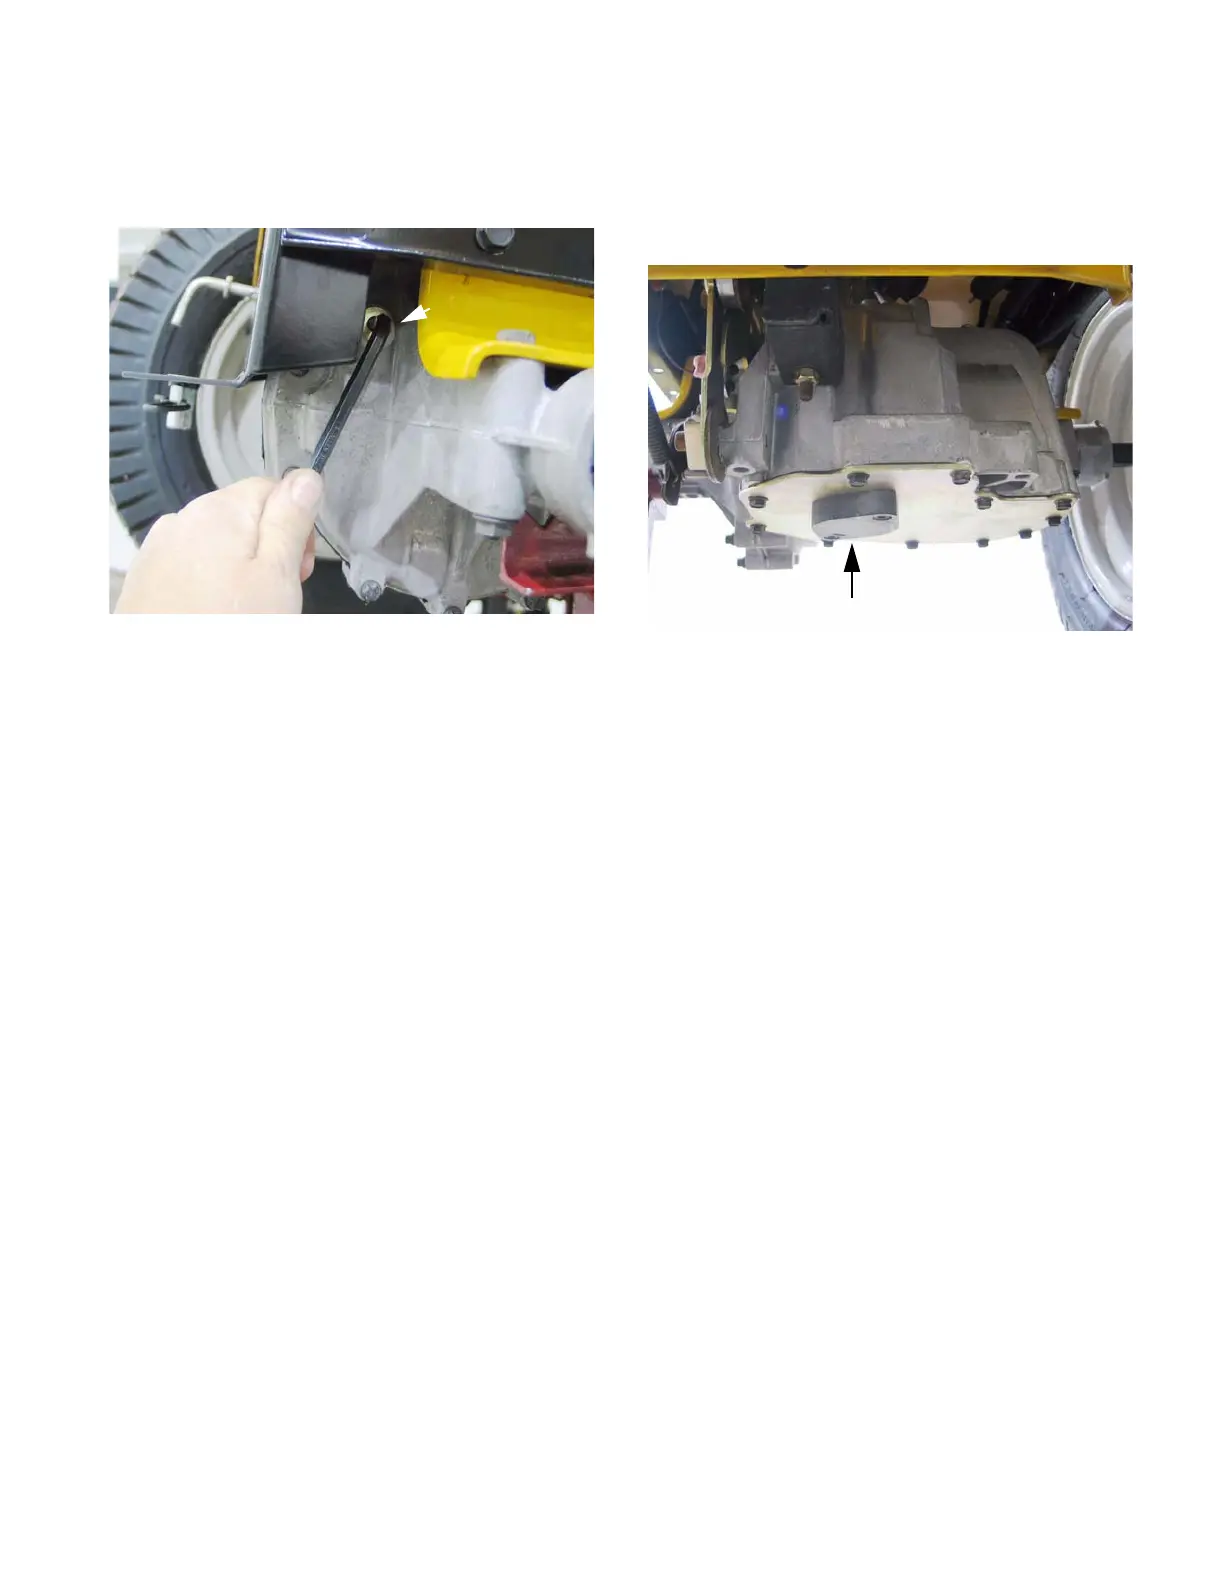
See Figure 33.6.
NOTE: Check the fluid level at the fluid level port
near the back of the right side axle housing. The
plug can be removed with a 1/4” Allen wrench.
NOTE: This oil (fluid) should not have to be
changed in the normal service life of the tran
-
saxle unless it develops a leak or becomes con-
taminated.
33.7. If the transaxle develops a leak, identify and
repair the leak to prevent further damage.
33.8. To drain the oil, Hydro-Gear recommends
removal of the transaxle, for draining through the
fill port.
Figure 33.6
Oil level plug
• To drain the oil and replace the filter:
33.9. Index-mark the charge pump housing for orien-
tation, then remove it using a 5mm Allen wrench.
See Figure 33.9.
NOTE: Place a large catch pan under the tran-
saxle.
33.10.The charge pump housing will come down with
the gerotor pump it contains, an O-ring seal, and
116.5 fl. oz. of 20W50 motor oil.
33.11. Remove the 11 perimeter screws that hold the
lower cover to the transaxle using a #8 internal
Torx bit.
See Figure 33.9.
33.12.Remove the lower cover and clean all sealant
from the mating surfaces.
33.13.Remove the charge pump housing screw O-
rings from the charge manifold.
33.14.Remove the charge check valve spring and ball.
33.15.Remove the filter, charge manifold, and the O-
ring that seals the charge manifold to the pump
center section.
33.16.It is highly recommended that the transaxle be
reassembled using new O-ring seals and a new
filter.
33.17.Inspect the geroter pump. Replace it if it is visibly
worn.
33.18.Reverse the order of disassembly to reassemble
the transaxle:
• Install the O-ring onto the pump center section.
• Install the filter and charge manifold.
• Install the charge check ball and spring.
Figure 33.9
Charge pump housing

 Loading...