Series 1000 and 1500
70
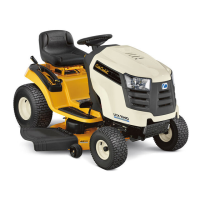
37.5. Disconnect the wiring harness connector from
the lighting harness connector.
See Figure 37.5.
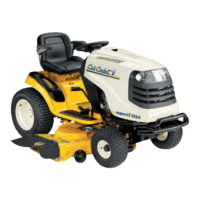
37.6. Remove the hex bolts securing the front grille
assembly to the front frame assembly using a
1/2" socket and extension.
See Figure 37.6.
37.7. Remove the grille and hood assembly together.
37.8. Remove the muffler and muffler guard as one
unit.
37.9. Secure the front of the tractor off of the ground,
behind the pivot bar.
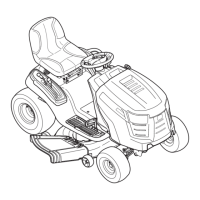
37.10.Loosen the large hex flange nut securing the left
axle assembly to the pivot bar using a 15/16"
socket.
See Figure 37.10.
NOTE: Some models will have a push cap. In
that case you would remove the push cap and
discard it. Do not reuse push caps.
37.11.Remove the lock nut securing the left ball joint to
the left axle assembly using a 9/16" socket and a
1/2" wrench.
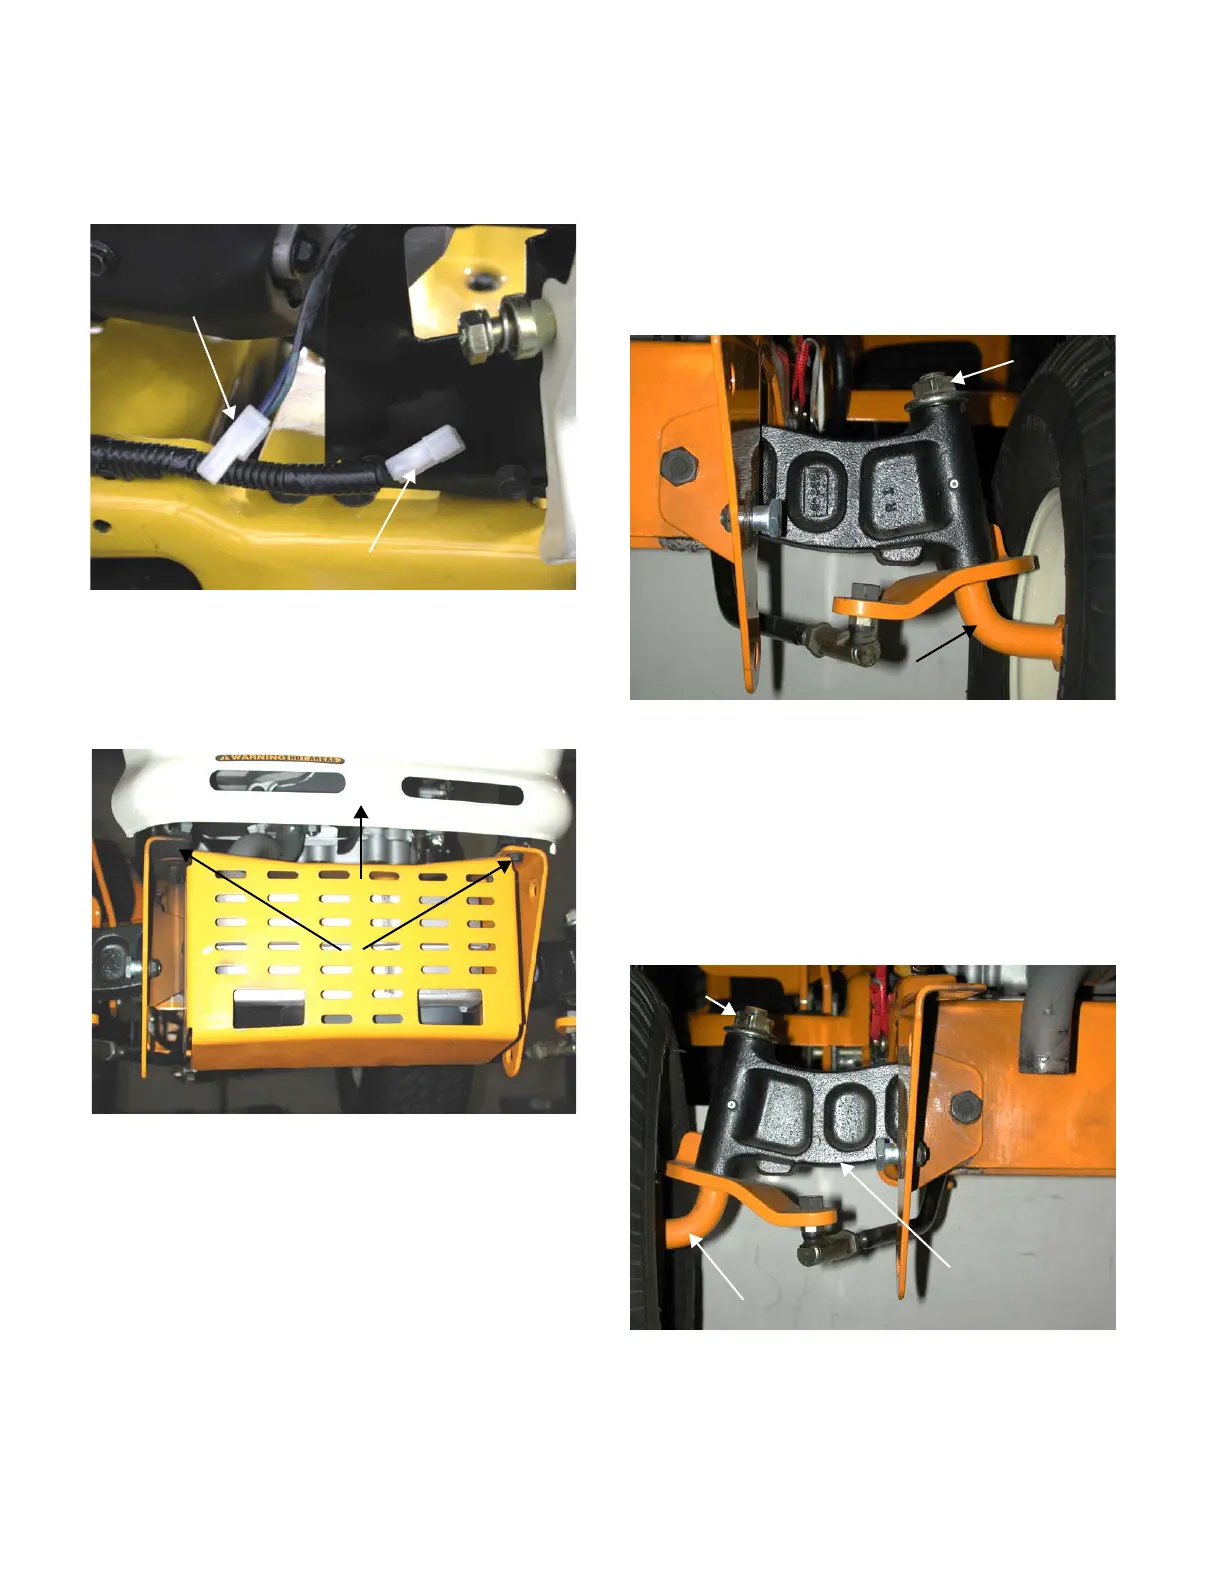
37.12.Loosen the large hex flange nut or remove the
push cap securing the right axle assembly to the
pivot bar using a 15/16" socket.
See Figure
37.12.
37.13.Remove the lock nut securing the right ball joint
to the right axle assembly using a 9/16" socket
and a 1/2" wrench.
Lighting Harness
Connector
Wiring Harness Connector
Figure 37.5
Hex Bolts
Grill
Figure 37.6
Hex
Nut
Axle Assembly
Flange
Figure 37.10
Hex
Flange
Nut
Axle Assembly
Pivot Bar
Figure 37.12
 Loading...