13
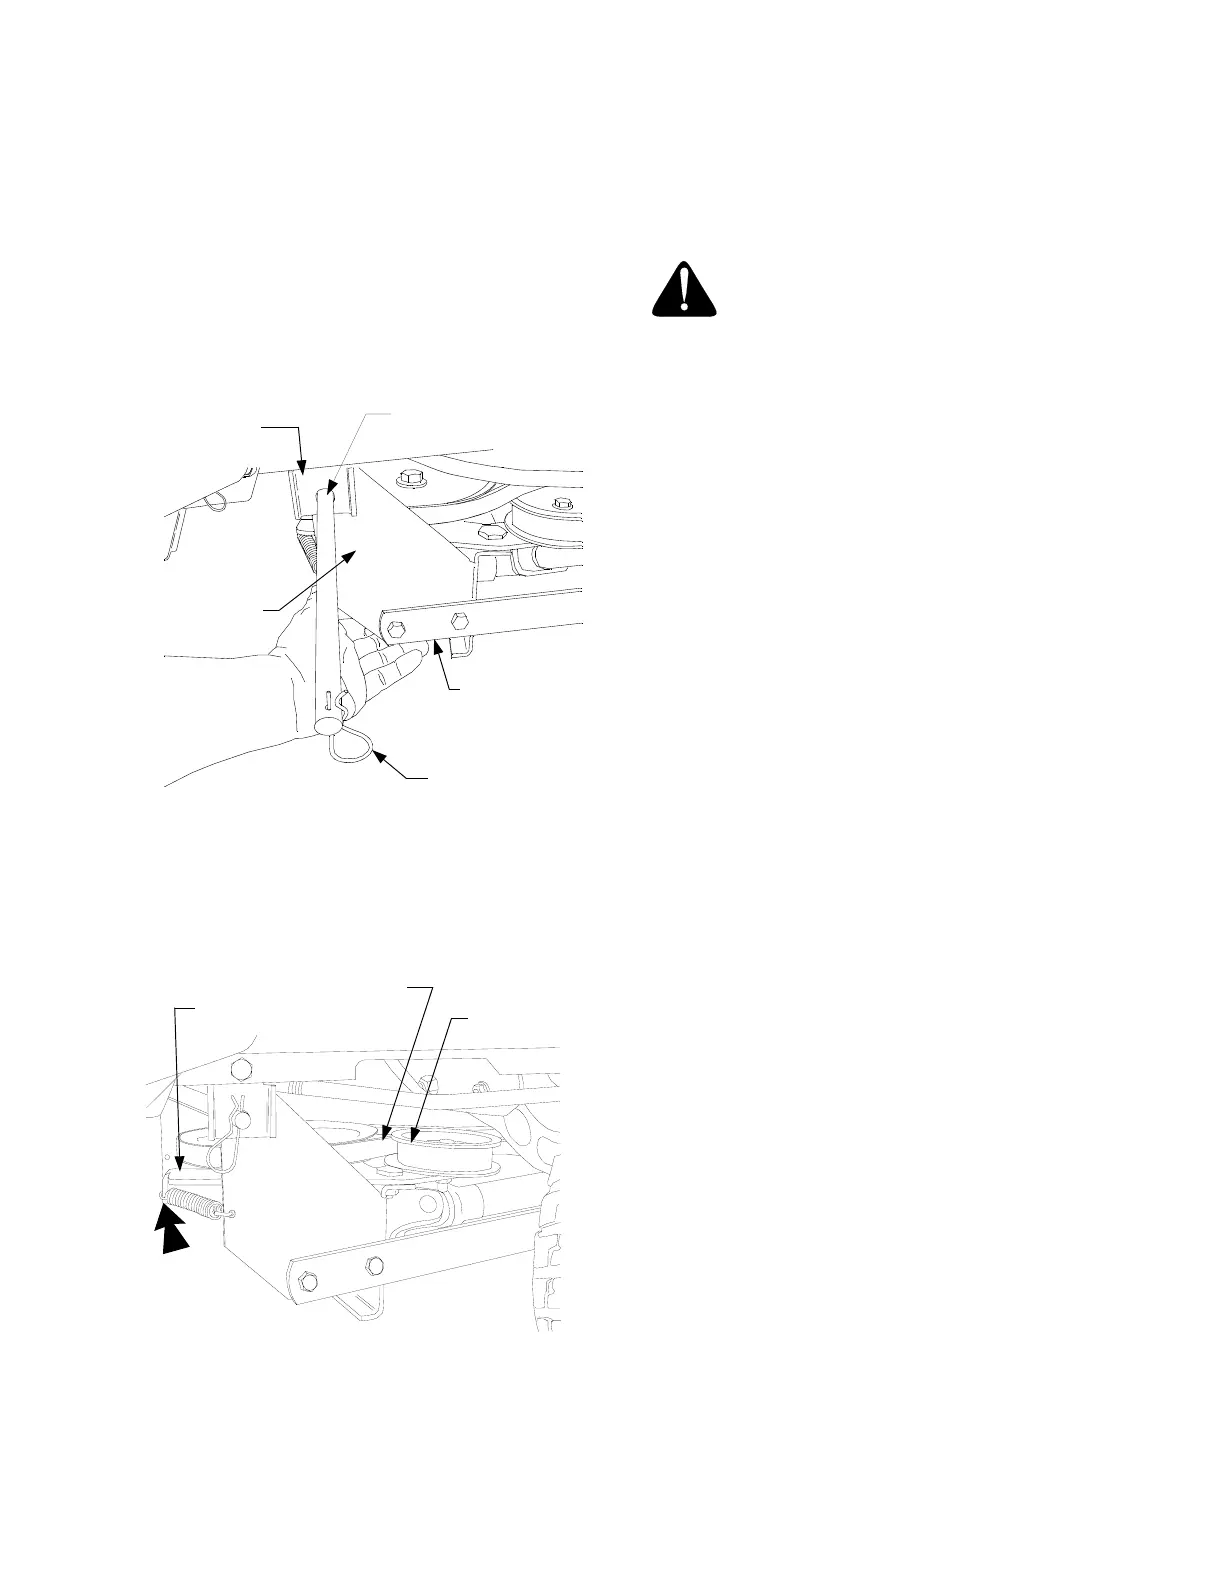
11. Install an internal cotter pin (2, Fig.2) into one end
of the rod (3, Fig.2). Refer to Figure 22.
12. Lift the gearbox mounting bracket/subframe
assembly up between the frame mounting
brackets (1, Fig.2) installed earlier on the tractor.
Align the holes and slide the rod (3) through the
frame mounting brackets and the gear box
mounting bracket. Install the other internal cotter
pin (2, Fig.2) into the other end of the rod. See
Figure 22.
Figure 22
13. From the right side of the tractor, press the
rearward end of the idler bracket inward to allow
the flat backside of the PTO belt in the flat idler
pulley. See Figure 23.
Figure 23
B. SNOW THROWER REMOVAL.
1. Drive the tractor with snow thrower assembly to a
firm and level surface near the storage location.
Disengage the PTO, place the controls in neutral,
and engage the parking brake.
WARNING: The exhaust tube, muffler,
and surrounding areas are HOT. Allow
the tractor to cool before beginning
removal of the snow thrower.
2. Grasp the lift handle (C) and squeeze the latch
release trigger to lower the snow thrower to the
ground (Refer to Figure 28).
3. Press inward on the rear of the idler bracket to
disengage the PTO belt from the flat idler pulley
(Refer to Figure 23).
4. Remove the internal cotter pin from one end of the
rod (3). Support the gearbox mounting bracket and
withdraw the rod from the frame mounting
brackets (Refer to Figure 22). Lower the subframe
to the ground.
5. Remove the PTO belt from the rear V-pulley on the
snow thrower gearbox (Refer to Figure 21)
IMPORTANT: Series 2500 Tractors Mfg. Date K015
and After. To open the tractor hood, the snow thrower
must be lowered to the ground and the discharge chute
rotated to the straight forward position.
6. Remove the PTO belt from the PTO clutch pulley
and pass the belt downward through the bottom of
the tractor frame to remove the belt from the tractor
(Refer to Figure 20).
7. Remove the hex cap screws and bell washers that
secure the snow thrower channel brackets in both
of the tractor frame channels (Refer to Figure 18).
8. Units with 15” front tires ONLY. Remove the
front hex flange lock nuts and cap screws securing
the gearbox mounting bracket to the subframe
arms. Loosen the rear fasteners (Refer to Figure
15).
9. Pull the snow thrower assembly forward to
disengage the channel brackets from the tractor
frame channels (Refer to Figure 17).
NOTE: For off-season storage, keep all removed parts
and fasteners with the snow thrower to avoid their loss.
INTERNAL
COTTER PIN
GEARBOX
MOUNTING
BRACKET
ROD
FRAME
MOUNTING
BRACKET
SUBFRAME
ARM
PTO BELT
FLAT IDLER
PULLEY
IDLER
BRACKET
PUSH
INWARD
 Loading...