6
For decorative trimming /
edging with the line head
cutting, lock the release
button of the lower boom into
the 90° hole (Fig. 8).
OPERATING THE EZ-LINK™ SYSTEM
The EZ-Link™ system enables the use of these optional Add-Ons:
Mach 4® Trimmer . . . . . . . . . . . . . . . . . . . . . . . . . . . . . . . . . . . . . . . .AF720
Articulating Hedge Trimmer . . . . . . . . . . . . . . . . . . . . . . . . . . . . . . . . AH720*
Brushcutter . . . . . . . . . . . . . . . . . . . . . . . . . . . . . . . . . . . . . . . . . . . . .BC720*
Bladed Pruner . . . . . . . . . . . . . . . . . . . . . . . . . . . . . . . . . . . . . . . . . . .BP720
Blower Trimmer . . . . . . . . . . . . . . . . . . . . . . . . . . . . . . . . . . . . . . . . . .BT720*
Blower Vacuum . . . . . . . . . . . . . . . . . . . . . . . . . . . . . . . . . . . . . . . . . .BV720
Garden Cultivator . . . . . . . . . . . . . . . . . . . . . . . . . . . . . . . . . . . . . . . . GC720
Lawn Dethatcher . . . . . . . . . . . . . . . . . . . . . . . . . . . . . . . . . . . . . . . . .LD720
Lawn Edger . . . . . . . . . . . . . . . . . . . . . . . . . . . . . . . . . . . . . . . . . . . . LE720*
Pole Saw . . . . . . . . . . . . . . . . . . . . . . . . . . . . . . . . . . . . . . . . . . . . . . . PS720
Straight Shaft Trimmer . . . . . . . . . . . . . . . . . . . . . . . . . . . . . . . . . . . . SS725
Snow Thrower . . . . . . . . . . . . . . . . . . . . . . . . . . . . . . . . . . . . . . . . . . .ST720
Turbo Blower . . . . . . . . . . . . . . . . . . . . . . . . . . . . . . . . . . . . . . . . . . . . TB720
* Do NOT use this add-on with an electric powered product.
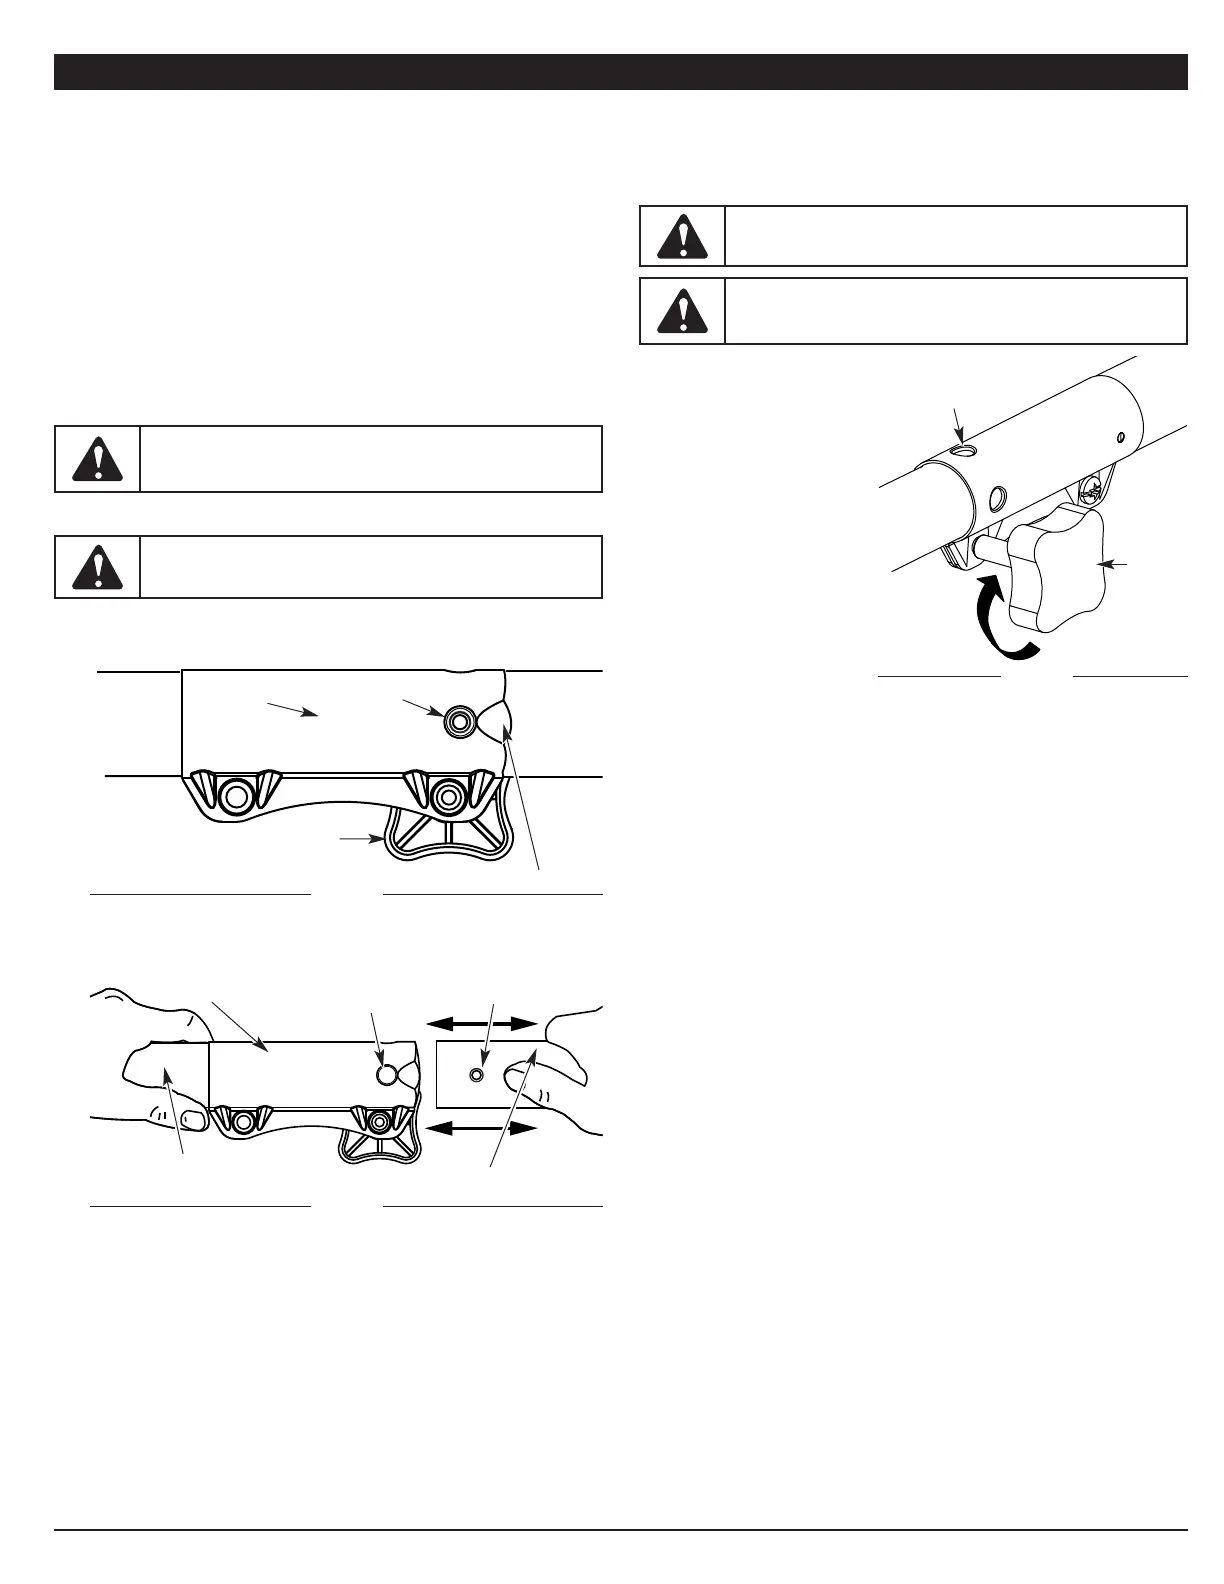
Removing the Add-On
1. Turn the knob counterclockwise to loosen (Fig. 6).
2. Press and hold the release button (Fig. 6).
Fig. 6
EZ-Link™
Coupler
Release
Button
Guide Recess
Knob
Primary Hole
Upper Shaft Housing
EZ-Link™ Coupler
2. While firmly holding the add-on, push it straight into the EZ-Link™
coupler (Fig. 7).
NOTE: Aligning the release button with the guide recess will help
installation (Fig. 6).
3. Turn the knob clockwise to tighten (Fig. 8).
Fig. 7
Fig. 8
Knob
Lower Shaft Housing
Release Button
90˚ Edge
Trimming Hole
ASSEMBLY INSTRUCTIONS
3. While firmly holding the upper shaft housing, pull the add-on straight out
of the EZ-Link™ coupler (Fig. 7).
Installing the Add-On
NOTE: To make installing or removing the add-on easier, place the unit on
the ground or on a work bench.
1. Turn the knob counterclockwise to loosen (Fig. 6).
WARNING: When using any add-on, read and understand
that add-on’s specific manual before you begin operation.
Follow all applicable safety information.
WARNING: To avoid serious personal injury and damage to
the unit, shut the unit off before removing or installing add-ons.
CAUTION: Lock the release button in the primary hole and
securely tighten the knob before operating this unit.
CAUTION: Add-ons are to be used in the primary hole only.
Using the wrong hole could lead to personal injury or damage
to the unit.
 Loading...