EasyManua.ls Logo

Cub Cadet BC 210

Cub Cadet BC 210
16 pages
To Next Page IconTo Next Page
Loading...
769-07384 P00 12/11
IMPORTANT: READ OPERATOR’S MANUAL THOROUGHLY AND FOLLOW THE SAFE OPERATION PRACTICES BEFORE OPERATING THE UNIT.
Removing Unit From Carton
Assemble The Unit
Starting The Unit
Remove cap from lower
boom. Push cutting
attachment into coupler.
Turn coupler knob clockwise
to tighten.
Assemble The Unit
Mix thoroughly in separate
fuel can:
3.2 fl. oz. of 2-cycle
engine oil
1 gallon of unleaded
gasoline
NOTE: Do not mix directly in
fuel tank.
Place unit on a level surface.
Fill fuel tank.
Press primer bulb 10 times,
or until fuel is visible
Crouch in starting position.
SQUEEZE and HOLD
throttle for ALL further
steps.
Pull rope 5 times. Move choke lever to
Position 2 and squeeze
throttle.
Pull rope 3-5 times to start
engine. Run unit for 30-60
seconds to warm up.
Continue to squeeze
throttle. Move choke lever
to Position 3.
11
Remove all contents from
carton.
4
5 6
18
9
2
Place the D-handle over the
shaft housing and onto the
bottom clamp. Place it a
minimum of 6 inches from the
end of the shaft grip.
Move choke lever to
Position 1.
Continue to squeeze
throttle. Run unit for an
additional 60 seconds to
complete warm-up. Unit
may be used during this
time.
7
3
Starting The Unit
10
11
12
13
14
Primer
Bulb
10 X
5 X
3-5 X
Choke Lever
Starter Rope
Fuel Cap
Throttle Control
Blade Shield /
Shield Mount
Brush Blade
Cutting
Head Shield
Cutting
Head
Line
Cutting
Blade
On/ Off Switch
D-Handle
Rapid-link™
Need Help?
Call 1-877-282-8684
DIDN’T START?
Repeat these instructions.
IF engine fails to start after 2 attempts,
move choke lever to position 3 and pull
the starter rope until engine starts
IF unit still fails to start, refer to the
operator’s manual for additional starting
and troubleshooting information
1 Gallon 3.2 oz
40:1
Choke Lever
Choke Lever
Min. 6"
Tools Required
• Flat blade screwdriver
• T-25 Tox screwdriver
• Locking Rod
• 13 mm closed-end
or socket wrench
Bottom
Clamp
(4) Screws
Unscrew bump knob
clockwise. Remove
inner reel and spring.
Insert 10' of 0.105"SplitLine
®
through hole in top of reel.
Pull most of line through hole
until 3"-4" remains.
Bend short end and push it
into the other hole. Pull tight.
Wind line tightly in direction
of arrow. Split other end of
SplitLine
®
back 6"-7".
Push 6"-7" ends into
the holding slots.
Insert lines through eyelets in
spool. Insert spring and reel
into spool.
11
Hold the inner reel in place.
Tighten Bump Knob
counterclockwise.
Reloading The Line*
3
4
5
6
7
Pull lines firmly to release
from holding slots.
18
Reloading The Line
2
For replacement line, call 1-877-282-8684 or go to
an authorized service dealer.
For single line installation or replacement spool
installation instructions, refer to the Replacing the
Trimming Line section of this manual.
*This is to assist in the reloading of Splitline® only. These instructions
are NOT part of the fast assembly instructions. Line does not need to
be installed on the initial assembly and start-up.
3
"
-4
"
Bump
Knob
Inner
Reel
Spool
Spring
Español — Page 11 English — Page 1Français — Page 6
NEED HELP? CALL 1-877-282-8684 IN U.S. OR 1–800–668–1238 IN CANADA
BC210
2-Cycle Gasoline
Trimmer /
Brushcutter
Operator’s Manual

Other manuals for Cub Cadet BC 210

Question and Answer IconNeed help?

Do you have a question about the Cub Cadet BC 210 and is the answer not in the manual?

Cub Cadet BC 210 Specifications

General IconGeneral
BrandCub Cadet
ModelBC 210
CategoryTrimmer
LanguageEnglish

Summary

Fastguide Assembly and Operation

Removing Unit From Carton

Initial steps for unpacking the unit from its packaging.

Assemble The Unit

Instructions for assembling the main components of the unit.

Tools Required

Essential tools for assembly.

Starting The Unit

Step-by-step guide to start the engine.

Reloading The Line

Procedure for replenishing the cutting line.

Troubleshooting Starting Issues

Guidance for engine starting problems.

Rules for Safe Operation

General Safety Warnings

Essential safety precautions for operating the unit.

California Proposition 65 Warning

Warning regarding chemicals in engine exhaust.

Safety Symbols and Meanings

Explanation of safety symbols and their importance.

Know Your Unit

Unit Components

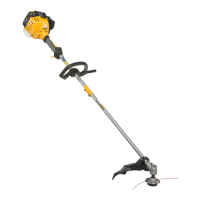
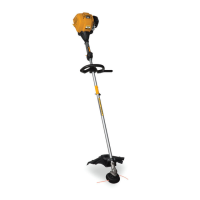
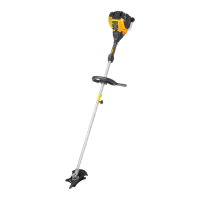
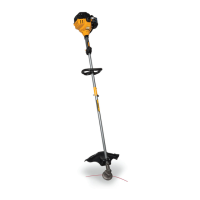
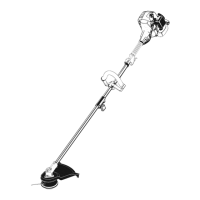
Identification of key parts of the unit.

Applications

Different uses for the unit as a trimmer or brushcutter.

Assembly Instructions

Install Cutting Attachment Shield

Procedure for installing the shield for trimmer use.

Remove and Install Cutting Blade

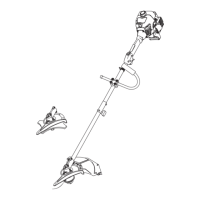
Steps for replacing the cutting attachment with a blade.

Remove and Install Cutting Attachment

Steps for replacing the blade with a cutting attachment.

Install Harness

Instructions for attaching and adjusting the shoulder harness.

Oil and Fuel Information

Fuel Mixing Instructions

Guidance on proper fuel and oil mixture ratios.

Blended Fuels

Information and precautions for using blended fuels.

Operating Instructions

Operating The Trimmer

Techniques for effective trimming and edging.

Cutting Head Operation

Proper use of the cutting head for various tasks.

Maintenance and Repair Instructions

Installing a Prewound Reel

Steps for installing a pre-wound line spool.

Air Filter Maintenance

Procedure for cleaning and maintaining the air filter.

Idle Speed Adjustment

How to adjust the engine's idle speed.

Replacing the Spark Plug

Instructions for replacing the spark plug.

Troubleshooting

Engine Will Not Start

Common causes and actions for a non-starting engine.

Engine Will Not Idle

Causes and solutions for an engine that won't idle.

Cutting Head Issues

Problems related to the cutting head and line.

Cleaning and Storage

Cleaning Procedures

How to properly clean the unit after use.

Storage Instructions

Guidelines for storing the unit short-term and long-term.

Specifications

Manufacturers Limited Warranty

Warranty Coverage

Details on what the limited warranty covers.

How to Obtain Service

Procedure for getting warranty service.

Warranty Exclusions

Conditions not covered by the limited warranty.

Related product manuals