4 5
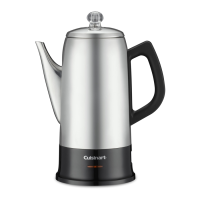
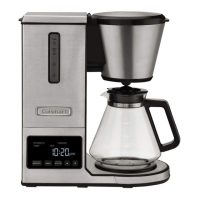
USING THE PERCOLATOR
1. Before using for the rst time, thoroughly
wash all parts of the percolator. (See the
Cleaning and Maintenance section of this
booklet.)
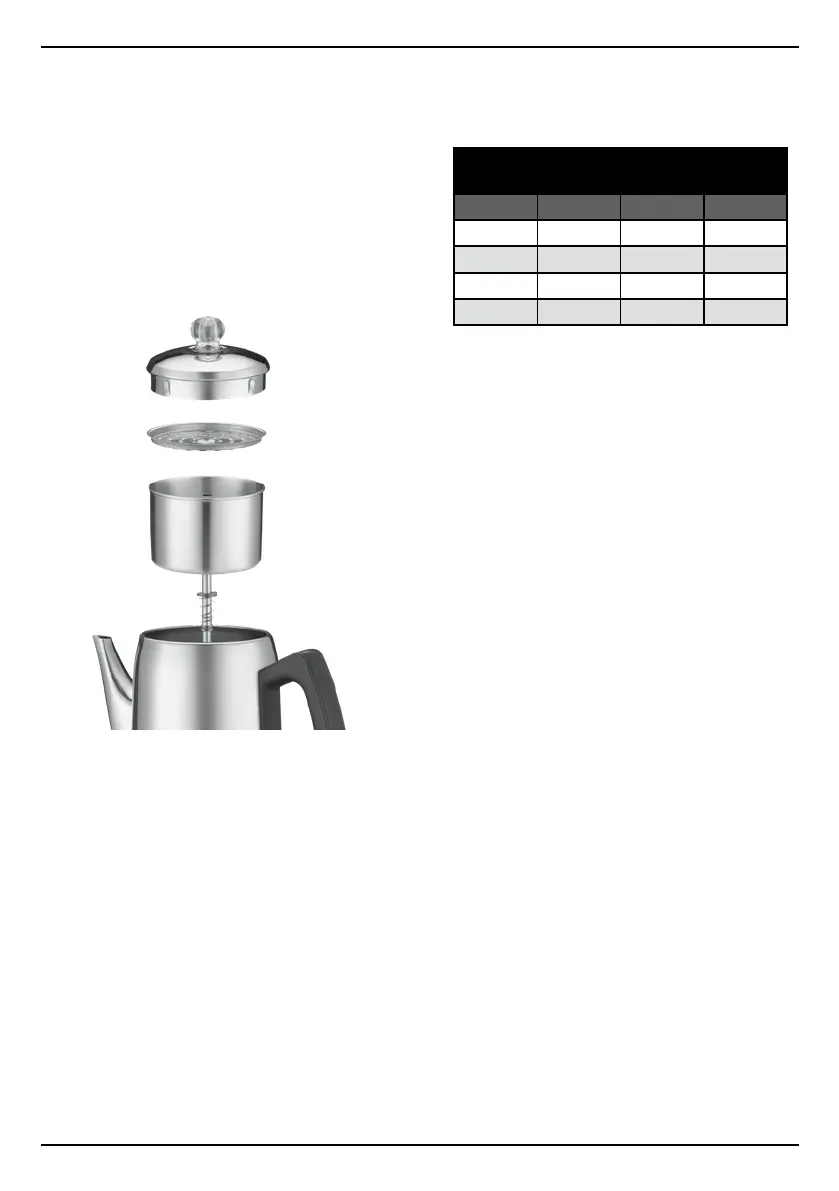
2. Remove cover, basket, lid, and pump
tube with spring. Using the measurement
markings (located inside the body), ll the
percolator with the desired amount of water.
For best results, be sure to use cold water
when lling the percolator.
3. Run cold water over the coffee basket. Place
basket on top of pump tube. Add desired
amount of coffee according to level markings
on basket. To help keep small coffee
grounds from sifting through the holes in the
basket, be certain to use a grind designed
for percolator coffee, or use a coarse grind.
Finer grinds may sift through the holes.
4. Place basket and pump tube assembly into
percolator so bottom of tube ts into well.
Place basket cover on top of basket and
push cover onto top of percolator.
5. Plug base into standard household
120-volt AC wall outlet. Brewing begins
within seconds, and continues for
approximately ten minutes. When brewing
is complete, the indicator light illuminate,
and the unit will enter Keep Warm mode.
The following chart serves as a guide for
preparing various brew strengths. Amounts
can be varied to suit personal taste and
particular coffees.
6. Once brewing cycle is complete, indicator
light will illuminate to signal your coffee is
ready.
WARNING: Be certain the percolating
process has stopped completely before
removing cover.
7. Once brewing has completed, remove the
cover carefully, and using a mitt or potholder,
remove the basket and pump tube.
CAUTION: do not touch the stainless steel
parts of the percolator, as they will be
hot.
8. Replace cover so it snaps into place.
You are now ready to enjoy a flavourful
cup of coffee.
9. Remove plug from percolator for easy
serving. Replace plug to keep coffee hot.
*1 coffee measure = 1 level tablespoon (15 ml)
BREW STRENGTH OF COFFEE/NUMBER OF
COFFEE MEASURES*
#Cups Mild Medium Strong
12 12 16 20
10 10 14 18
8 8 12 16
6 6 8 12
 Loading...