CURTMFG.COM
•
PRODUCT SUPPORT: 877.287.8634
•
13333-INS-RA
•
05/13/2020
•
ECN7022
•
PAGE 2
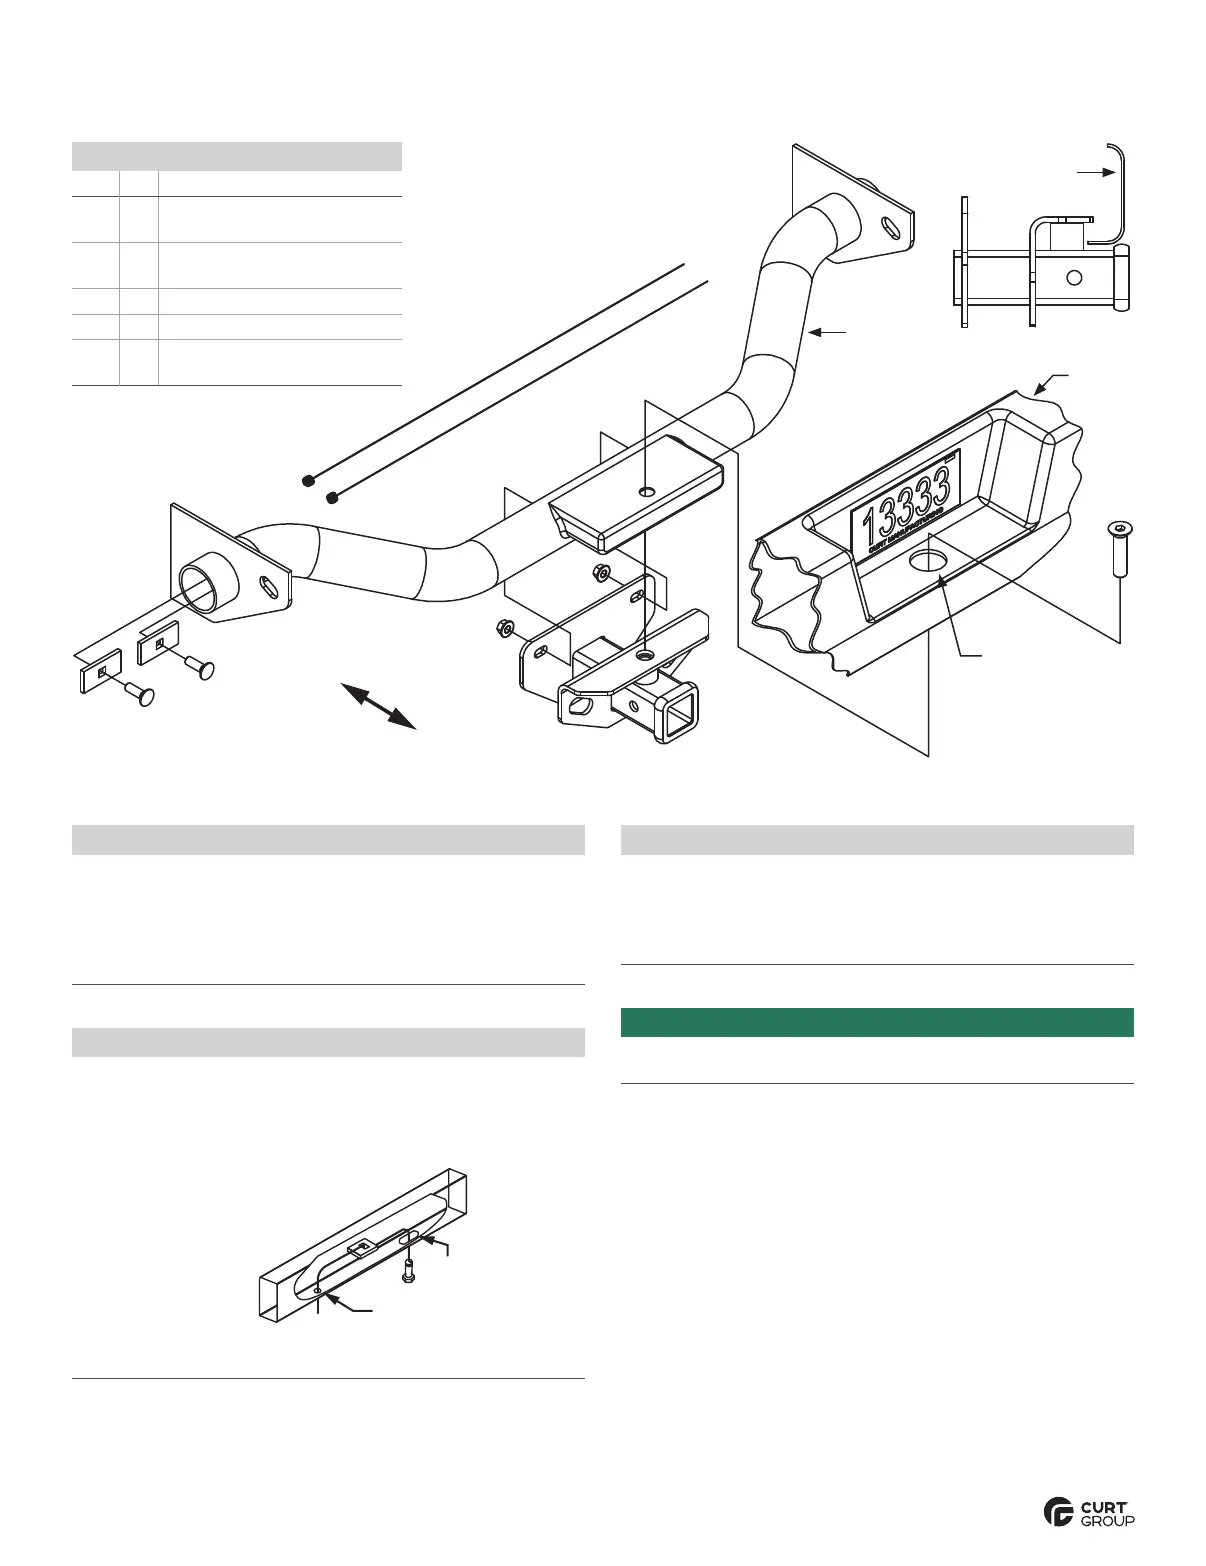
Installed hitch position
Remove trailer
ball hole cap
Bumper
support
Bumper
Bumper
AS SE MBLY
5
4
3
2
1
Step 1
Remove the existing trailer ball hole cap from the
center of the bumper and return it to the vehicle owner.
Raise the trailer hitch into position and secure with the
provided 3/4" flat-head socket bolt (#5) through the
bumper and bumper support into the hitch.
Step 3
Secure the trailer hitch to the bumper support
with 1/2" serrated-flange nuts (#3).
Torque all 1/2" hardware to 110 lb-ft
and all 3/4" hardware to 320 lb-ft.
TOWING BASICS & SAFETY INFORMATION
For information on safely towing your trailer,
visit curtmfg.com/understanding-towing.
Step 2
Fishwire (#4) 1/2" carriage bolts (#1) and square-hole
spacers (#2) through the end of the bumper support
tube and into each mounting hole of the hitch.
Insert coiled end of fishwire tool through hitch
mounting hole in vehicle frame rail and out the
access hole. Pass coiled end of fishwire
through spacer and thread bolt into
coil. Kink wire to keep spacer
seperate from bolt as shown.
Pull fishwire, spacer and
bolt through frame and
out mounting hole. Use
fishwire to guide hitch during mounting and
prevent loss of bolt or spacer inside frame rail.
MOUNTING
HOLE
ACCESS
HOLE
Parts List
Item Qty Description
1 2 Carriage bolt,
1/2"-13 x 1-1/2", grade 8
2 2 Square-hole spacer,
1/4" x 1-1/2" x 3"
3 2 Serrated-flange nut, 1/2"-13
4 2 Fishwire, 1/2" x 30"
5 1 Flat-head socket bolt,
3/4"-10 x 3-1/4", grade 8



 To Previous Page