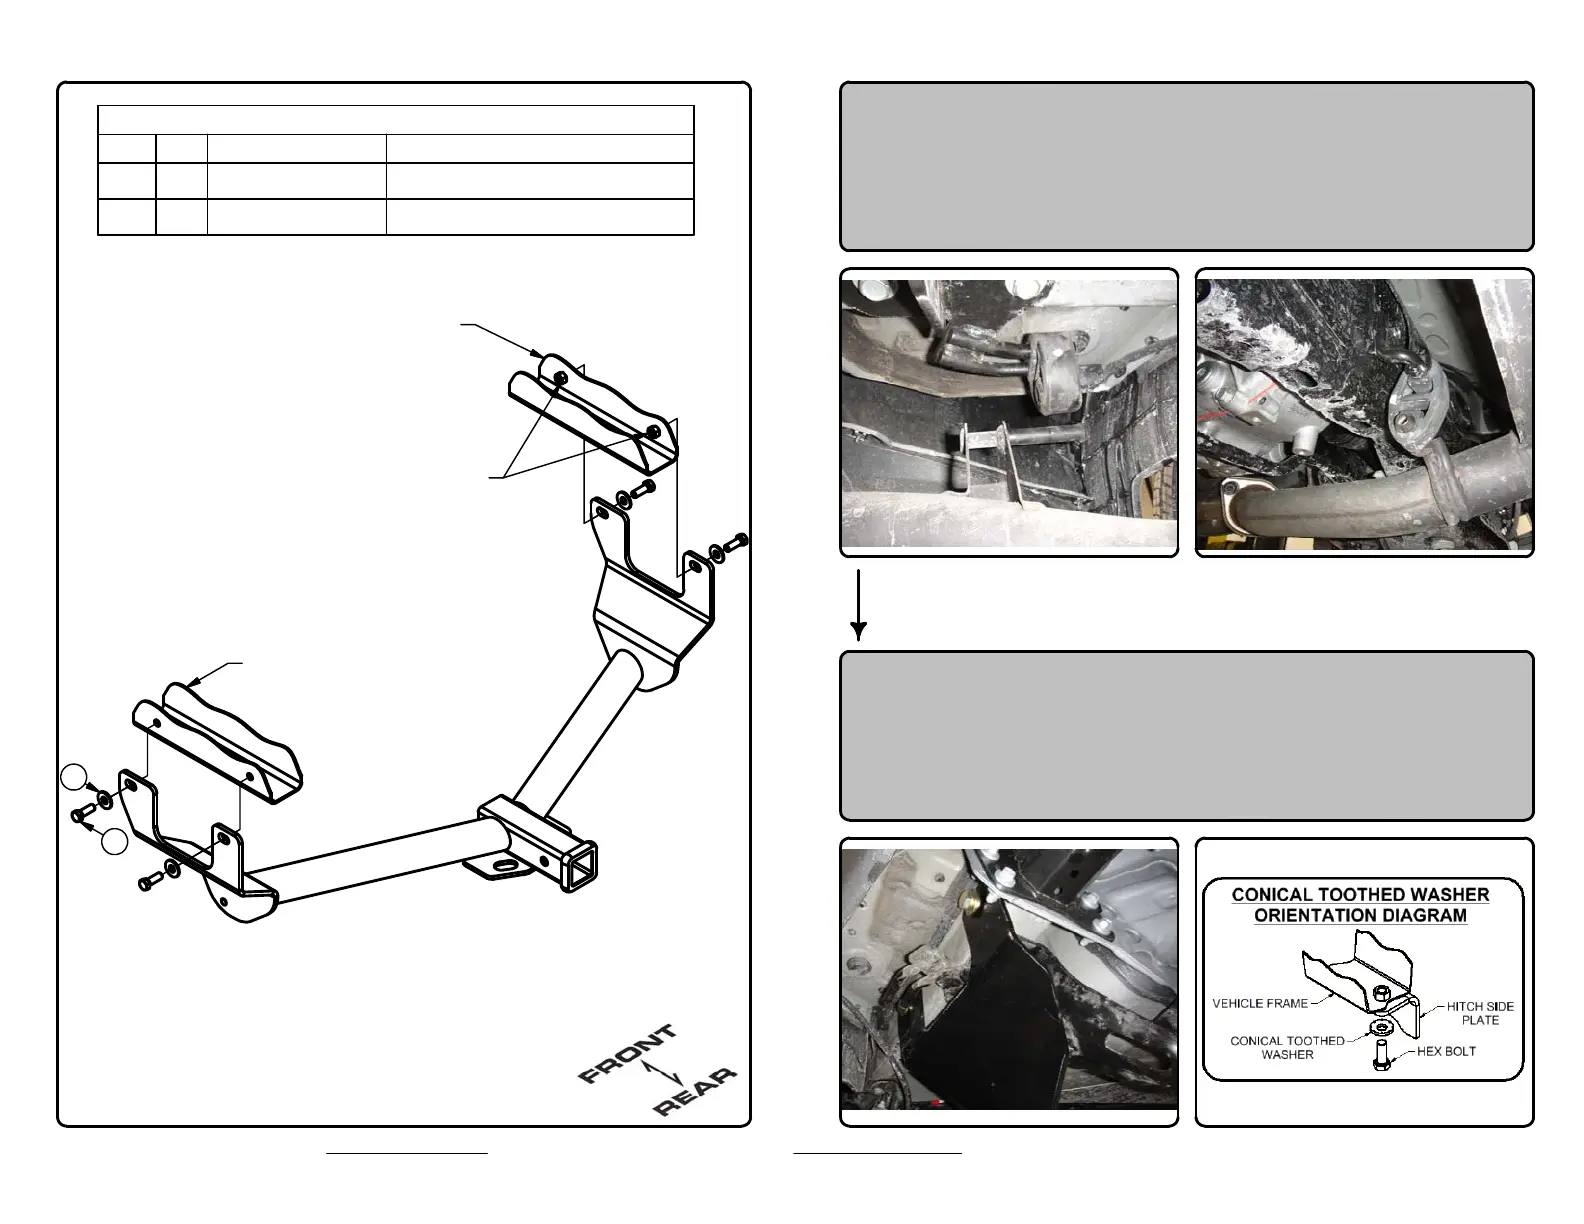
INSTALLATION WALKTHROUGH:
For more information log onto www.curtmfg.com, & for helpful towing tips log onto www.hitchinfo.com
Parts List
DESCRIPTION
PART NUMBER
QTY
ITEM
HHCS,M12x1.25,35,CL10.9,YZ10-10275
4
1
WASHER,S-CON,1/2,YZ
30-0014942
2
1
DRIVER SIDE
FRAME RAIL
PASSENGER SIDE
FRAME RAIL
EXISTING WELDNUTS
(BOTH SIDES)
1. Lower the exhaust by removing the (3) rearmost rubber
exhaust isolators. Note: Support the exhaust during
installation to prevent damage.
(See Rubber Isolator Removal Diagram.)
2. Raise hitch into position and loosely secure hitch with
M12 bolts and conical washers.




 To Next Page