EasyManua.ls Logo

Curt Manufacturing 18101 - User Manual

Curt Manufacturing 18101
2 pages
Print Icon
To Next Page IconTo Next Page
Loading...
ATV Cargo Carrier
Operation Manual & Safety Instruction
Model: 18101
Installation A
1. Unpack all parts and identify according to FIG.1&2 and PARTS LIST 1&2.
2. Position the rear flat rack (part no. 18100) so it is centered on the rear rack of the ATV.
a. The rack extension of the ATV may have to be removed before the basket can be installed.
3. Position any two sets of mount plates under the ATV rack so the mounting plates holes line
up with the holes of the rear flat rack. Insert M8*50 bolts (part no. DB-11) through washers
(part no. DB-10), rear flat rack, and into the mount plates. Leave the bolts loose until all the
bolts have been installed.
a. If the mount plates don't work, refer to the Assembly/Mounting Installation B on the back of
this sheet.
4. Align the rear flat rack evenly on the ATV rack and tighten all bolts.
5. Insert the plugs (part no. DB-6) into square tubes
PARTS LIST
ITEM Q'TY PART NO. DESCRIPTION ITEM Q'TY PART NO. DESCRIPTION
1 1 RF-1 REAR FLAT RACK 5 2 DB-8 MOUNT PLATE,5.4"
2 1 N/A ATV RACK 6 12 DB-11 BOLT M8*50
3 2 DB-9 MOUNT PLATE,3" 7 12 DB-10 FLAT WASHER,M8
4 2 DB-7 MOUNT PLATE,11.75" 8 2 DB-6 SQUARE TUBE PLUG
Question and Answer IconNeed help?

Do you have a question about the Curt Manufacturing 18101 and is the answer not in the manual?

Summary

Installation A: Rear Rack Mounting

Part Identification and Preparation

Unpack and identify all parts using figures and the parts list before installation.

Positioning the Rear Flat Rack

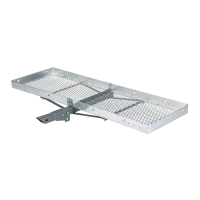
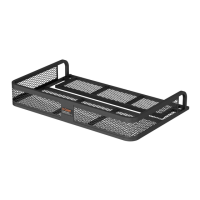
Center the rear flat rack on the ATV rack, removing extensions if needed.

Mounting Plate Attachment

Align and loosely attach mount plates using bolts, washers, and nuts to the rear flat rack.

Final Alignment and Tightening

Ensure even alignment of the rear flat rack and fully tighten all bolts.

Finishing Plug Insertion

Insert the plugs into the square tubes to complete the assembly.

Installation B: Frame Rail Mounting

Mount Bracket Positioning and Securing

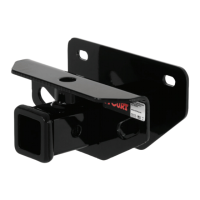
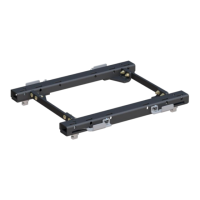
Position and secure mount brackets onto frame rails using bolts, nuts, and washers.

Even Spacing of Brackets

Space the mount brackets evenly across the rear flat rack for optimal support.

Final Plug Insertion

Insert plugs into square tubes to finish the installation.

Overview

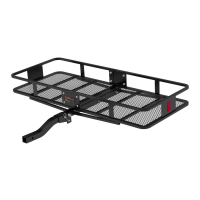
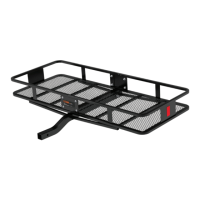
This document outlines the installation and operation of the CURT ATV Cargo Carrier, Model 18101. This cargo carrier is designed to attach to the rear rack of an All-Terrain Vehicle (ATV), providing additional storage capacity for transporting gear and equipment. The manual presents two distinct installation methods, Installation A and Installation B, to accommodate various ATV rack configurations.

Function Description:

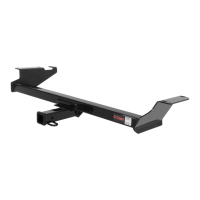
The primary function of the CURT ATV Cargo Carrier is to expand the carrying capacity of an ATV. It provides a stable and secure platform, referred to as a "rear flat rack," for transporting items that might not fit on the ATV's existing rack or require a more secure attachment point. This is particularly useful for outdoor activities such as hunting, fishing, camping, or utility tasks where extra equipment needs to be transported across varied terrain. The design aims to integrate seamlessly with the ATV's existing structure, ensuring stability and safety during operation.

Important Technical Specifications:

The core component of the cargo carrier is the "REAR FLAT RACK" (Part No. RF-1), which serves as the main platform. The installation process involves various mounting plates, bolts, washers, and nuts to secure this rack to the ATV.

For Installation A, the following components are specified:

  • REAR FLAT RACK (RF-1): The main cargo platform.
  • Mount Plates:
    • DB-8 (5.4")
    • DB-9 (3")
    • DB-7 (11.75") These plates are used to create a secure connection between the cargo carrier and the ATV rack.
  • Fasteners:
    • BOLT M8*50 (DB-11): These are the primary bolts for securing the rack to the mount plates.
    • FLAT WASHER, M8 (DB-10): Used with the M8 bolts to distribute pressure and prevent damage.
  • SQUARE TUBE PLUG (DB-6): These are inserted into the square tubes of the carrier, likely for aesthetic purposes and to prevent debris ingress.

For Installation B, which is an alternative mounting method, the specifications include:

  • REAR FLAT RACK (RF-1): The main cargo platform, identical to Installation A.
  • MOUNT BRACKET (DB-12): These brackets are used instead of the mount plates in Installation A, designed to secure the rack to the frame rail of both the rear flat rack and the ATV rack.
  • Fasteners:
    • BOLT M6*75 (DB-13): These are the primary bolts for securing the rack with the mount brackets.
    • FLAT WASHER M6 (DB-3): Used with the M6 bolts.
    • LOCK NUT M6 (DB-5): These nuts provide a secure, vibration-resistant fastening.
  • SQUARE TUBE PLUG (DB-6): Similar to Installation A, for finishing the square tubes.

The distinction between M8 and M6 bolts and their corresponding washers and nuts highlights the different fastening requirements and load distribution characteristics of the two installation methods. Installation A appears to use larger diameter bolts (M8), suggesting it might be designed for a more direct and robust attachment to certain ATV rack types, potentially utilizing existing holes or a wider surface area. Installation B uses smaller diameter bolts (M6) and specific mount brackets, indicating a design that might be more adaptable to various frame rail configurations, possibly where direct plate mounting is not feasible.

Usage Features:

The CURT ATV Cargo Carrier is designed for straightforward use once installed. Its primary feature is the expanded cargo space it provides.

  • Versatility: The existence of two distinct installation methods (A and B) suggests that the cargo carrier is designed to be compatible with a wide range of ATV models and rack designs. This adaptability is a key usage feature, ensuring that more users can benefit from the product.
  • Secure Attachment: Both installation methods emphasize secure fastening using multiple bolts, washers, and nuts (or lock nuts in Installation B). This ensures that the cargo carrier remains firmly attached to the ATV, even when traversing rough terrain or carrying heavy loads, minimizing the risk of detachment or shifting.
  • Ease of Installation (with options): While installation requires some manual effort, the step-by-step instructions aim to make the process manageable for the user. The option to choose between Installation A and B based on the ATV's specific rack configuration simplifies the process by providing tailored guidance.
  • Potential for Customization: The instructions for Installation A mention that "the rack extension of the ATV may have to be removed before the basket can be installed," indicating that users might need to make minor adjustments to their ATV for optimal fitment. This implies a degree of user involvement in customizing the setup.
  • Finishing Touches: The inclusion of "SQUARE TUBE PLUG" (DB-6) in both installations suggests attention to detail, providing a finished look and potentially protecting the internal structure of the tubes from dirt and moisture.

Maintenance Features:

The manual does not explicitly detail maintenance features, but based on the product's nature and components, general maintenance practices can be inferred:

  • Regular Fastener Checks: Given that the carrier is subjected to vibrations and stresses during ATV operation, it is crucial to regularly check the tightness of all bolts and nuts (M850, M675, M8 flat washers, M6 lock nuts). Loose fasteners can lead to instability, noise, or even detachment of the carrier.
  • Corrosion Prevention: The components are likely made of metal, and exposure to outdoor elements (rain, mud, dust) can lead to corrosion. While not explicitly stated, cleaning the carrier after use and inspecting for signs of rust would be a good practice. Applying a protective coating or rust inhibitor to exposed metal parts, especially the bolts and mounting brackets, could extend the product's lifespan.
  • Structural Integrity Inspection: Periodically inspect the "REAR FLAT RACK" (RF-1) and all mounting plates/brackets (DB-8, DB-9, DB-7, DB-12) for any signs of damage, cracks, bends, or deformation. Any structural compromise could affect the carrier's load-bearing capacity and safety.
  • Plug Integrity: The "SQUARE TUBE PLUG" (DB-6) should be checked to ensure they remain in place. If they fall out, the exposed tubes could accumulate dirt or water, potentially leading to internal corrosion or aesthetic issues.
  • Cleaning: Regular cleaning of the cargo carrier, especially after use in muddy or dusty conditions, will help maintain its appearance and prevent the buildup of corrosive materials.

In summary, the CURT ATV Cargo Carrier Model 18101 is a practical accessory designed to enhance the utility of an ATV by providing additional, secure storage space. Its key features include adaptable installation methods, robust fastening systems, and a design that integrates with the ATV's existing structure. While specific maintenance instructions are not provided, general care for outdoor equipment, particularly regular checks of fasteners and structural integrity, will ensure its longevity and safe operation.

Curt Manufacturing 18101 Specifications

General IconGeneral
BrandCurt Manufacturing
Model18101
CategoryAutomobile Accessories
LanguageEnglish

Related product manuals