CURTMFG.COM
•
PRODUCT SUPPORT: 877.287.8634
•
13200-INS-RA
•
05/13/2020
•
ECN7022
•
PAGE 3
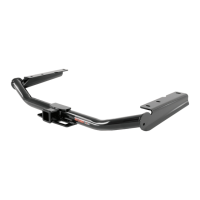
Step 1
Remove the seven fasteners securing the
driver-side underbody panel. After lowering
the underbody panel return it to the owner
or trim and reinstall in Step 5.
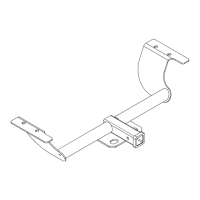
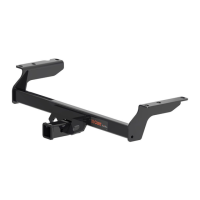
Step 4
Raise the hitch over the exhaust and align
the holes in the hitch with the weldnuts in
the frame. Secure the hitch to the frame
using the provided M12-1.25 hex bolts (#1)
and 1/2" conical-toothed washers (#2).
Torque all M12 hardware to 86 ft-lbs.
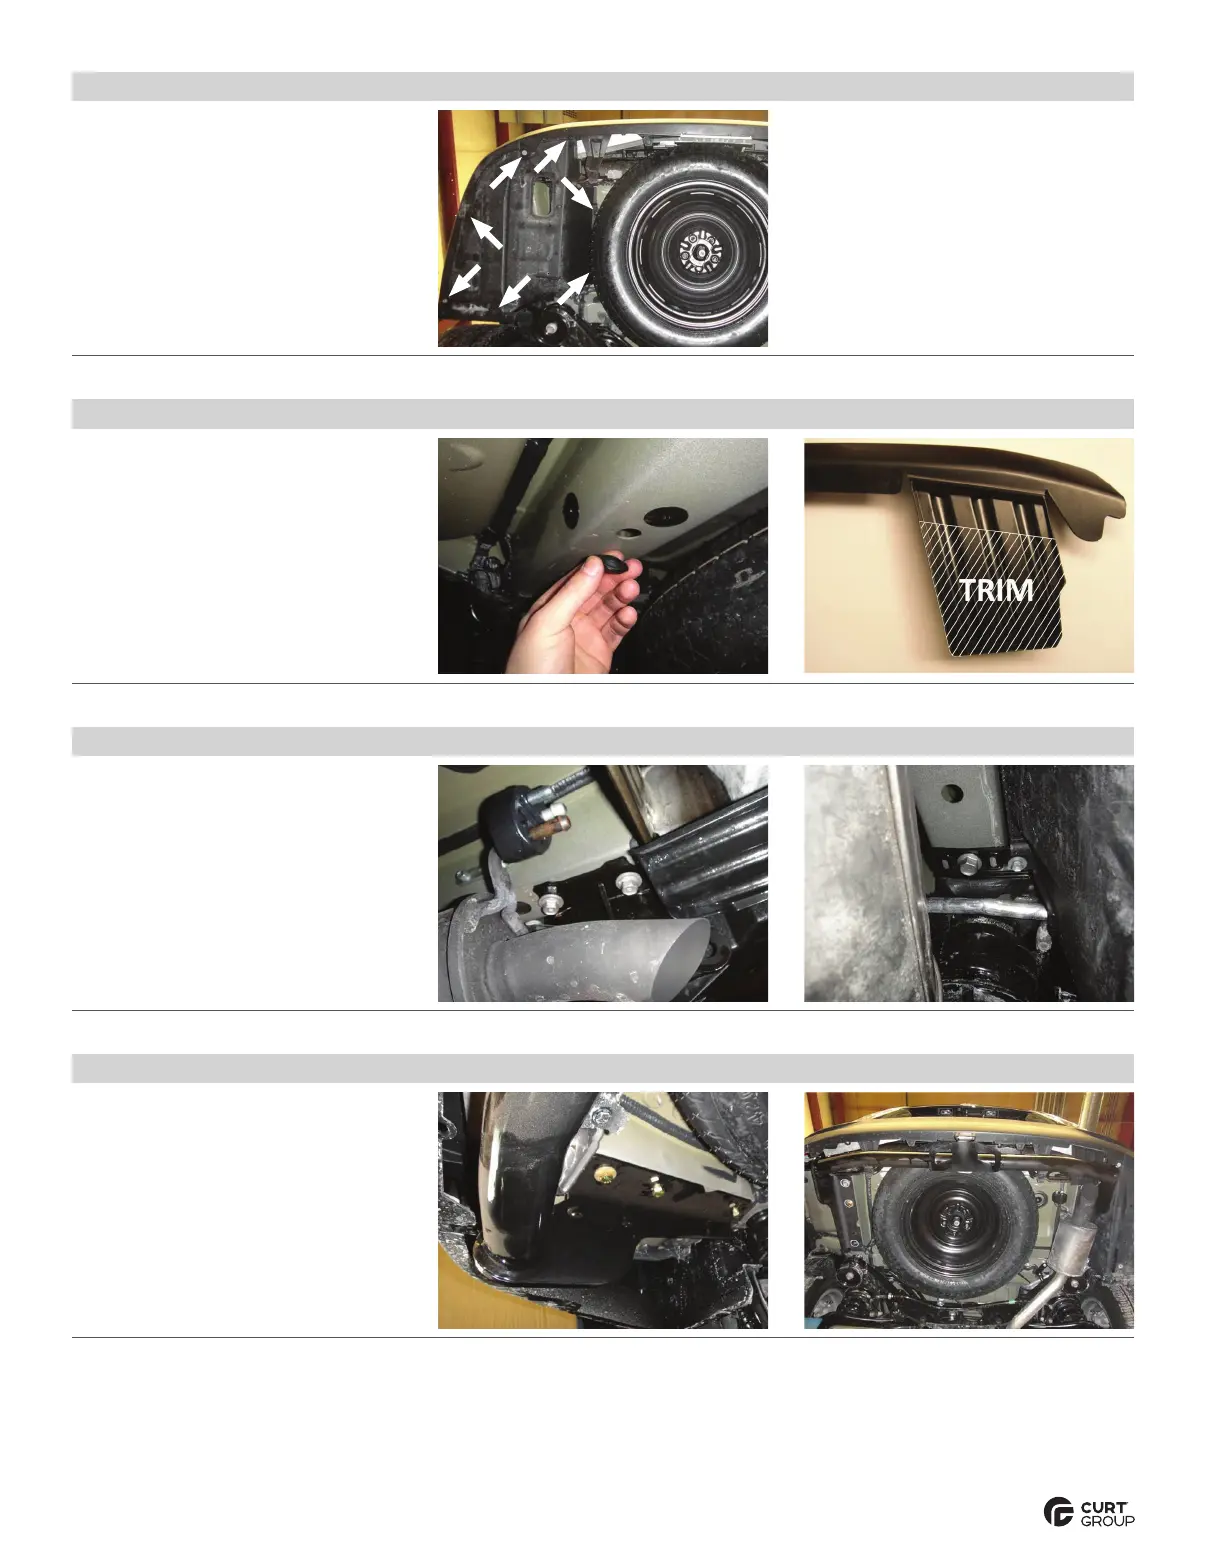
Step 2
Remove the two rubber plugs from each of the
frame rails. Unscrew the three threaded plastic
inserts from the driver-side frame rail. Return
the plugs and inserts to the owner.
Mark the lower fascia exhaust air
deflector 2" from the 'hinge'. Trim
as shown to allow room for the hitch.
Step 3
Remove the three M12 bolts securing
the metal fascia tab and tow loop to
the passenger-side frame rail.
Remove the single fascia screw and metal fascia
tab from the passenger-side underbody panel.
Return the fascia tab, tow loop
and fasteners to the owner.
2"