WARNING
BATT
BATTERY
USING
!
ON
POWER
LOAD
AVR
WARNING
LOAD
BATT
ON
POWER
AVR
BATTERY
USING
!
WARNING
LOAD
BATT
ON
POWER
AVR
BATTERY
USING
!
WARNING
BATT
USING
!
LOAD
ON
POWER
AVR
BATTERY
BATTERY
AVR
POWER
ON
LOAD
!
USING
BATT
WARNING
1. Remove the right side front panel.
2. Remove the three retaining screws for the cable protection cover and remove the cover.
3. Remove the two retaining screws from the cable connectors.
4. Disconnect the black and red cable.
5. Remove the four retaining screws holding the battery pack in place.
6. Remove the battery pack.
7. Install the new battery pack. Assemble the screws, cover, cable and front panel in the reverse order of the previous
steps. Charge the unit for 4-8 hours to ensure the UPS performs expected runtimes.
1. Remove the right side front panel.
2. Remove the three retaining screws for the cable protection cover and remove the cover.
3. Disconnect the black and red cable.
4. Remove the one retaining screw holding the battery pack in place.
5. Remove the battery pack.
6. Install the new battery pack. Assemble the screws, cover, cable and front panel in the reverse order of the previous
steps. Charge the unit for 4-8 hours to ensure the UPS performs expected runtimes.
1. Remove the right side front panel.
2. Remove the two retaining screws for the cable protection cover and remove the cover.
3. Disconnect the black and red cable.
4. Remove the four retaining screws holding the battery pack in place.
5. Remove the battery pack.
6. Install the new battery pack. Assemble the screws, cover, cable and front panel in the reverse order of the previous
steps. Charge the unit for 4-8 hours to ensure the UPS performs expected runtimes.
1. Remove the six retaining screws, and remove the front panel from the UPS.
2. Remove the two retaining screws for the cable protection cover and remove the cover.
3. Remove the two retaining screws from the cable connectors.
4. Disconnect the black and red cable.
5. Remove the three retaining screws holding the battery pack in place.
6. Remove the battery pack.
7. Install the new battery pack. Assemble the screws, cover, cable and front panel in the reverse order of the previous
steps. Charge the unit for 4-8 hours to ensure the UPS performs expected runtimes.
1. Remove the right side front panel.
2. Remove the two retaining screws for the cable protection cover and remove the cover.
3. Disconnect the black and red cable.
4. Remove the one retaining screw holding the battery pack in place.
5. Remove the battery pack.
6. Install the new battery pack. Assemble the screws, cover, cable and front panel in the reverse sequence of the
above steps. Charge the unit for 4-8 hours to ensure the UPS performs expected runtimes.
1. Remove the right side front panel.
2. Remove the three retaining screws for the cable protection cover and remove the cover.
3. Remove the two retaining screws from the cable connectors.
4. Disconnect the black and red cable.
5. Remove the four retaining screws holding the battery pack in place.
6. Remove the battery pack.
7. Install the new battery pack. Assemble the screws, cover, cable and front panel in the reverse order of the previous
steps. Charge the unit for 4-8 hours to ensure the UPS performs expected runtimes.
4
1 2 3
5 6
1 2
4 5
3
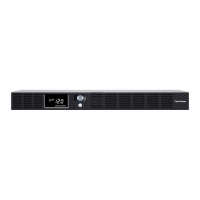
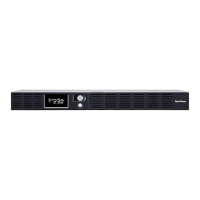
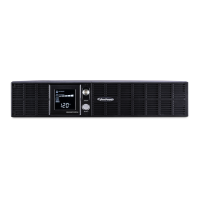
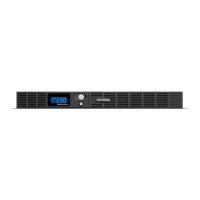
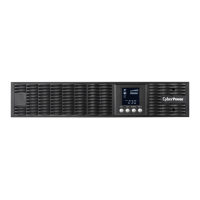
Smart APP Intelligent LCD Series
MODEL: OR500LCDRM1U, OR700LCDRM1U, OR1000LCDRM1U, OR1500LCDRM1U
MODEL: OR1500LCDRM1U, OR2200LCDRM2U, OR1500LCDRTXL2U, OR2200LCDRTXL2U
1 2
4 5
3
1 2
4 5
3
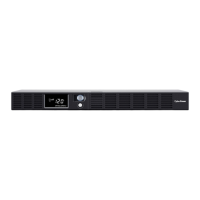
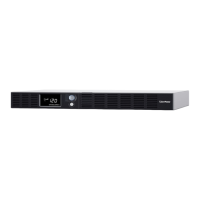
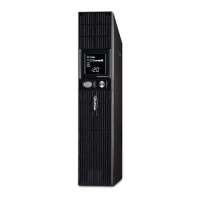
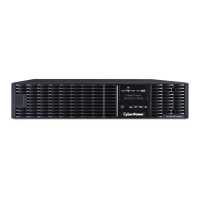
Smart APP SINEWAVE Series
MODEL: PR750LCDRM1U, PR1000LCDRM1U
MODEL: PR1500SWRM2U, PR2200SWRM2U
654
1 2 3
21
!
3
4 5 6
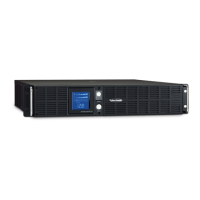
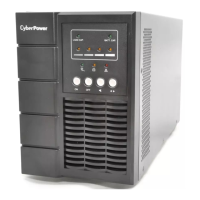
Smart APP SINEWAVE Series
MODEL: PR1000LCDRT2U, PR1000LCDRTXL2U, PR1500LCDRT2U, PR2200LCDRT2U,
PR3000SWRM2U
MODEL: PR1000LCDRTXL2Ua, PR1500LCDRTXL2U, PR2200LCDRTXL2U, PR3000LCDRT2U,
PR3000LCDRTXL2U