Cable routing
1. Place a small amount of Loctite® on BHSCS and inside threads of ball stop.
2. Secure ball stop to cable using a 1/8” Allen wrench.
3. Reconnect handle, pulley, and cable to adjusting posts on both sides.
4. Position pulley mount parallel to the top weight.
5. Pull down on pulley mount until cable is tight.
6. Verify cable is still routed through all pulleys.
7. Attach pulley mount to lifting post with spiral pin using a hammer and 3/16” pin punch.
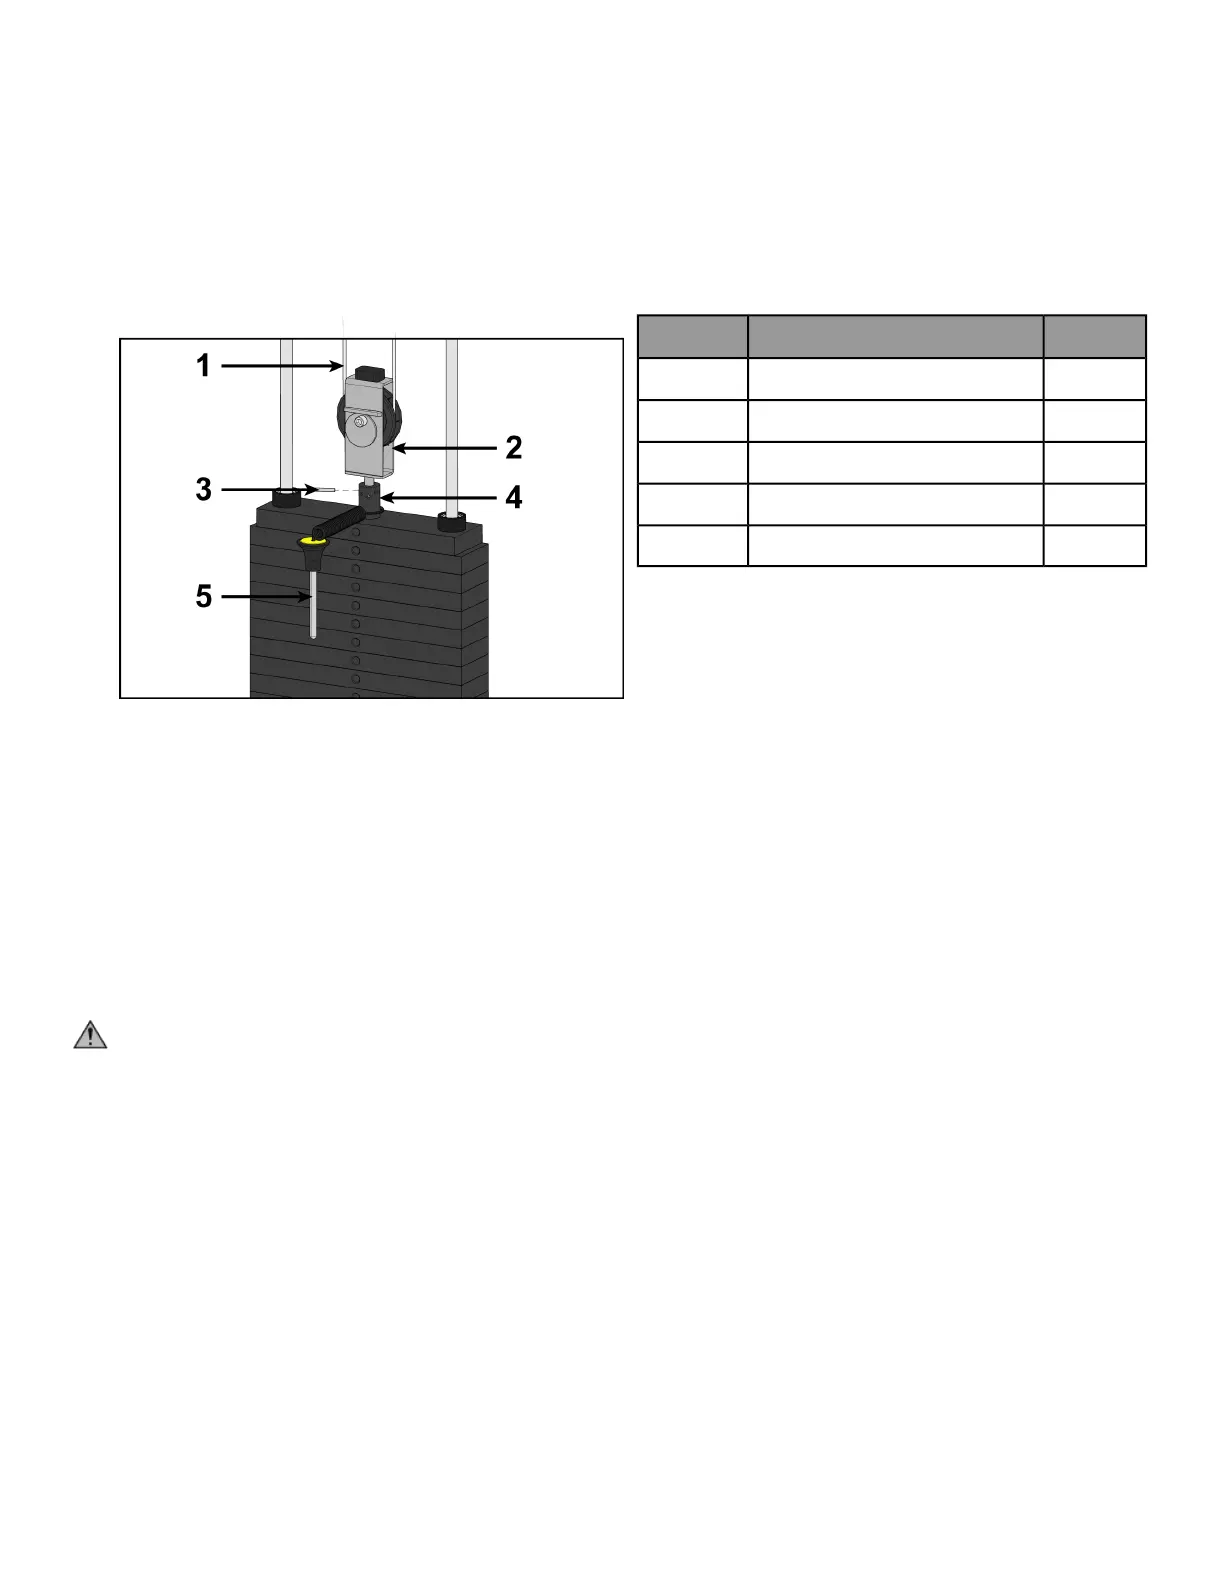
QtyDescriptionItem
1Cable1
1Pulley bracket2
1Roll pin3
1Top weight connector4
1Weight selector pin5
8. Lift top weight up and down simulating normal operation (without selecting any resistance).
9. Verify the cable is moving smoothly.
Install back panel
1. Place back panel into position.
2. Secure top cap in place using two BHSCS and 7/32” Allen wrench.
Securely anchor machine to floor
Owner should not allow equipment to be used until it is properly anchored as described below.
WARNING: Anchoring equipment:
• To maximize stability and eliminate rocking, tipping, or falling over, equipment must be anchored to a
solid, level surface, utilizing all anchoring holes provided.
• Fasteners must have a minimum of 500 lbs. tensile capacity. Cybex recommends .3/8” grade 2 bolts or
better. A minimum pull force of 220 lbs/100 kgs is required for each anchor position.
• If leg frames do not contact surface, DO NOT pull down with anchors. Shim any leg or frame not in contact
with surface using flat washers.
• Due to the wide variation of flooring on which machines may be anchored or installed, consult with a
qualified and licensed contractor to ensure proper anchoring and installation.
Verify proper operation
Page 16 of 27
 Loading...