14
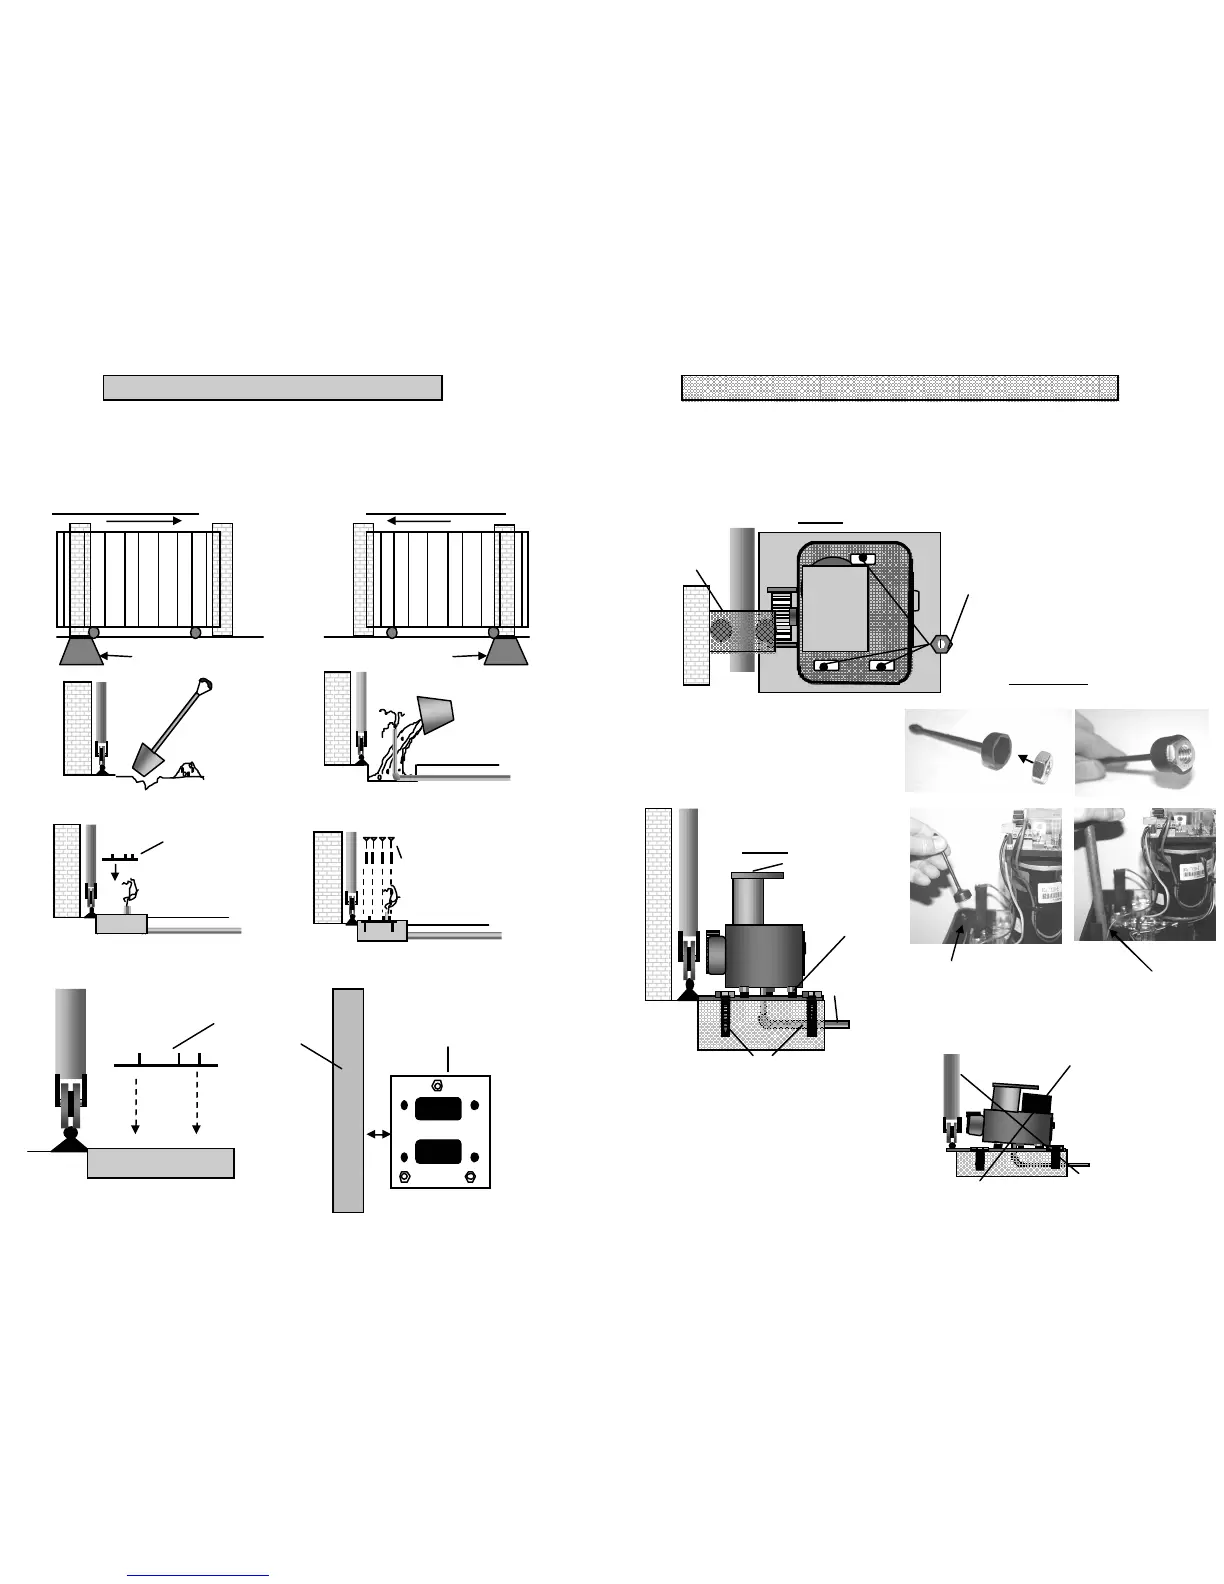
It is very important that the motor is mounted on a firm foundation that can not move or become loose over time. The
foundation should be constructed from concrete. The size of the plinth should be about 300 x 300 mm square and about
200mm deep. The foundation plate supplied with the motor must be securely mounted to the concrete using coach
screws and plugs. The foundation plate can also be welded to the gate rail if need be. The concrete should be allowed
sufficient time to set before the motor is mounted onto the plate.
Allow concrete to set and then place the
foundation plate onto the concrete plinth
3
Foundation plate
Place concrete plinth here
Place concrete plinth here
For a gate closing to the right For a gate closing to the left
2
Place the conduit in the correct position before filling the
hole with concrete. Flexible conduit may also be used.
4
Trim the conduit and the cable to the correct length
before placing the motor onto the foundation plate.
Use 8 mm coach screws to
mount the foundation plate to
the concrete
Dig a hole about 300mm square
1
Top view
Foundation plate
Gate
Side view
Foundation plate
35mm
ANCHORING THE MOTOR
15
When anchoring the motor it is important to ensure that the following points are checked.
1. The electrical cable is in place.
2. The concrete is fully set.
3. The motor foundation mountings are secure and can not m ove or become loose.
4. The motor should be set level and parallel to the gate.
5. The motor must be set above the flood level or if this is not possible, a flood proof wall should be constructed
around the m otor.
After placing the motor onto the three jack-up
bolts, place the three clamping nuts and washers
over the bolts to clamp the motor in place. Use the
Nut Applicator as shown below.
Top view
Anti-lift device and
Rollers
P.C.B.
Conduit
Jack-up nuts
for adj usting the
motor height.
Concrete plinth
8mm coach screws in plugs
P.C. Board
Side view
Ensure that the m otor is mounted level
SECURING THE MOTOR TO THE FOUNDATION PLATE
Nut Applicator.
Insert the nut into the applicator
Place the nut on the bolt
Tighten the nut with a spanner.