8D-Link DCH-S161 User Manual
Section 2 - Installation
Getting Started
To mount your water on a wall, please follow the steps below. It is recommended that you congure the water sensor prior to mounting.
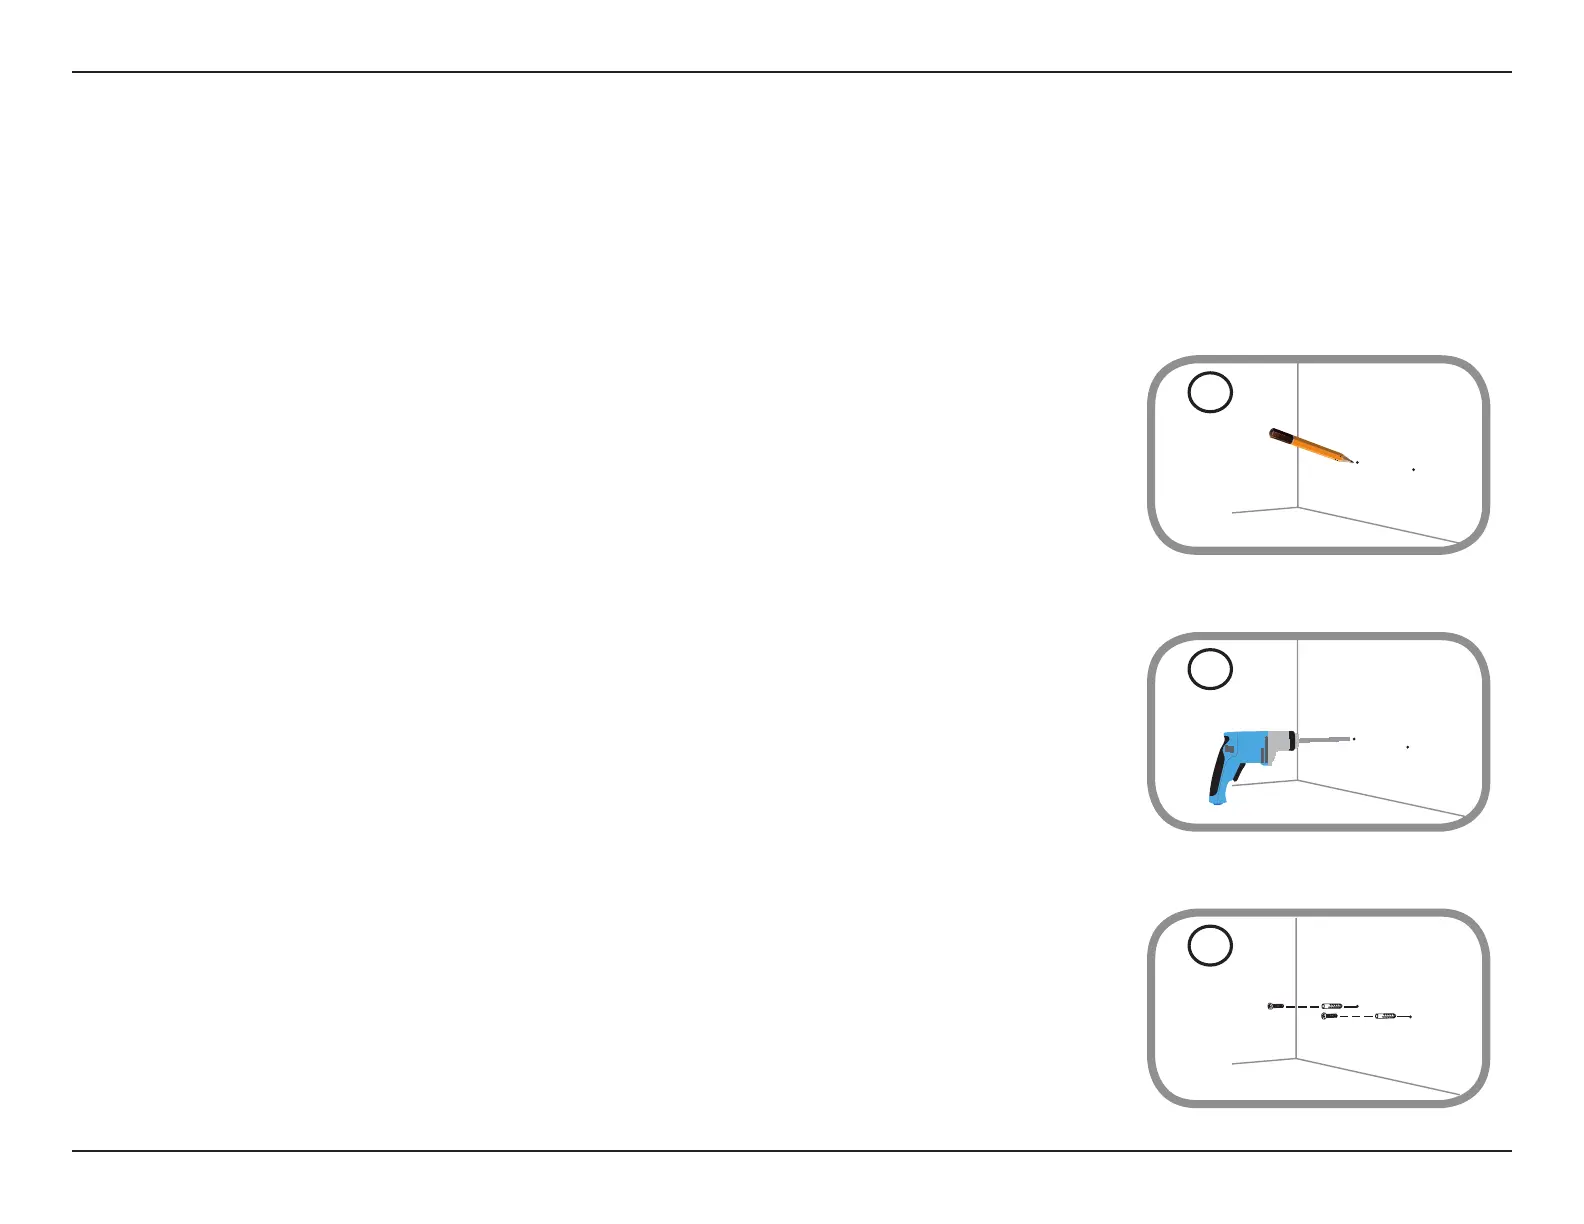
Step 1
Identify and mark the location where you want to install the bracket, ensuring that the water-
sensing probe cable length is long enough to reach the desired location where you want to
detect the presence of water.
Note: You can extend the cable length by using a 3.5 mm (0.125 in) stereo audio extension cable.
Step 2
Using a 6 mm drill bit, drill two holes that are 2.5 cm deep over the marks. For a plaster, drywall, or
concrete wall, insert plastic anchors to support the screws rst.
Step 3
Twist the screws into the wall or anchors, making sure to leave enough clearance between the
screw head and the wall.
1
Mounting the Water Sensor
2
3