
R
ronald30Aug 15, 2025
What to do if my Dahua Technology LM49-S400 has no image or sound?
- KKelli AndersonAug 15, 2025
If your Dahua Technology Monitor is showing no image or sound, try switching to another channel or input to resolve the issue.
What to do if my Dahua Technology LM49-S400 has no image or sound?
If your Dahua Technology Monitor is showing no image or sound, try switching to another channel or input to resolve the issue.
Why is the image on my Dahua Technology Monitor inferior but the sound is normal?
If you're experiencing a poor image quality but the sound is normal on your Dahua Technology Monitor, the first step is to check the video signal line to ensure it's properly connected.
How to fix inferior sound on Dahua Technology LM49-S400 with normal image?
If the sound quality is poor while the image is normal on your Dahua Technology Monitor, check if the audio signal line is properly connected.
Why does my Dahua Technology LM49-S400 have a poor signal?
A poor signal on your Dahua Technology Monitor might be due to interference from other electric appliances. Try to identify and remove any potential sources of interference.
What to do if there is rung stripe in image on Dahua Technology LM49-S400 Monitor?
If you notice rung stripes in the image on your Dahua Technology Monitor, verify that the system is set up properly.
How to fix a vague image on Dahua Technology LM49-S400 Monitor?
If the image on your Dahua Technology Monitor appears vague, try adjusting the fine tuning settings.
How to remove interfering lines in image on Dahua Technology Monitor?
To address interfering lines in the image on your Dahua Technology Monitor, adjust the contrast ratio setting.
How to improve inferior color on Dahua Technology LM49-S400 Monitor?
To improve inferior color display on your Dahua Technology Monitor, adjust the color setting.
How to fix twisty image on Dahua Technology LM49-S400 Monitor?
If the image on your Dahua Technology Monitor appears twisty, try adjusting the color setting.
Crucial safety precautions for using and maintaining the monitor to prevent injury or property damage.
Guidelines for product placement and environmental conditions to ensure optimal performance and longevity.
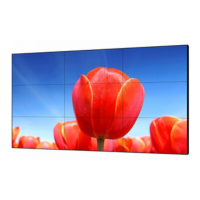
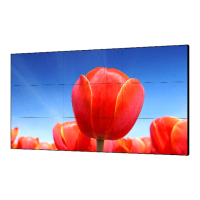
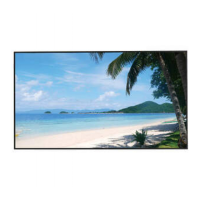
Visual description of the monitor's physical design and components.
Key technical specifications and advantages of the UHD LED monitor, such as image quality and response time.
Adjust color temperature, aspect ratio, noise reduction, and picture mode for optimal visual output.
Configure balance, auto volume calibration, surround sound, EQ, and sound mode for audio preferences.
Customize OSD language, factory reset, software updates, OSD transparency, and auto sleep features.
Adjust H-position, V-position, clock, phase, and auto-adjust for precise image alignment.
Select the input source, such as VGA, HDMI, or other available channels.
Instructions on safely cleaning the monitor housing and screen using appropriate materials.
Guide to diagnose and resolve common issues with the monitor using a problem-solution chart.
This document is a User Manual for a Dahua UHD LED Monitor, providing comprehensive information on its features, operation, maintenance, and troubleshooting.
The Dahua UHD LED Monitor is designed to display high-resolution images and video, offering a clear and vibrant visual experience. It supports various input signals and includes features for image and sound adjustment, making it suitable for a range of applications. The monitor is equipped with a top-ranking video processing chip to ensure optimal performance and image quality.
The monitor offers a user-friendly interface with a main menu accessible via buttons on the bezel. This menu allows users to navigate through various sub-menus to customize settings related to picture, sound, and general options.
Main Menu Navigation: The main menu is activated by pressing the menu button on the bottom left of the bezel. It comprises several sub-menus: PC Menu, Picture Menu, Audio Menu, OSD Menu, Function Menu, and Geometry Menu. Navigation within these menus is intuitive, using arrow buttons to select items and adjust values.
Signal Channel Selection: The "Source" button allows users to display all available signal channel menus, enabling them to select the desired input source (e.g., VGA, HDMI, DP, BNC).
Picture Menu: This menu provides extensive controls for image customization:
Sound Menu: The sound menu offers controls for audio output:
Option Menu: This menu contains general settings for the monitor's operation:
Screen Menu: The screen menu is crucial for optimizing the display's position and timing:
External Connections: The monitor provides a variety of I/O interfaces for connecting to external devices, including:
The manual provides detailed safety warnings and notes to ensure the product's longevity and safe operation.
Safety Warnings:
Notes:
Cleaning the Product:
Troubleshooting: The manual includes a troubleshooting chart to help diagnose common issues before contacting service staff. It lists problems such as "No image or sound," "Inferior sound," "Poor signal," "Vague image," "Double image," "Interfering lines," "Twisty image," "Rung stripe," "Image vertically scrolls," "Inferior color," and "No color." For each problem, a series of potential fixes are suggested, including:
Warranty Information: The product comes with a warranty that covers manufacturing defects for a specified period. The warranty period for operation is twelve months from the purchase date, covering manual fees and spare parts (excluding the panel). After the initial twelve months, an extended three-year warranty for reparation is offered, though spare parts fees may apply. The warranty does not cover damage from wrong operation, natural disasters, unauthorized repairs, altered serial numbers, or non-compliance with provided directions. For transportation during repairs, users are advised to use original, quake-proof packing and include the warranty card.
| Screen Size | 49 inches |
|---|---|
| Resolution | 3840 x 1080 |
| Aspect Ratio | 32:9 |
| Response Time | 8 ms |
| Contrast Ratio | 3000:1 |
| Connectivity | HDMI, DisplayPort, USB |
| Refresh Rate | 60 Hz |
| Viewing Angle | 178°(H)/178°(V) |
| Operating Temperature | 0°C to 40°C |
| Storage Temperature | -20°C to 60°C |