EasyManuals Logo

Dahua XVR SERIES User Manual

Dahua XVR SERIES
14 pages
To Next Page IconTo Next Page
To Previous Page IconTo Previous Page
Page #6 background imageLoading...
Page #6 background image
2
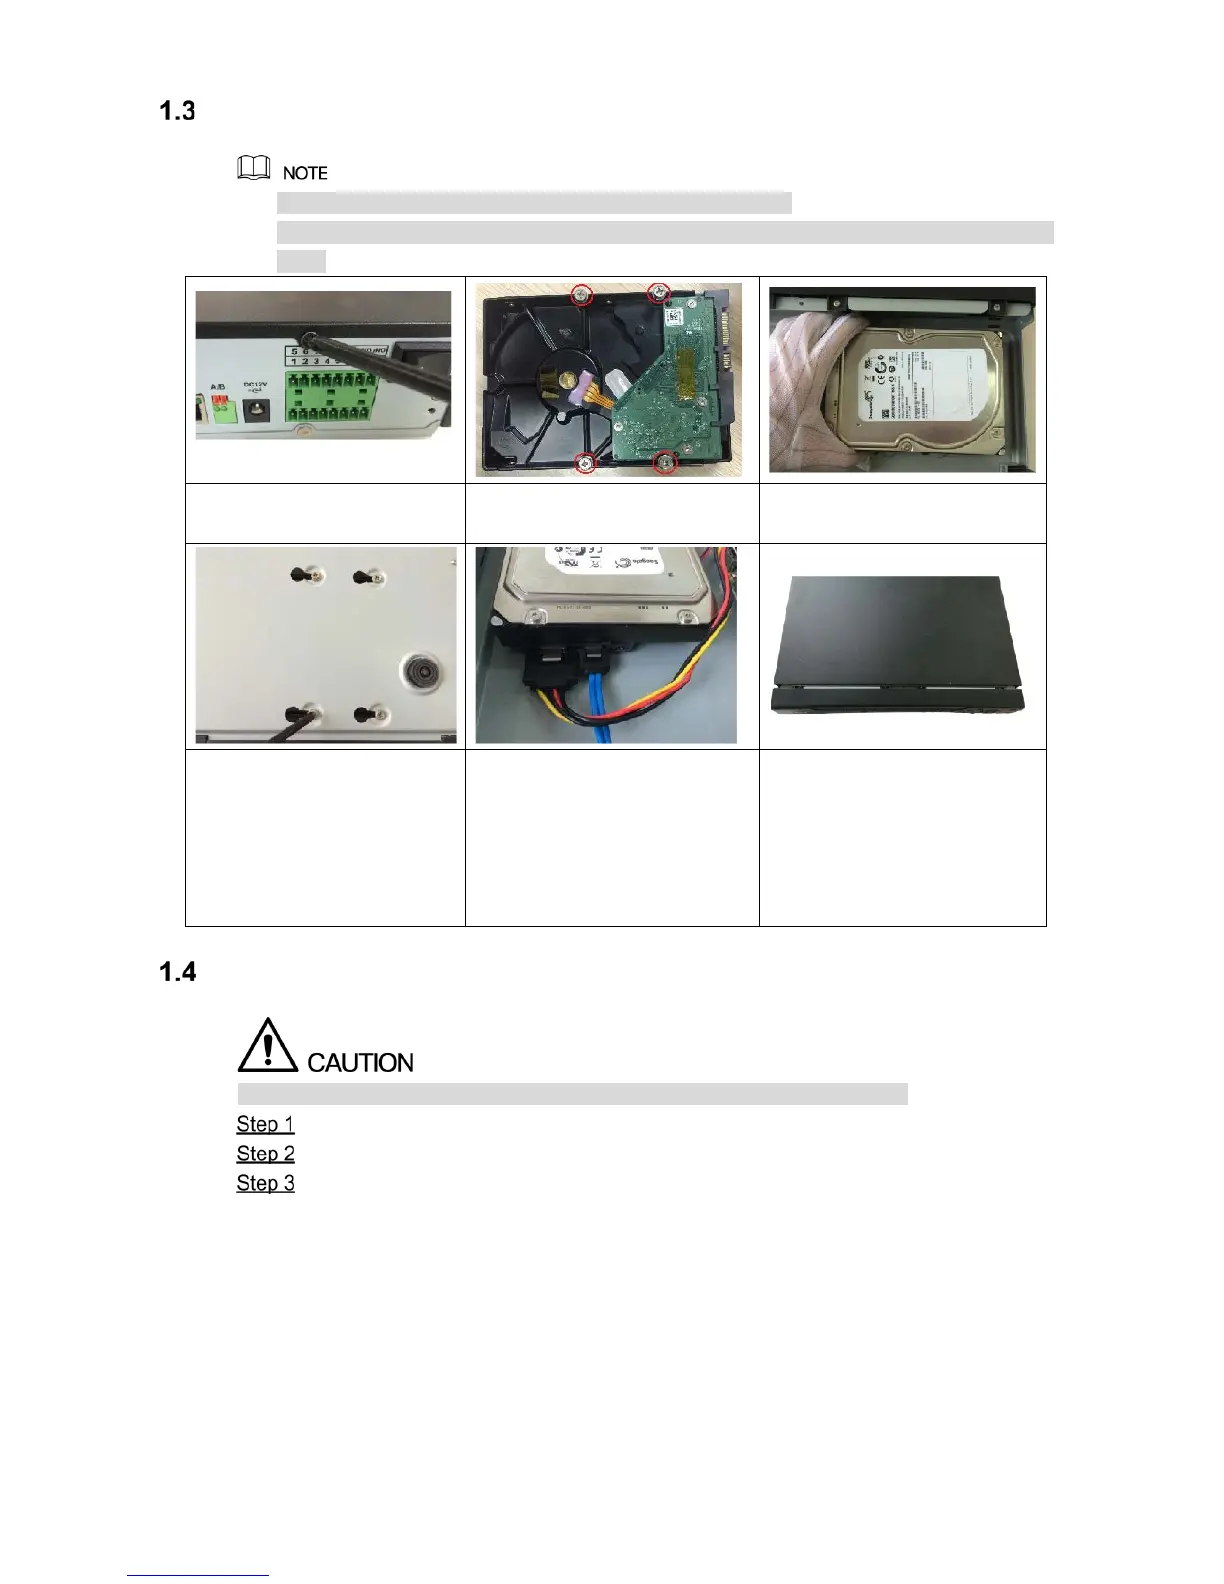
Installing Hard Disk Drive (HDD)
Please use the recommended HDD from the manufacturer.
Shut down the DVR and unplug the power cable before opening the cover to replace the
HDD.
1. Remove the screws to take
off the cover.
2. Fix the screws onto the HDD
but do not fasten them.
3. Put the HDD into the DVR.
4. Turn the DVR to see the
back side of it. Aim the
screws of the HDD at the
holes on the back of the
DVR, and then fasten the
screws.
5. Use the HDD cable and
power cable to connect HDD
and mainboard.
6. Put back the cover and
fasten the screws.
Booting up
Ensure the input voltage corresponds to the power requirement of the DVR.
Connect the DVR to a display.
Plug in the power cable to the DVR.
Press the power button to turn on the DVR. The power indicator glows. On the
connected display, the live view screen is displayed.

Questions and Answers:

Question and Answer IconNeed help?

Do you have a question about the Dahua XVR SERIES and is the answer not in the manual?

Dahua XVR SERIES Specifications

General IconGeneral
Video CompressionH.265; H.264
Audio CompressionG.711A; G.711U
Backup ModeUSB, Network
Network ProtocolHTTP; DHCP; DNS; DDNS; SMTP; NTP; UPnP; SNMP
CategoryDigital Video Recorder
SeriesXVR
Video InputAnalog
Video OutputHDMI, VGA
Recording ResolutionUp to 8MP
Network InterfaceRJ45 10M/100M
Operating Temperature-10°C to +55°C (+14°F to +131°F)
Operating Humidity10% to 90%
Hard Drive CapacityUp to 10TB

Related product manuals