7 | Piping installation
Installer reference guide
44
2(A)MXM40+50 + 2(A)MXF40+50
R32 Split series
4P600463-2C – 2020.08
2 Check for leaks by applying the bubble test solution to all connections.
3 Discharge all nitrogen gas.
7.3.4 To perform vacuum drying
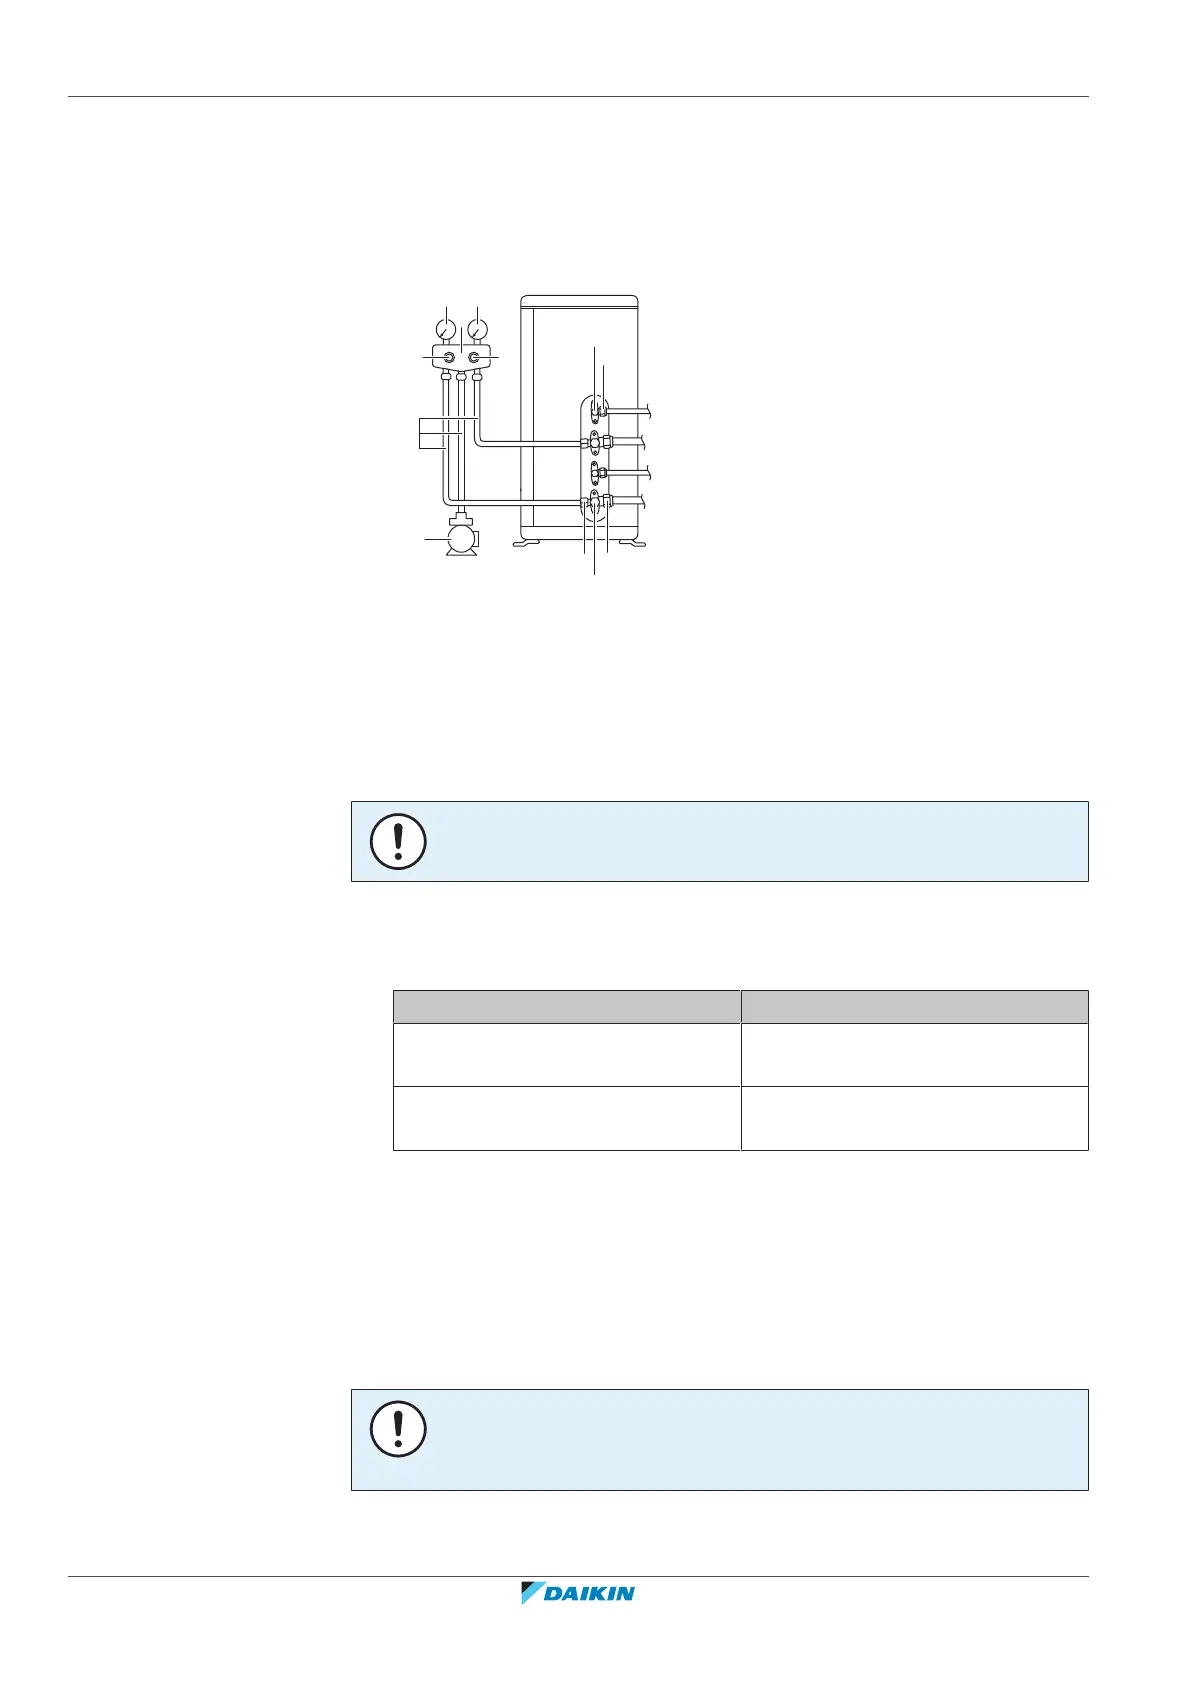
Connect the vacuum pump and manifold as follows:
a Low pressure gauge
b Gauge manifold
c High pressure gauge
d Low-pressure valve (Lo)
e High-pressure valve (Hi)
f Charging hoses
g Vacuum pump
h Valve caps
i Service port
j Gas stop valve
k Liquid stop valve
NOTICE
Connect the vacuum pump to both the service ports of the gas stop valves.
1 Vacuum the system until the pressure on the manifold indicates −0.1 MPa
(−1bar).
2 Leave as is for 4-5minutes and check the pressure:
If the pressure… Then…
Does not change There is no moisture in the system.
This procedure is finished.
Increases There is moisture in the system. Go
to the next step.
3 Vacuum the system for at least 2hours to a manifold pressure of −0.1MPa
(−1bar).
4 After turning the pump OFF, check the pressure for at least 1hour.
5 If you do NOT reach the target vacuum or CANNOT maintain the vacuum for
1hour, do the following:
▪ Check for leaks again.
▪ Perform vacuum drying again.
NOTICE
Be sure to open the gas stop valve after piping installation and vacuuming. Running
the system with the valve closed, the compressor may break down.



 To Next Page