13 English
Wiring
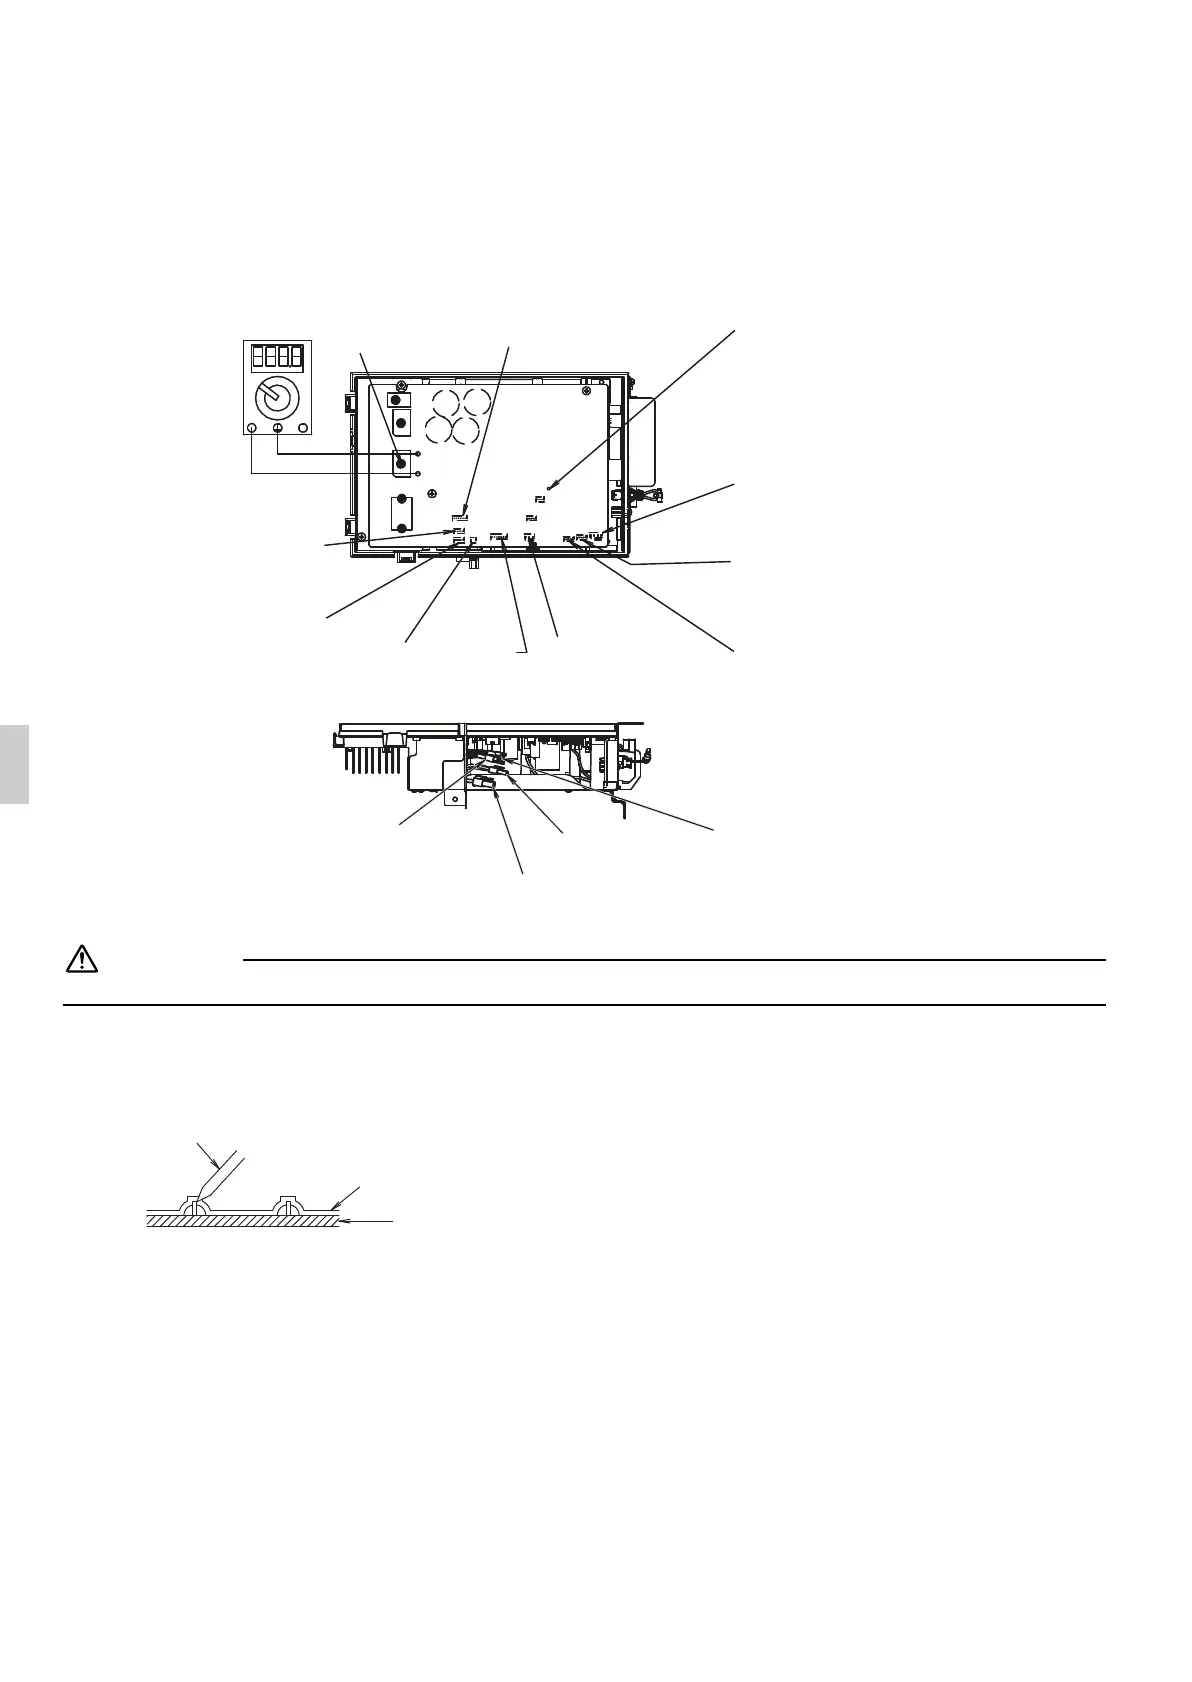
1. Safe handling of high voltage part
• Turn the circuit breaker off and wait for 10 minutes before servicing.
1-1.
To prevent electrical shock
• Use tester to check that the voltage between ‘+’ and ‘-’ is 50V or less. (Refer to figure below for the locations to check.)
• The surface of the test points (+, -) may be covered with coating.
• Be sure to make firm contact between tester probes and test points.
All circuitry including thermistor is subject to power supply voltage.
2. Reconnecting after check
• When reconnecting, be sure to reconnect everything the same way as it was before.
LED A
MULTIMETER (DC,
VOLTAGE RANGE)
DB1
ACDC
DC
-
+
S21 (RED) (ROOM B)
ELECTRONIC EXPANSION
VALVE COIL
S20 (WHITE) (ROOM A)
ELECTRONIC EXPANSION
VALVE COIL
S91 (RED) (L
THERMISTOR
LEAD WIRE
S40 OL LEAD WIRE HIGH
PRESSURE SWITCH
S70 FAN
MOTOR
LEAD WIRE
S80 (WHITE) FOUR
WAY VALVE LEAD
WIRE
S90 THERMISTOR
S92 (
THERMISTOR
LEAD WIRE
S99 HEATING
LOCK
COMPRESSOR
LEAD WIRE
REACTOR
LEAD WIRE
(RED)
(LIQUID)
THERMISTOR
LEAD WIRE
(S91)
(WHITE) (GAS)
THERMISTOR
LEAD WIRE
(S92)
TESTER PROBE
COATING
PCB
3PEN423316-4P.book Page 13 Wednesday, January 16, 2019 11:27 AM
 Loading...