Do you have a question about the Daikin 3MKD75BVMA8 and is the answer not in the manual?
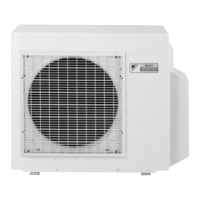
Guidance on identifying unit appearance and removing external panels like top, front, and piping cover.
Procedure for disconnecting connecting wires from the electrical box and terminal board.
Steps to remove the terminal board fixing screw and wire fixing plate.
Details on opening the terminal board and disconnecting various harness connectors.
Instructions for removing reactor lead wires and the main electrical box.
Procedure for removing the drip proof cover and disconnecting the fan motor connector.
Final steps to lift and dismount the electrical box.
Steps to remove screws, hooks, and disconnect connectors for PCBs.
Detailed procedure for disconnecting various connectors from the main PCB.
Instructions for removing the service monitor PCB and the inverter PCB.
Procedure for removing the outdoor fan and fan motor mount screws.
Disconnecting fan motor lead wires and removing the fan motor.
Steps to remove screws from the right side panel and partition plate.
Guidance on carefully removing various sound blankets from the unit.
Procedure for removing four way valve, defrost solenoid valve, and expansion valve coils.
Instructions for releasing the fixture and removing the discharge pipe thermistor.
Procedure for removing thermistors and the wire harness.
Steps to remove valve coils and disconnect brazed points of the four way valve.
Important cautions for restoration, brazing, and handling refrigerant.
Procedure for disconnecting brazed points and removing the defrost solenoid valve.
Steps to remove putty and heat/disconnect brazed parts for distributor removal.
Important notes on pipe cutting, handling, and brazing flame protection.
Procedure for removing the terminal cover and disconnecting compressor lead wires.
Steps to remove putty and nuts securing the compressor.
Procedure for disconnecting brazed parts and removing the compressor.
Safety warnings regarding heat, refrigerant leaks, and compressor oil.
| Capacity | 7.5 kW |
|---|---|
| Cooling Capacity | 7.5 kW |
| Refrigerant | R32 |
| Power Supply | 220-240V, 50Hz |
| Operating Temperature (Heating) | -15°C to 18 °C |