EasyManua.ls Logo

Daikin 3MKS75EVMA User Manual

Daikin 3MKS75EVMA
32 pages
To Next Page IconTo Next Page
Page #1 background imageLoading...
Page #1 background image
REMOVAL
PROCEDURE
SERVICE MANUAL
6.8/7.5 kW Class
18000 Btu/h Class
Outdoor Unit
Inverter
Multi Type
Si121175
Question and Answer IconNeed help?

Do you have a question about the Daikin 3MKS75EVMA and is the answer not in the manual?

Daikin 3MKS75EVMA Specifications

General IconGeneral
BrandDaikin
Model3MKS75EVMA
CategoryInverter
LanguageEnglish

Summary

Electrical Box Removal - Pattern 1

Disconnecting Wiring and Terminal Board Connections

Procedure for disconnecting wires and matching colors to terminal board connections.

Disconnecting Electronic Expansion Valve Connectors

Procedure to disconnect S20, S21, and S22 connectors for electronic expansion valve coils.

Disconnecting Four Way Valve Coil Connector

Step to remove the connector for the four way valve coil [S80].

Disconnecting Thermistor and Protector Connectors

Disconnecting connectors for thermistors [S90, S92, S93] and overload protector [S40].

Removing the Main Electrical Box

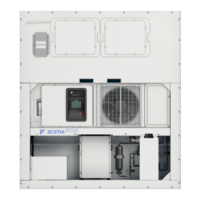
Procedure to remove the electrical box by unscrewing it from multiple sides.

Dismounting the Electrical Box Assembly

Final step to lift up and dismount the electrical box.

Electrical Box Removal - Pattern 2

Removing Electrical Box Side Screws (Pattern 2)

Steps to remove screws on the right and front sides of the electrical box.

Removing the Electrical Box Unit (Pattern 2)

Final step to remove the electrical box unit.

PCB Removal - Pattern 1

Removing Service Monitor PCB Assembly

Step to release hooks and remove the service monitor PCB assembly.

Removing the Inverter PCB (MID2)

Procedure to remove the inverter PCB (MID2) by unscrewing it.

PCB Removal - Pattern 2

Removing Service Monitor PCB Assembly (Pattern 2)

Step to unfasten hooks and remove the service monitor PCB assembly.

Removing the Inverter PCB (MID2) (Pattern 2)

Procedure to remove the inverter PCB (MID2) by unscrewing it.

Fan Motor Removal Procedure

Disconnecting Fan Motor Wire and Removing Motor

Steps to release lead wire from clamps and remove the fan motor.

Four Way Valve and Defrost Solenoid Valve Removal

Heating and Disconnecting Four Way Valve Brazed Joints

Procedure to heat and disconnect brazed points of the four way valve.

Disconnecting and Removing the Four Way Valve

Steps to disconnect points (b), (c), (d) and remove the four way valve.

Disconnecting and Removing Defrost Solenoid Valve

Procedure to disconnect brazed points (e), (f) and remove the defrost solenoid valve.

Distributor Removal Procedure

Heating and Disconnecting Distributor Piping

Procedure to heat and disconnect five brazed parts to remove the distributor.

Compressor Removal Procedure

Disconnecting Suction Side Piping

Procedure to disconnect the brazed part at the suction side of the compressor.

Removing the Compressor Unit

Final step to remove the compressor unit.

Related product manuals