2 ■English
Remote controller installation
Installing the wireless remote controller
Do not throw the remote controller or subject it to powerful
shocks and do not store the remote controller where it may
be exposed to moisture or direct sunlight.
When operating, point the transmitting part of the remote
controller in the direction of the receiver.
The direct transmitting distance of the remote controller is
approximately 23ft (7m).
The signal cannot be transmitted if something such as
curtains blocks the receiver and the remote controller.
Installing to a wall or a pillar
1 Turn on all the uorescent lamps in the room, if any, and
nd a location where the remote controller signals are
properly received by the indoor unit (within 23ft (7m)).
2 Fix the remote controller
holder with the supplied
screws.
Remote
controller
holder
Push
2
Mount
1
3 Mount the remote
controller on to the hook
of the remote controller
holder and then push it
toward the wall.
How to insert the batteries
1 Slide the back cover to take
it off.
2 Insert 2 dry batteries AAA.
LR03 (alkaline).
Position (+) and
(–) correctly!
3 Replace the back cover.
Determination of address and MAIN/SUB
remote controller
If setting multiple wireless remote controllers to operate in
one room, perform address setting for the receiver and the
wireless remote controller.
If using both a wired remote controller and a wireless
remote controller with one indoor unit, change the MAIN/
SUB switch of the transmitter board.
Setting procedure
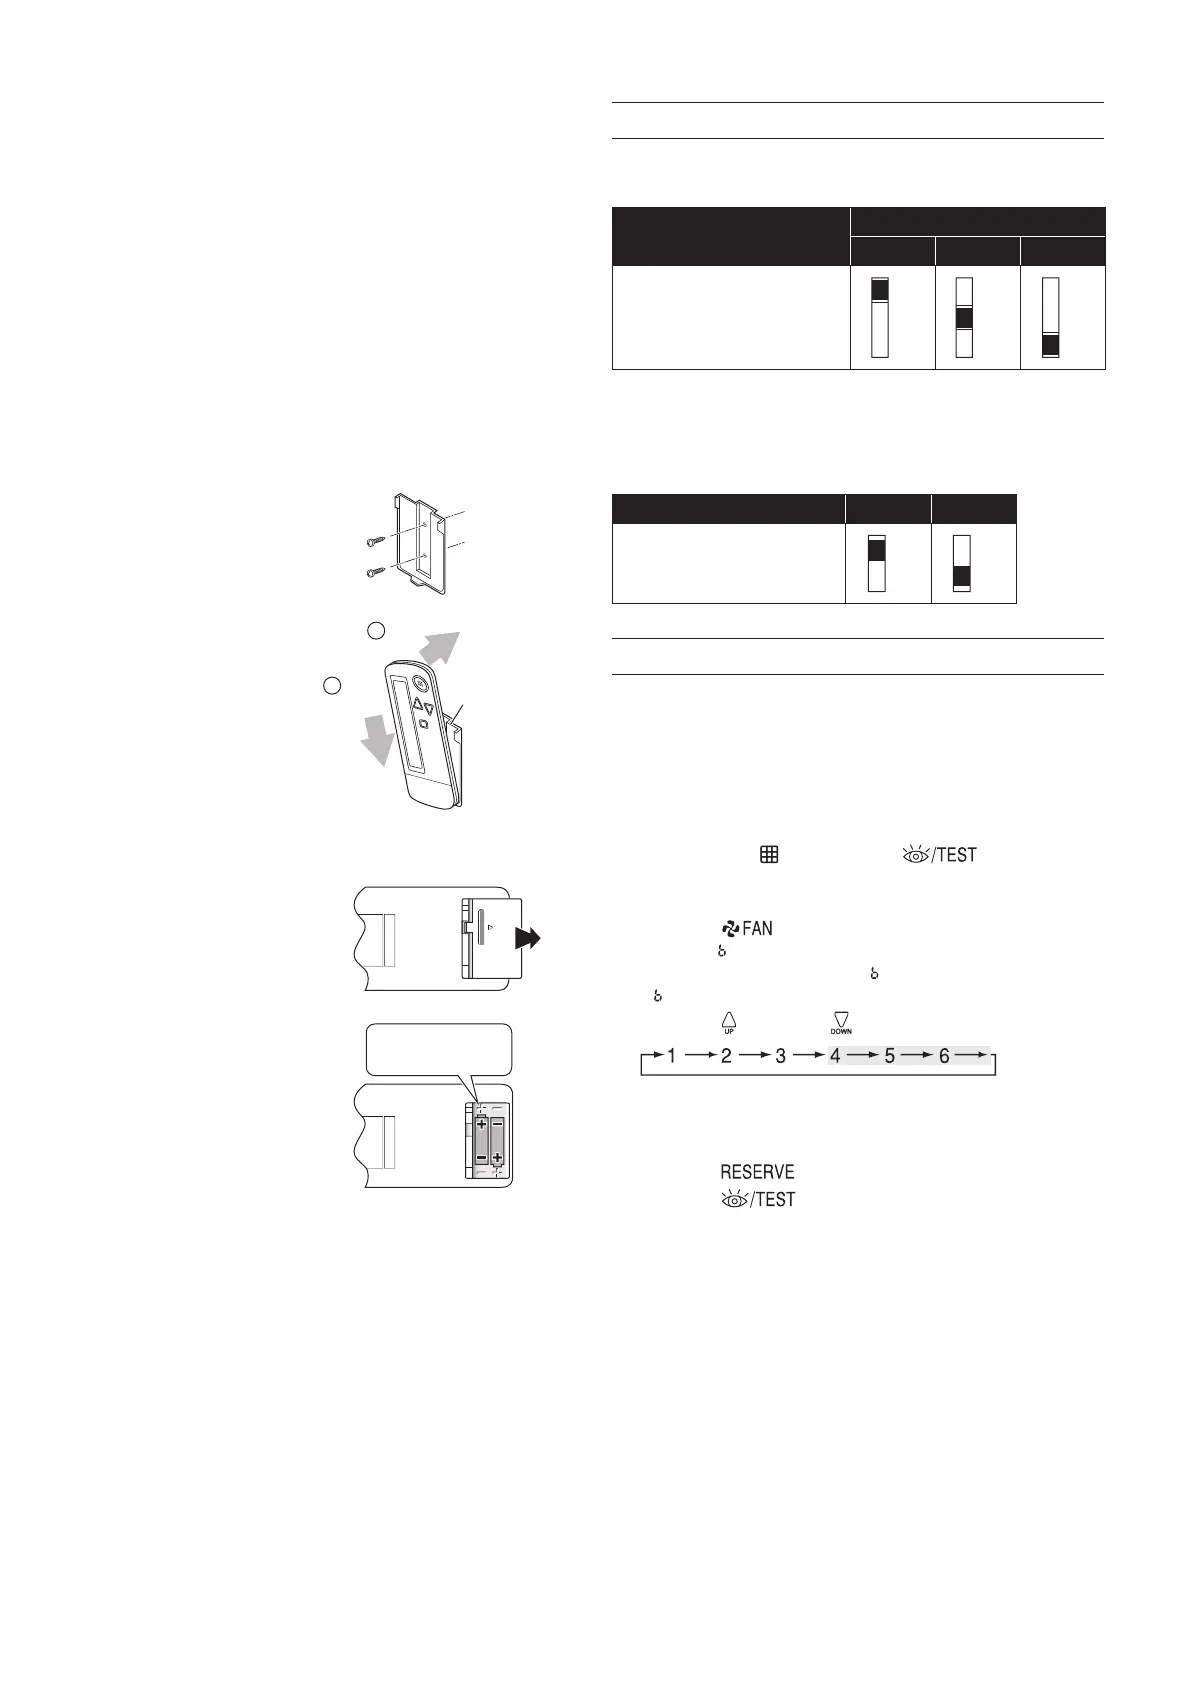
Setting the transmitter board
Set the wireless address switch (SS2) on the transmitter
board according to the table below.
Unit No.
123
Wireless address switch
(SS2)
1 2 3
1 2 3
1 2 3
When using both a wired and a wireless remote controller
for 1 indoor unit, the wired controller should be set to MAIN.
Therefore, set the MAIN/SUB switch (SS1) of the transmitter
board to SUB.
MAIN SUB
MAIN/SUB switch (SS1)
MS
MS
Setting the address of the wireless remote controller
(See gure 3)
A Field Set mode
B Address (is factory set to “1 ”)
C Display setting
Setting from the remote controller
1 Hold down the
button and the button for at
least 4 seconds to enter the Field Set mode.
(Indicated in the display area in the gure.)
2 Press the
button and select an appropriate display
setting (A/ ). Each time the button is pressed the display
switches between “ A ” and “ ”. Refer to “Display setting
A/ ” on page 3 for full comprehension of this feature.
3 Press the
button and button to set the address.
Address can be set from 1 to 6, but set it to 1-3 and to
same address as the receiver. (The receiver does not
work with address 4-6.)
4 Press the
button to conrm the setting.
5 Press the
button to quit the Field Set mode and
to return to normal display again.
01_EN_3P444567-1.indd 2 7/5/2016 11:05:28 AM
 Loading...