Electrical Box Si041417EA
6 Removal Procedure
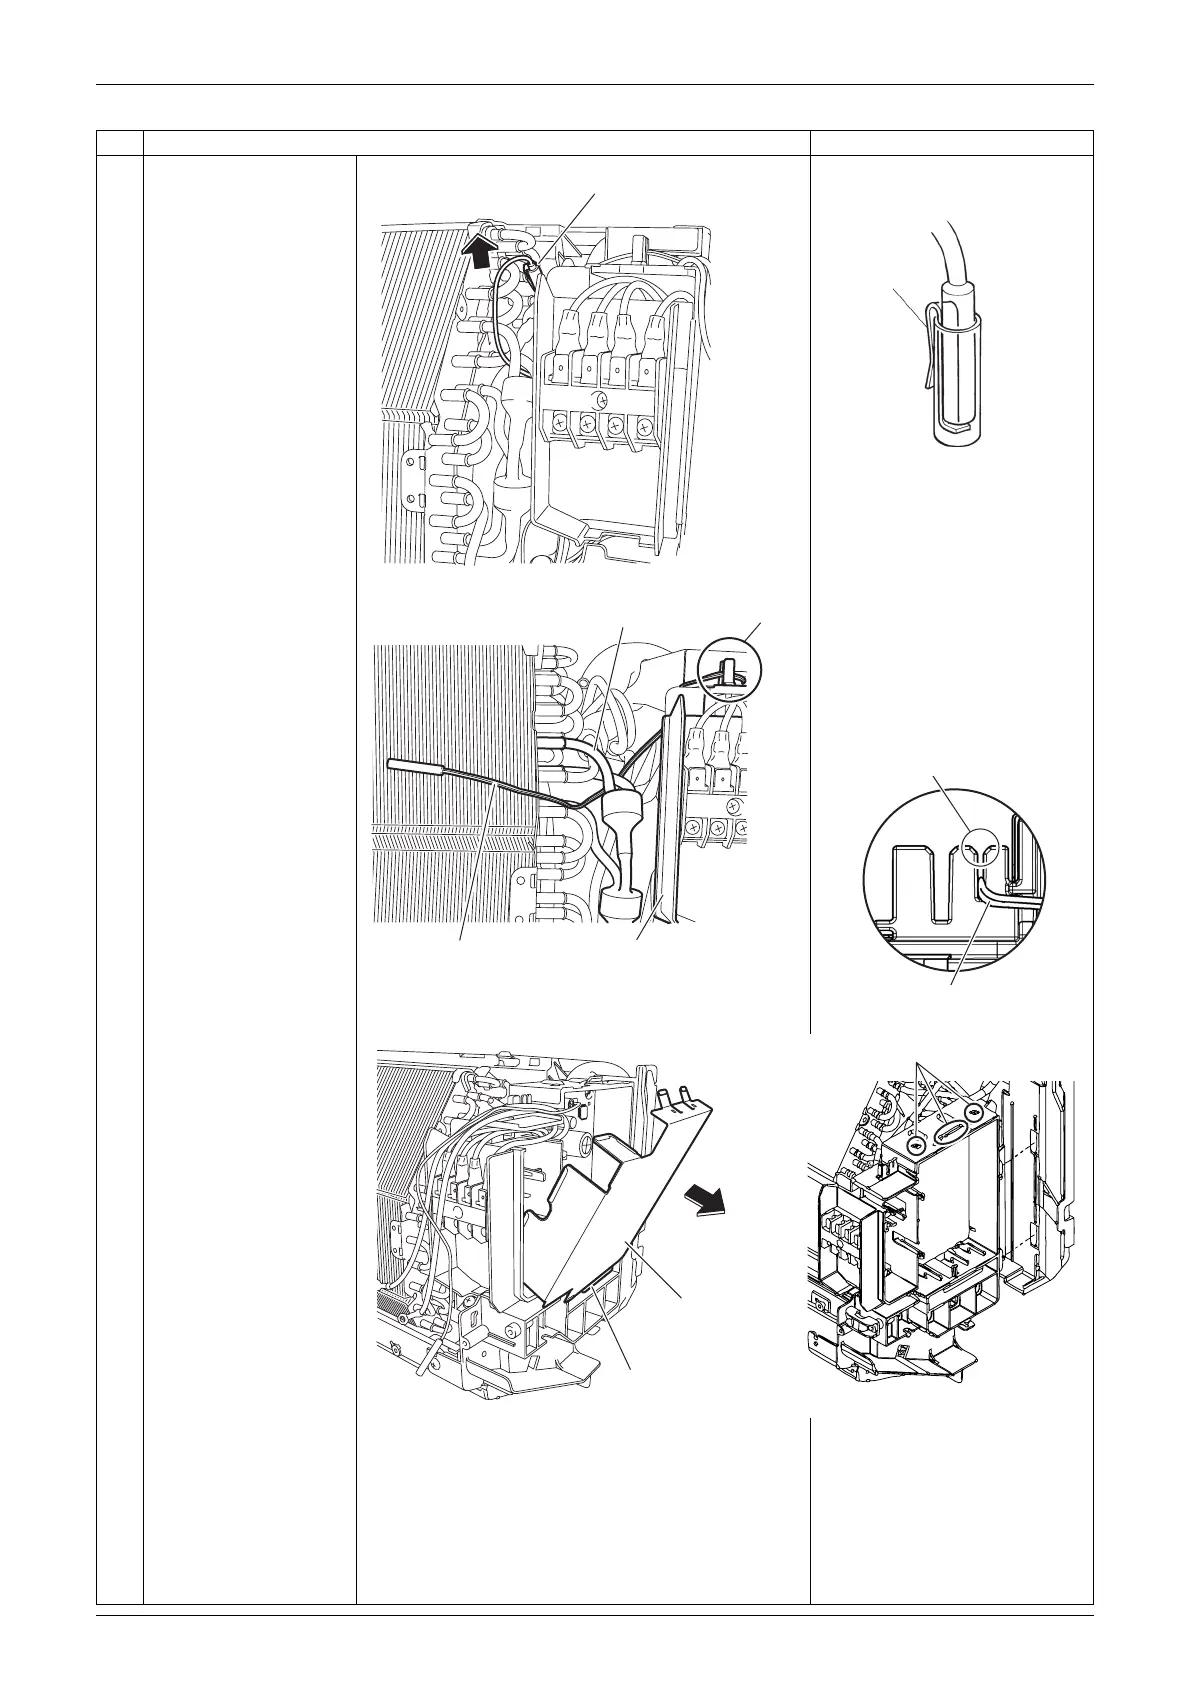
3 Pull out the indoor heat
exchanger thermistor.
Be careful not to lose the clip
of the thermistor.
The position of the indoor
heat exchanger thermistor
varies depending on the
model.
4 Release the thermistor
harness from the pipes
of the heat exchanger
ASSY and from the
back slit at the top of
the electrical box.
When reassembling, be sure
to insert the thermistor
harness in the back slit and
pass it below the pipes of the
heat exchanger ASSY as
shown in the picture.
5 Unfasten the 4 hooks
and remove the
electrical box cover.
When reassembling, make
sure that the 4 hooks are
securely fastened.
Step Procedure Points
Indoor heat exchanger thermistor
(R21015)
Clip
(R11268)
Thermistor harness
Heat exchanger ASSY
Electrical box
Back slit
(R24256)
Back slit
Thermistor harness
(R21079)
Hook
Electrical box
cover
Hook
(R21017)


 To Next Page